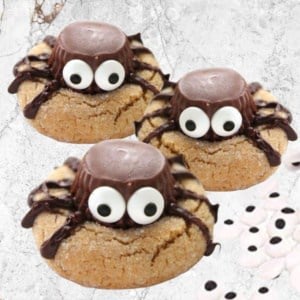
These fun and silly Halloween Spider Cookies feature miniature Reese’s Peanut Butter Cups for a soft, chewy cookie base topped with delicious chocolate peanut butter flavor. These spider cookies will easily be the star of any Halloween party!
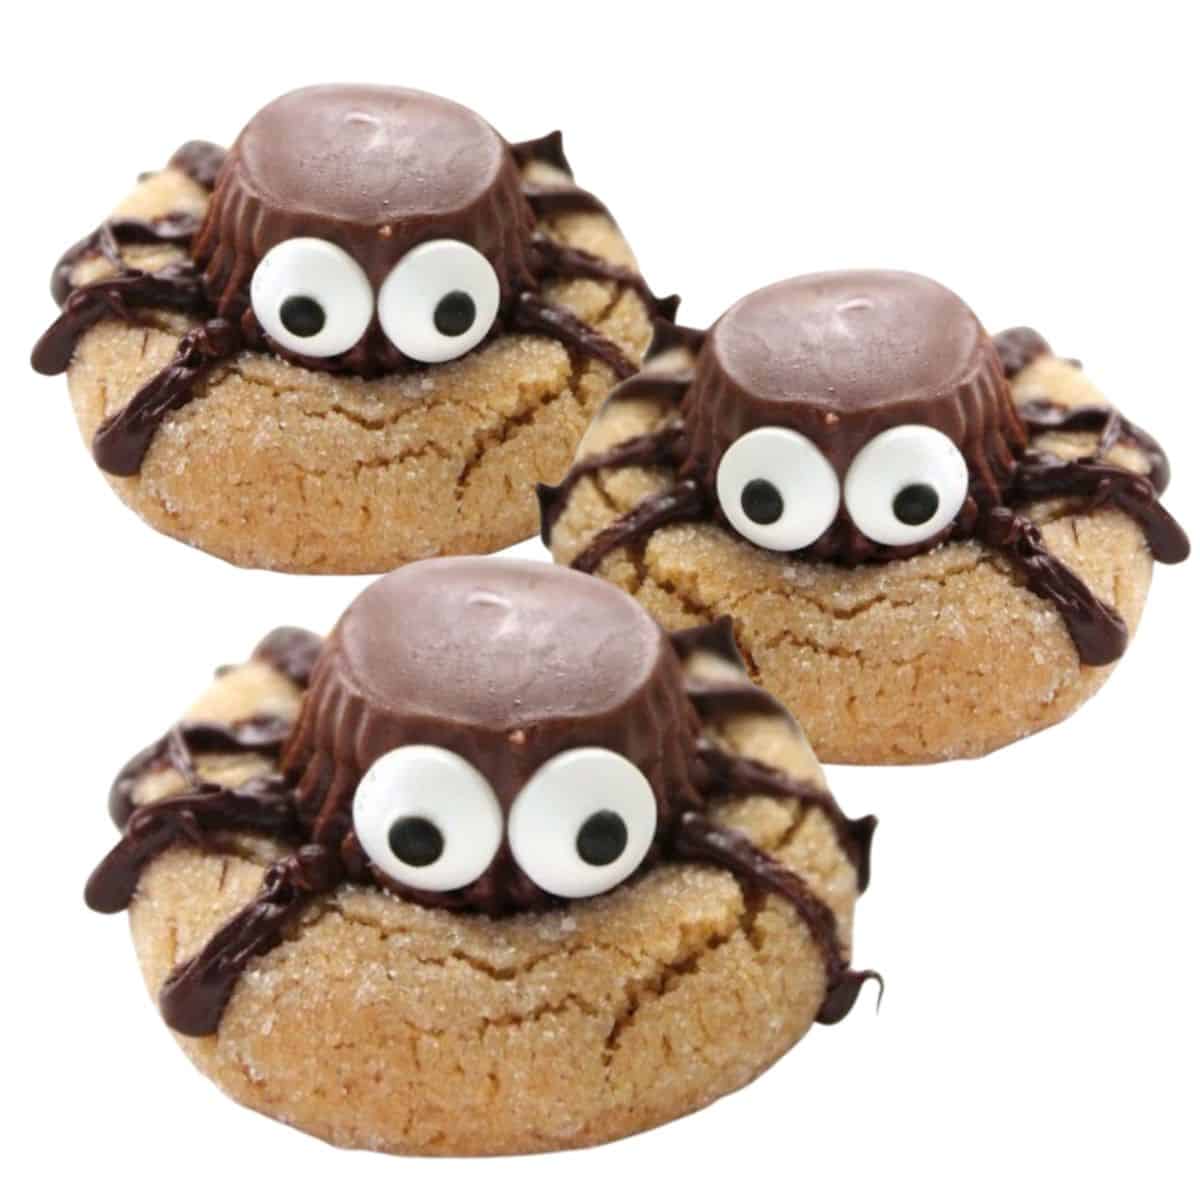

When it comes to Halloween candy my number one favorite has been Reese’s Peanut Butter Cups ever since I was a little girl.
So, it’s not a far stretch to say that my favorite Halloween cookie recipe is now this Silly Halloween Spider Cookies Recipe because it features the Reese’s right on top!!
That coupled with the peanut butter sugar cookie base makes for a cookie you can’t refuse.
Not only are they made with my favorite Halloween candy, but they look super cute too!
Jump to:
⭐ Why You’ll Love this Recipe ⭐
Pantry Staples – Besides the Reese’s, these Halloween cookies use only basic pantry staples to come together.
Classic Flavor – All the comfort of a classic peanut butter sugar cookie with your favorite chocolate peanut butter on top.
Make Ahead – These cookies are easy to make in advance and bring to your Halloween party.
Easy To Make – The cookies are much easier than they look. The eyes pop right on and the legs are made by just melting chocolate chips.
Edible – Everything on these cookies right down to the spider eyes can be eaten making it ultra-fun for kids.
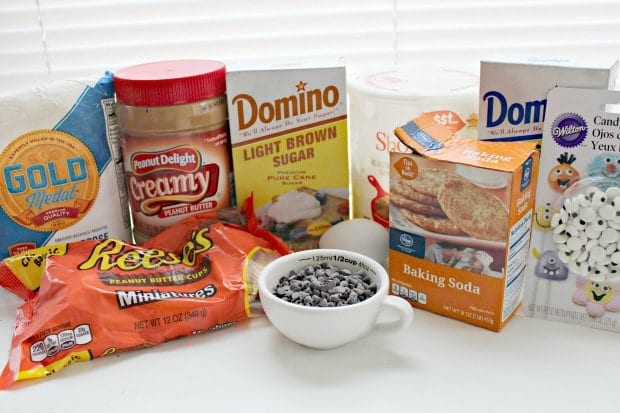
🧾 Ingredients Needed
Shortening – allow your shortening to come to room temperature so that it’s easiest to mix.
Sugars – you’ll need a blend of brown sugar and classic sugar to make the Spider Cookies.
Peanut butter – any peanut butter will work but if you’re using a natural one let it come to room temperature before mixing.
Flour – sift the flour beforehand so that the cookie batter is even.
Baking basics – you’ll need classic ingredients like egg, milk, vanilla, salt, and baking soda.
Miniature Reese’s cups – unwrap each up and freeze them before you make the cookies. This way, when you set them on top they don’t melt.
Chocolate chips – you’ll be melting these in a plastic baggie to make the spider legs. You can use classic milk chocolate or dark chocolate.Candy Eyes – Always fun to have on hand around Halloween these complete the spider look on the cookies!
📌 Be sure to see the recipe card below for the full ingredients list with quantities and step-by-step instructions!
🔁 Variations
Though these Halloween cookies are really fun the way they’re made, there’s a couple of swaps you can make to vary the flavor and finished product!
Butterscotch legs – in place of chocolate spider legs, melt butterscotch chips instead for a fun swap.
Add-ons – if you let kids decorate their own cookies (this is a fun party idea!) you could have them add on mini sprinkles or candied skulls.
🥣 How to Make
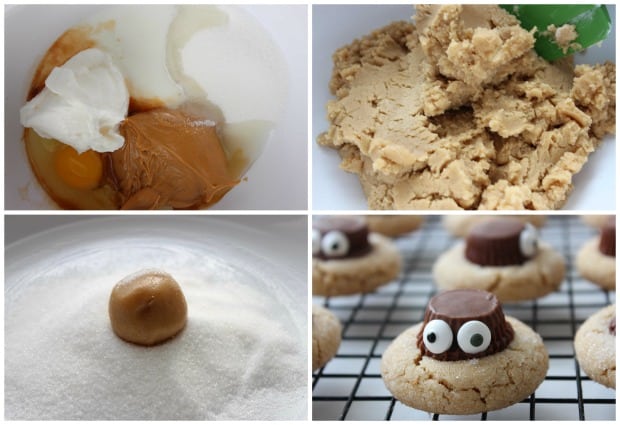
STEP 1: Beat together the shortening, peanut butter, egg, sugar, brown sugar, vanilla and milk.
STEP 2: In another bowl mix the dry ingredients and add the wet to the dry to create a sticky dough.
STEP 3: Roll the dough into 1″ balls and bake until golden.
STEP 4: Press an upside-down Peanut Butter Cup on top and add the candy eyes and let the cookies cool before decorating further. Place in the fridge 10 minutes to set.
STEP 5: Place chocolate chips in the corner of a zip-top sandwich bag. Microwave for 20 seconds, knead and repeat until chocolate is melted.
STEP 6: Clip very small piece off of corner of bag to allow for piping and draw 8 legs on each spider cookie.
⭐ Pro Tips ⭐
- The peanut butter cookies expand so, make sure to place them a couple inches apart on the cookie sheet.
- You want to cool the cookies before decorating the chocolate legs so that the chocolate peanut butter cup doesn’t melt fully and so the chocolate hardens as you pipe it on.
- When piping on the legs keep the hole you cut in the plastic baggie pretty small! The thicker the legs the more chance they’ll blend together on the cookie.
- You can make your spider eyes with white and chocolate frosting. However, candy eyes make it much easier.
📝 Recipe FAQs
Unfortunately no. For spider cookies you need to use shortening. If you replace it with butter the cookies have a tendency to crumble. You want the firm enough to press the peanut butter cup into.
Spider cookies are a classic peanut butter cookie which means that they don’t need long to cook. They should come out of the oven looking slightly underdone which is what will result in the next texture.
More Fun Halloween Recipes to Try
If you tried this Halloween Spider Cookies Recipe or any other recipe on my site, please please leave a 🌟 star rating and let me know how it turned out in the 📝 comments below. I love hearing about your results and thoughts!
📖 Recipe
Silly Halloween Spider Cookies
Ingredients
- 1/2 cup Shortening
- 1/2 cup Peanut Butter
- 1/2 cup Brown Sugar
- 1/2 cup Sugar
- 1 Egg
- 2 tbsp Milk
- 1 tsp Vanilla
- 1 3/4 cup Flour
- 1 tsp Baking Soda
- 1/2 tsp Salt
- 1/4 cup Sugar For rolling
- 48 miniature Reese’s cups unwrapped and frozen
- 96 Candy Eyes
- 1/2 cup Chocolate Chips
Instructions
- Preheat oven to 375.
- In a large bowl, beat together shortening, peanut butter, egg, sugar, brown sugar, vanilla and milk.
- In a medium bowl, whisk together flour, baking soda and salt.
- Gradually add dry mixture to wet mixture and beat until blended.
- Form dough into 1 inch balls.
- Roll each ball in sugar and place a couple of inches apart on an ungreased baking sheet.
- Bake 10-12 minutes or until golden.
- Immediately, gently press an upside down frozen peanut butter cup on top of each cookie and move to wire rack to cool.
- After placing and moving all of the cookies on the wire rack. put in place the candy eyes while chocolate is still slightly soft.
- Place in refrigerator for 10 minutes to allow cookies to firm.
- Place chocolate chips in the corner of a zip-top sandwich bag.
- Microwave for 20 seconds, knead and repeat until chocolate is melted.
- Clip very small piece off of corner of bag to allow for piping and draw 8 legs on each spider cookie.
- Place in refrigerator for 10 minutes to allow legs to set.
Notes
- The peanut butter cookies expand so, make sure to place them a couple inches apart on the cookie sheet.
- You want to cool the cookies before decorating the chocolate legs so that the chocolate peanut butter cup doesn’t melt fully and so the chocolate hardens as you pipe it on.
- When piping on the legs keep the hole you cut in the plastic baggie pretty small! The thicker the legs the more chance they’ll blend together on the cookie.
- You can make your spider eyes with white and chocolate frosting. However, candy eyes make it much easier.
- Store the cookies in the fridge in an airtight container. When ready o serve, let them come to room temperature.









Heather Douglas says
Can I make these ahead of time and freeze them?
Chrysa says
To freeze the spider cookies, first freeze them flat on a baking sheet. Once they’re completely frozen you can transfer them to a ziplock bag or a freezer container.
Lisa says
I’ve made these before and they’re a big hit but I was wondering do you think I can do a sugar cookie (just because of people at my work place that have nut allergies) or what cookie would you suggest? Thanks!
Lucy says
Keep the peanut butter cups in the freezer between batches, or they will melt and slide off the 2nd batch of cookies. Easy to make and delicious!
Athena Gaskins says
Can you make a different type of cookie for these?
Chrysa says
You could, but the peanut butter cookies blend well with the peanut butter cups.
Lisa says
I’ve used Lindt balls before and I’m also gonna try the rolo candy this year
Claudia Lamascolo says
what an adorable idea and my grandson is obsessed with spiders! I love this idea and cant wait to make these with him!
Jen says
I followed the directions however the inside of my cookies look uncooked. Any ideas as to why the outside is cooked and the inside is doughy?
G K says
These are cute! They also use my favorite candy.
Brigitte says
Made these last Halloween and got lots of compliments!! I will be making them again.
Kristie says
Those look so cute!! And easy too! Thanks for sharing! kristiedonelson(at)gmail(dot)com Thank you.
Kimberly Flickinger says
These are so cute and look delicious! Thank you for sharing!
Sarah L says
They make me smile. And have good flavors, too.
Jan says
Can you sub butter for shortening?
Chrysa says
You can, but the cookies will likely spread out more so you’ll have “flatter” faces. (We haven’t tried them with butter.)
Michele Pineda says
with Halloween coming right up, I can’t wait to try these out…just pinned the recipe so I will be ready to make them for the grandsons!
justin tan says
This is so cute. Can’t wait to make for the coming Halloween party
Sherri says
Those are adorable! I wish I was creative enough to come up with things like this
Dana Rodriguez says
This is such a cute idea! I think I am going to make these for our Halloween party!