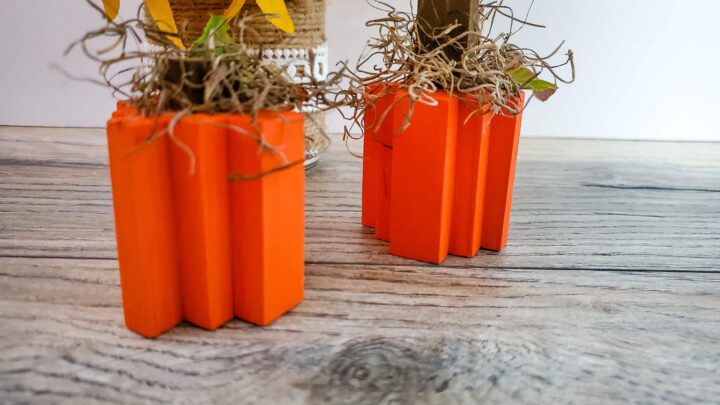
These Wooden Block Pumpkins are the perfect fall craft idea to add some rustic charm to your home this season. They're great for adults, older kids, or even as a family craft project!
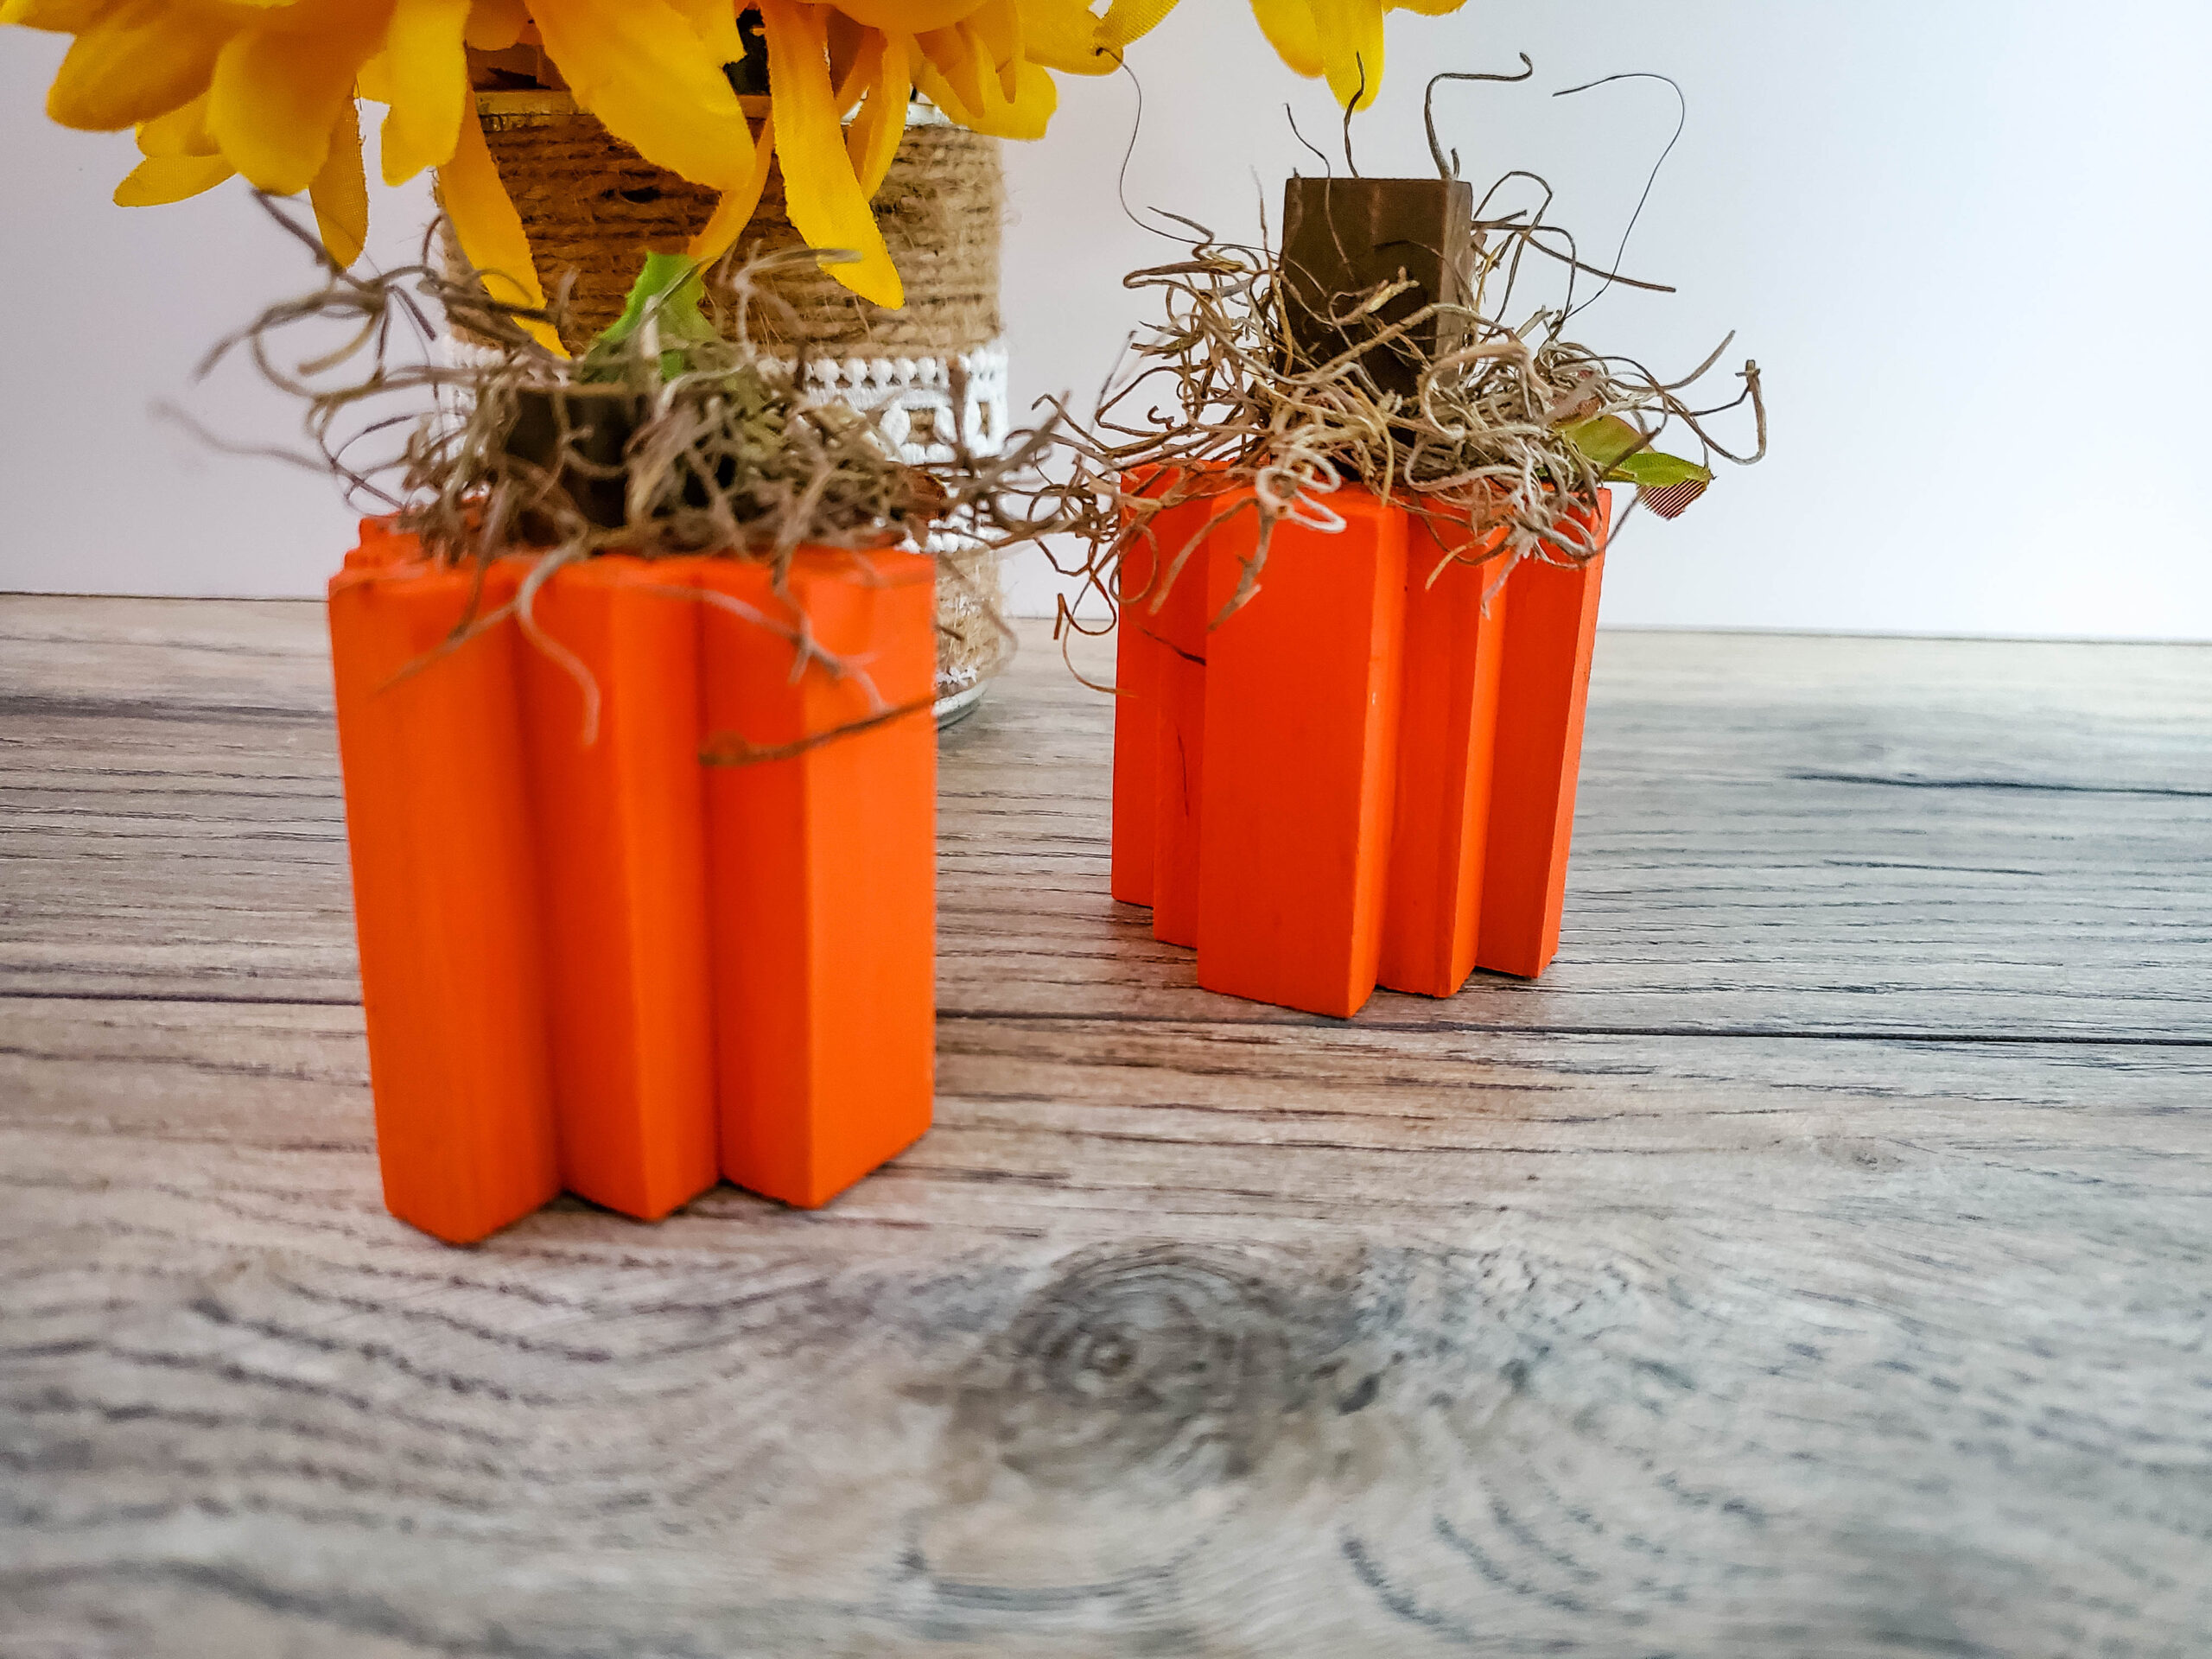

Something about pumpkins makes them a fall favorite for both kids – and even adults like me! They're bright, fun, and remind us of everything from pumpkin patches to Halloween! With just a few Dollar Tree supplies, we built our own pumpkins, perfect for decorating at home and to give as a fun fall gift!
What makes this craft so much fun is how easy it is to put together and how creative both kids and adults can be with it. They can paint their pumpkins in classic orange or sunny yellow or even try unique colors like white or green. Adding the leaf and Spanish moss on top gives each pumpkin its personality, making no two alike!
IWhether it's a weekend project or a classroom activity, Wooden Block Pumpkins are a budget-friendly way to make fall memories.
Supplies Needed
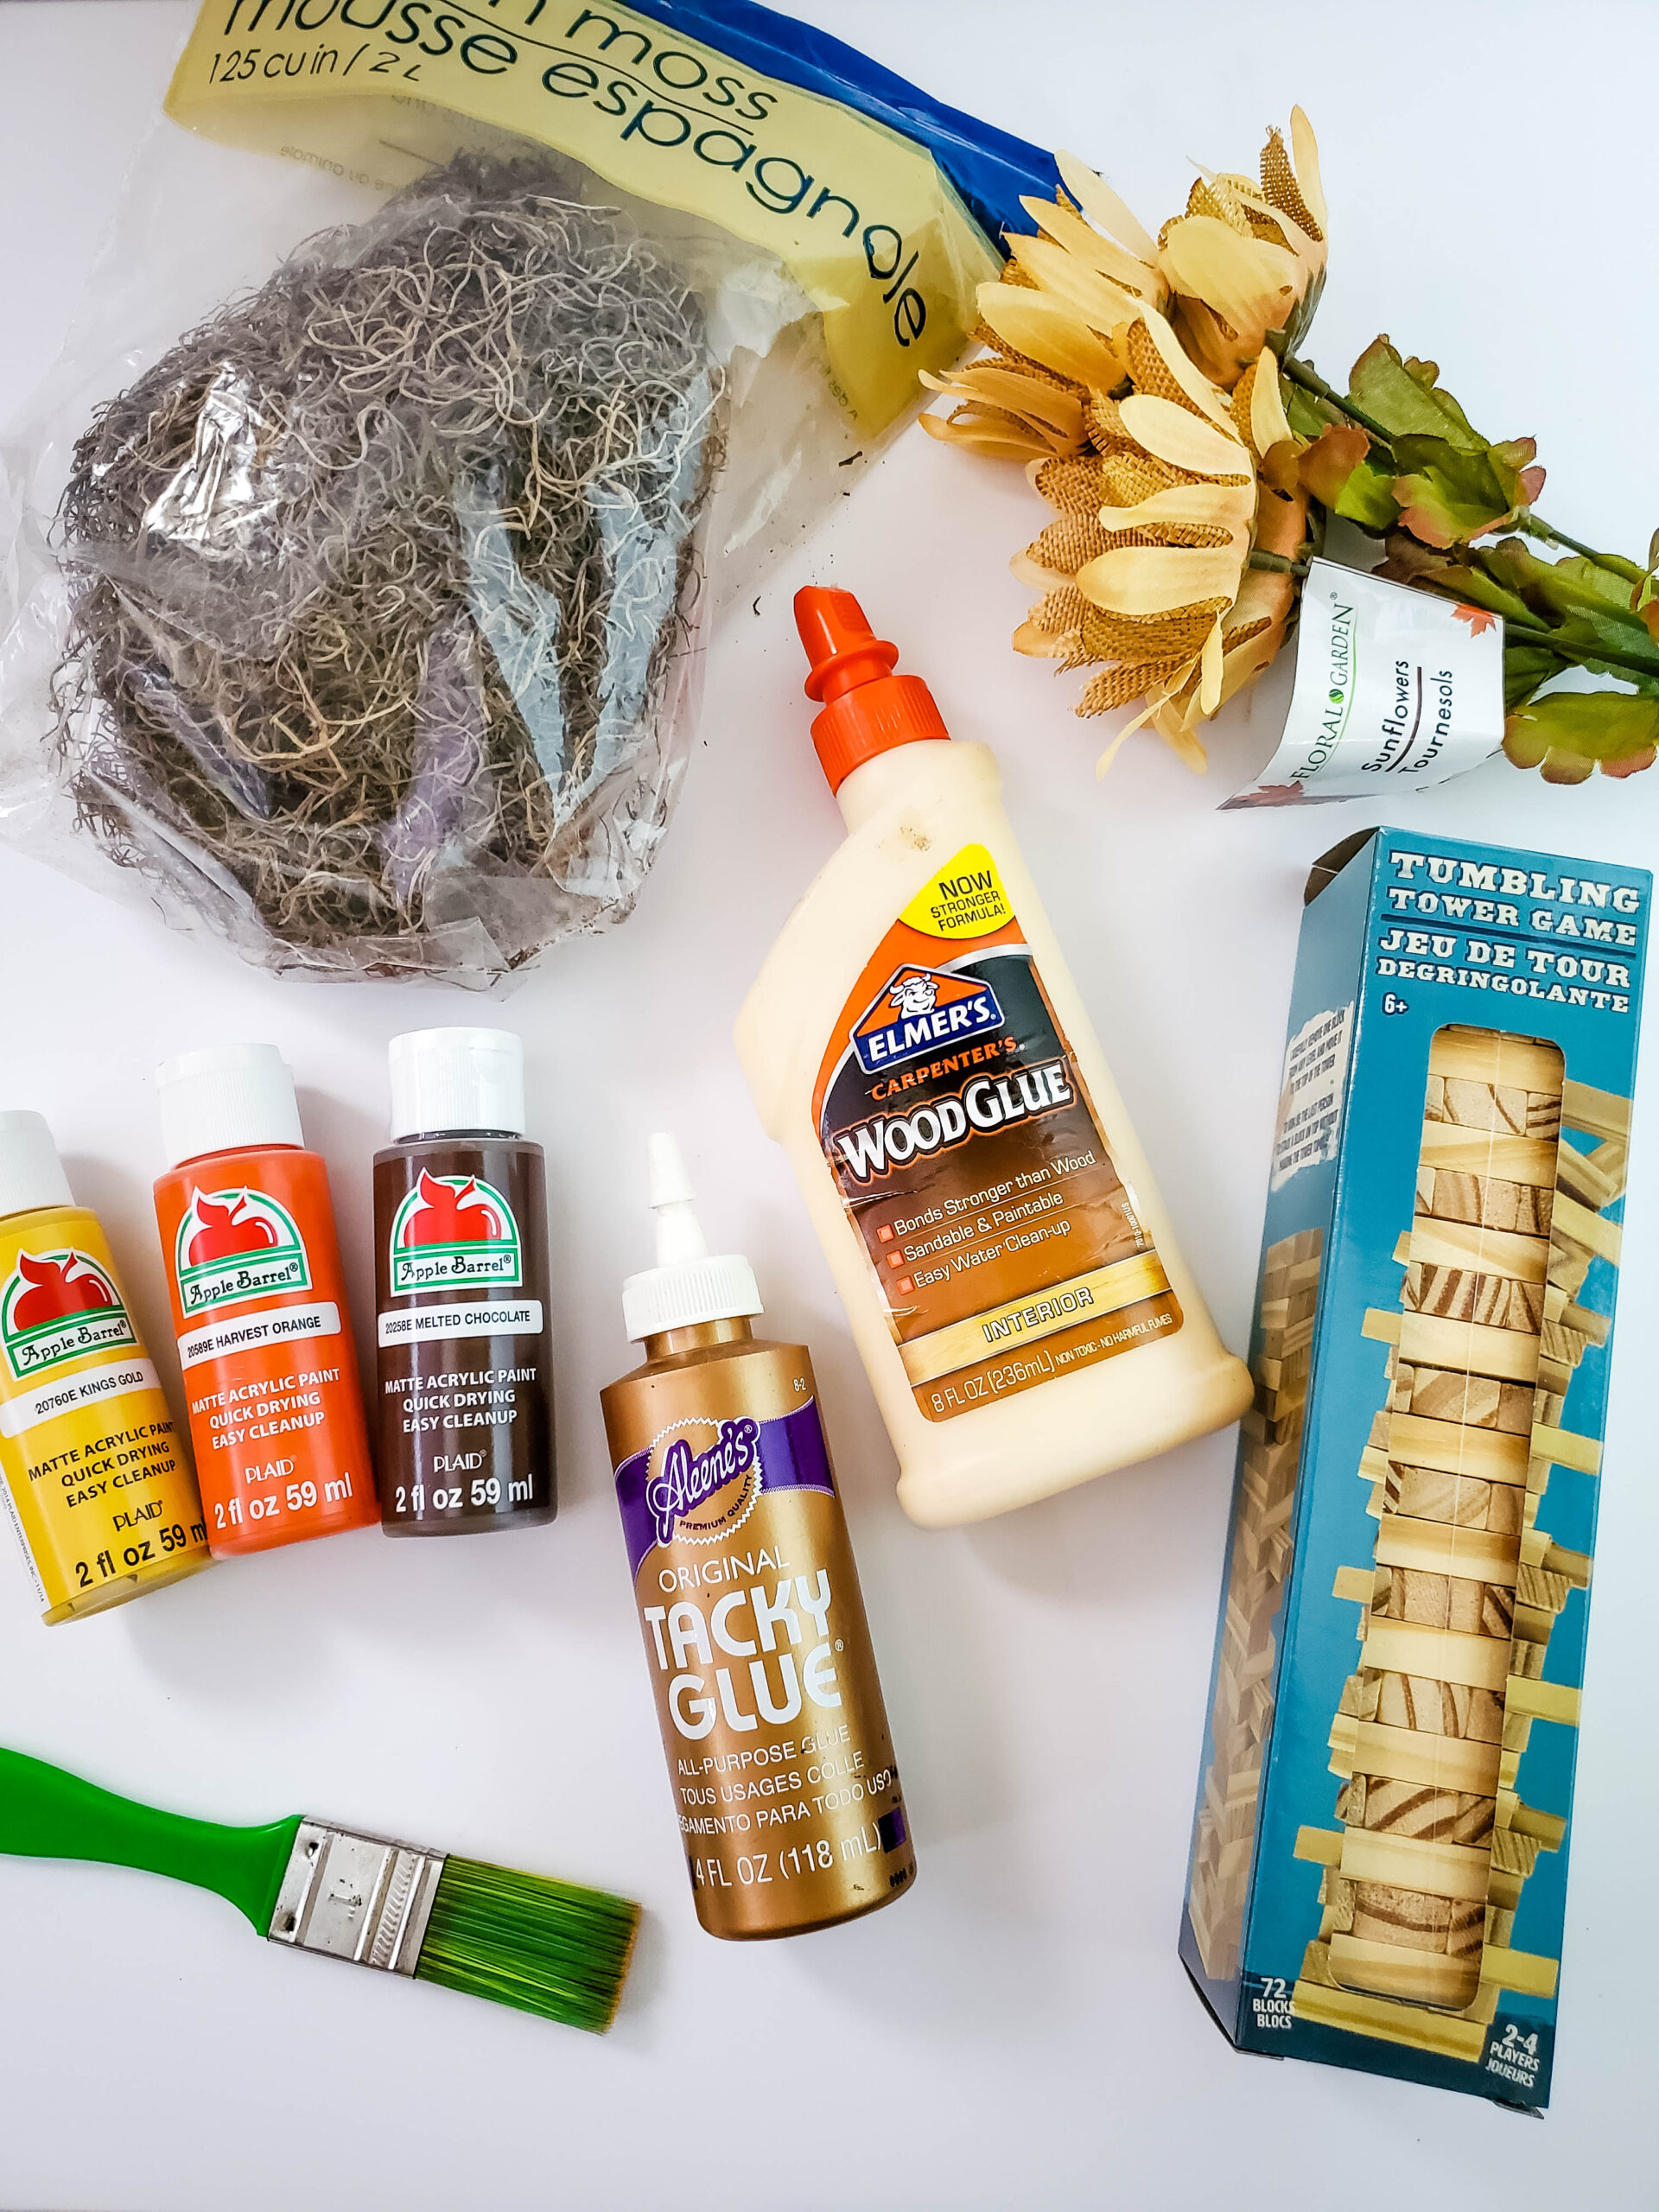
- Blocks from Tumbling Tower Game (Dollar Tree)
- Wood glue
- Small paintbrush
- Paint (We used Apple Barrel brand: Kings Gold, Harvest Orange, and Melted Chocolate)
- Paint brush
- Tacky glue
- Spanish Moss
- Leaves from sunflowers (Dollar Tree)
- Scissors
How to Make
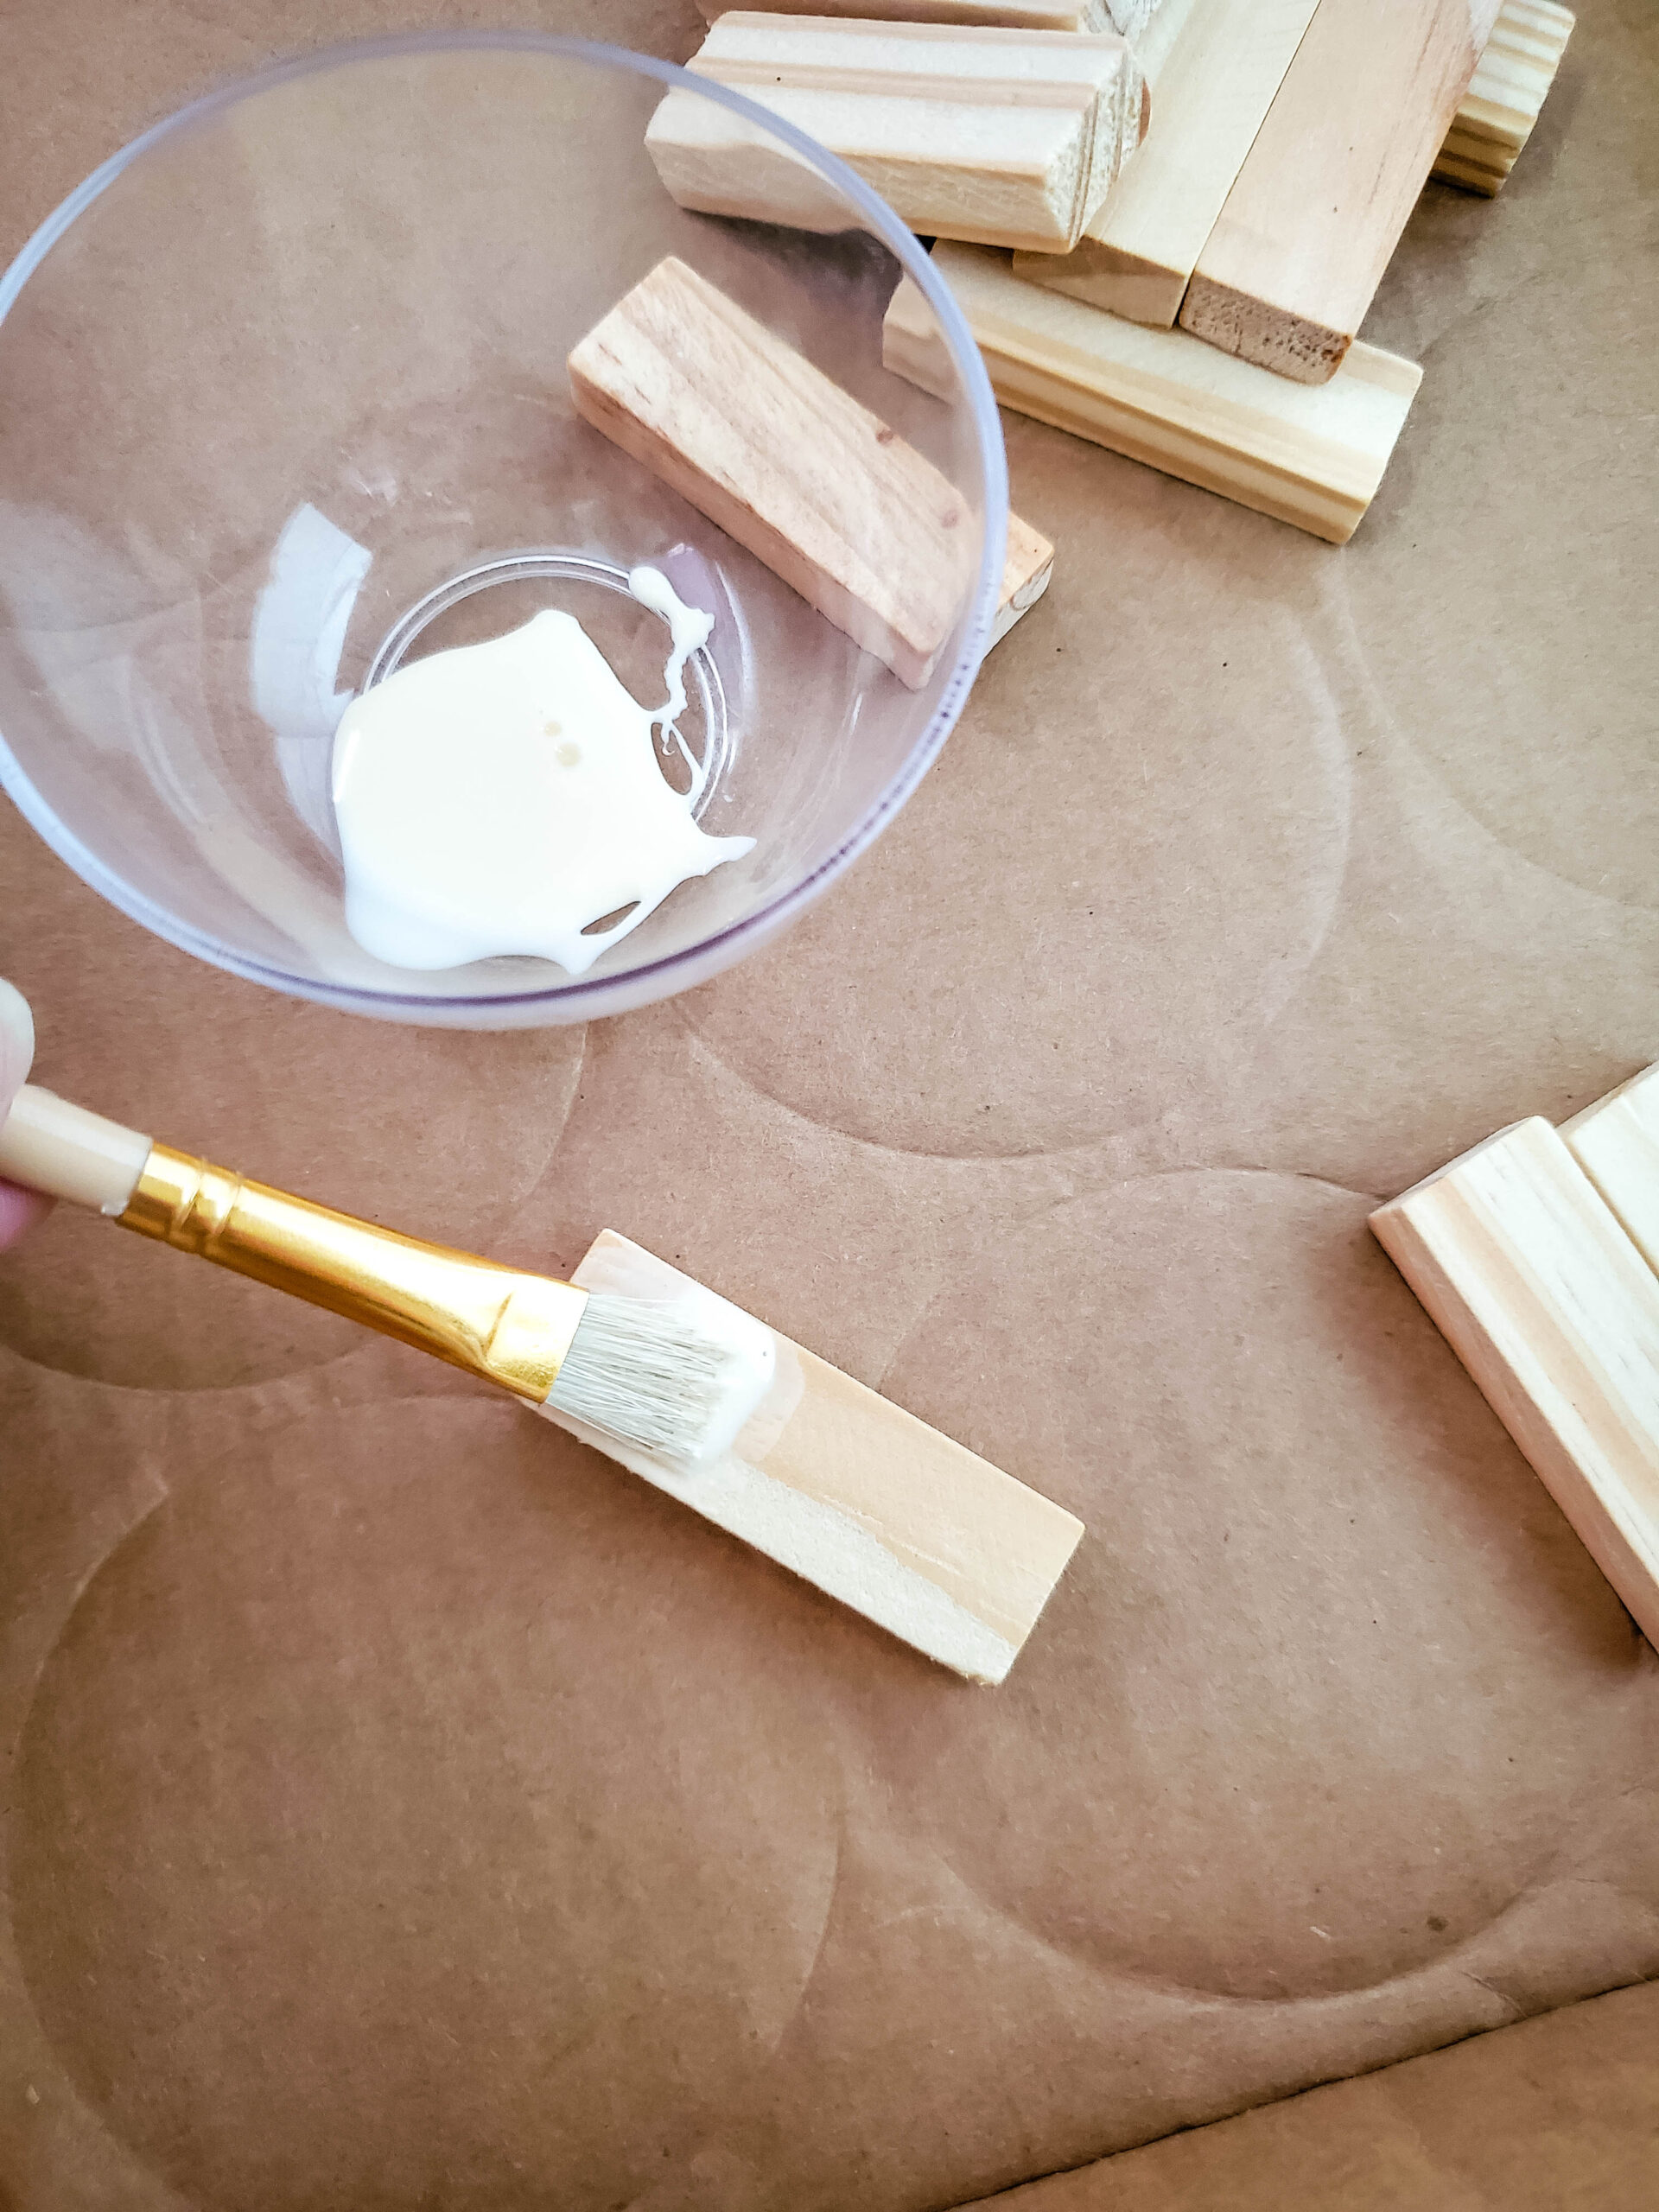
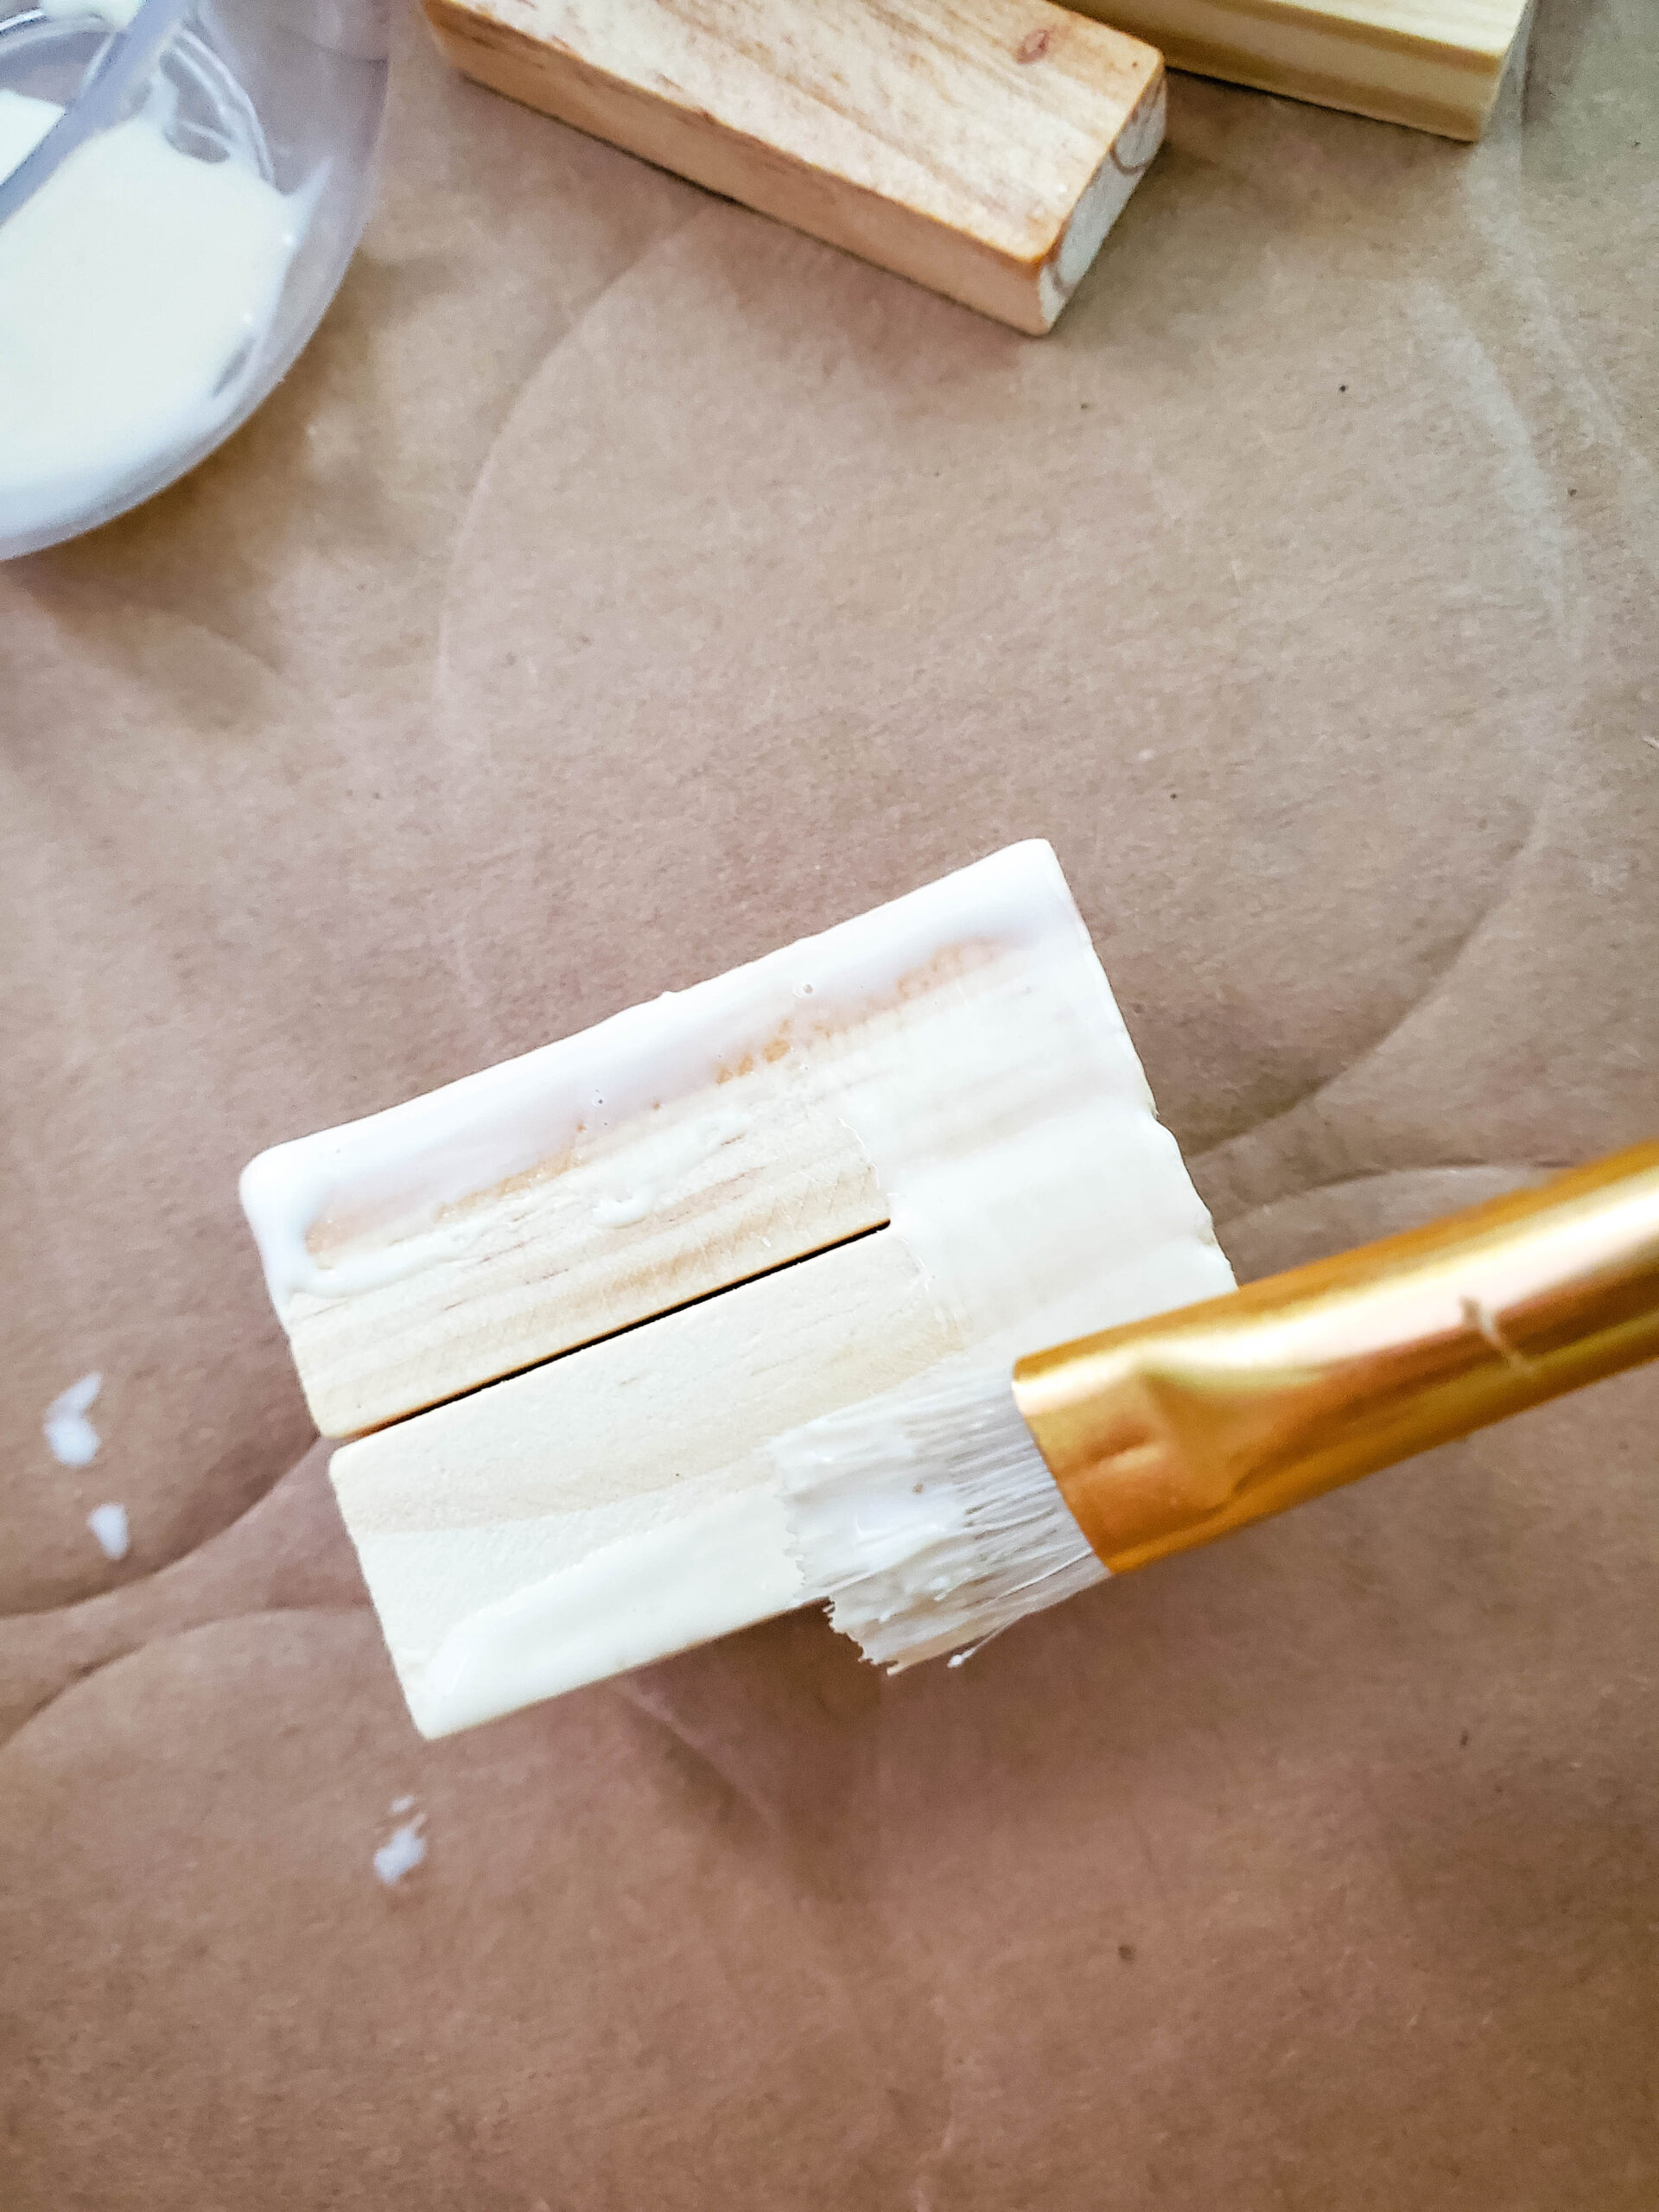
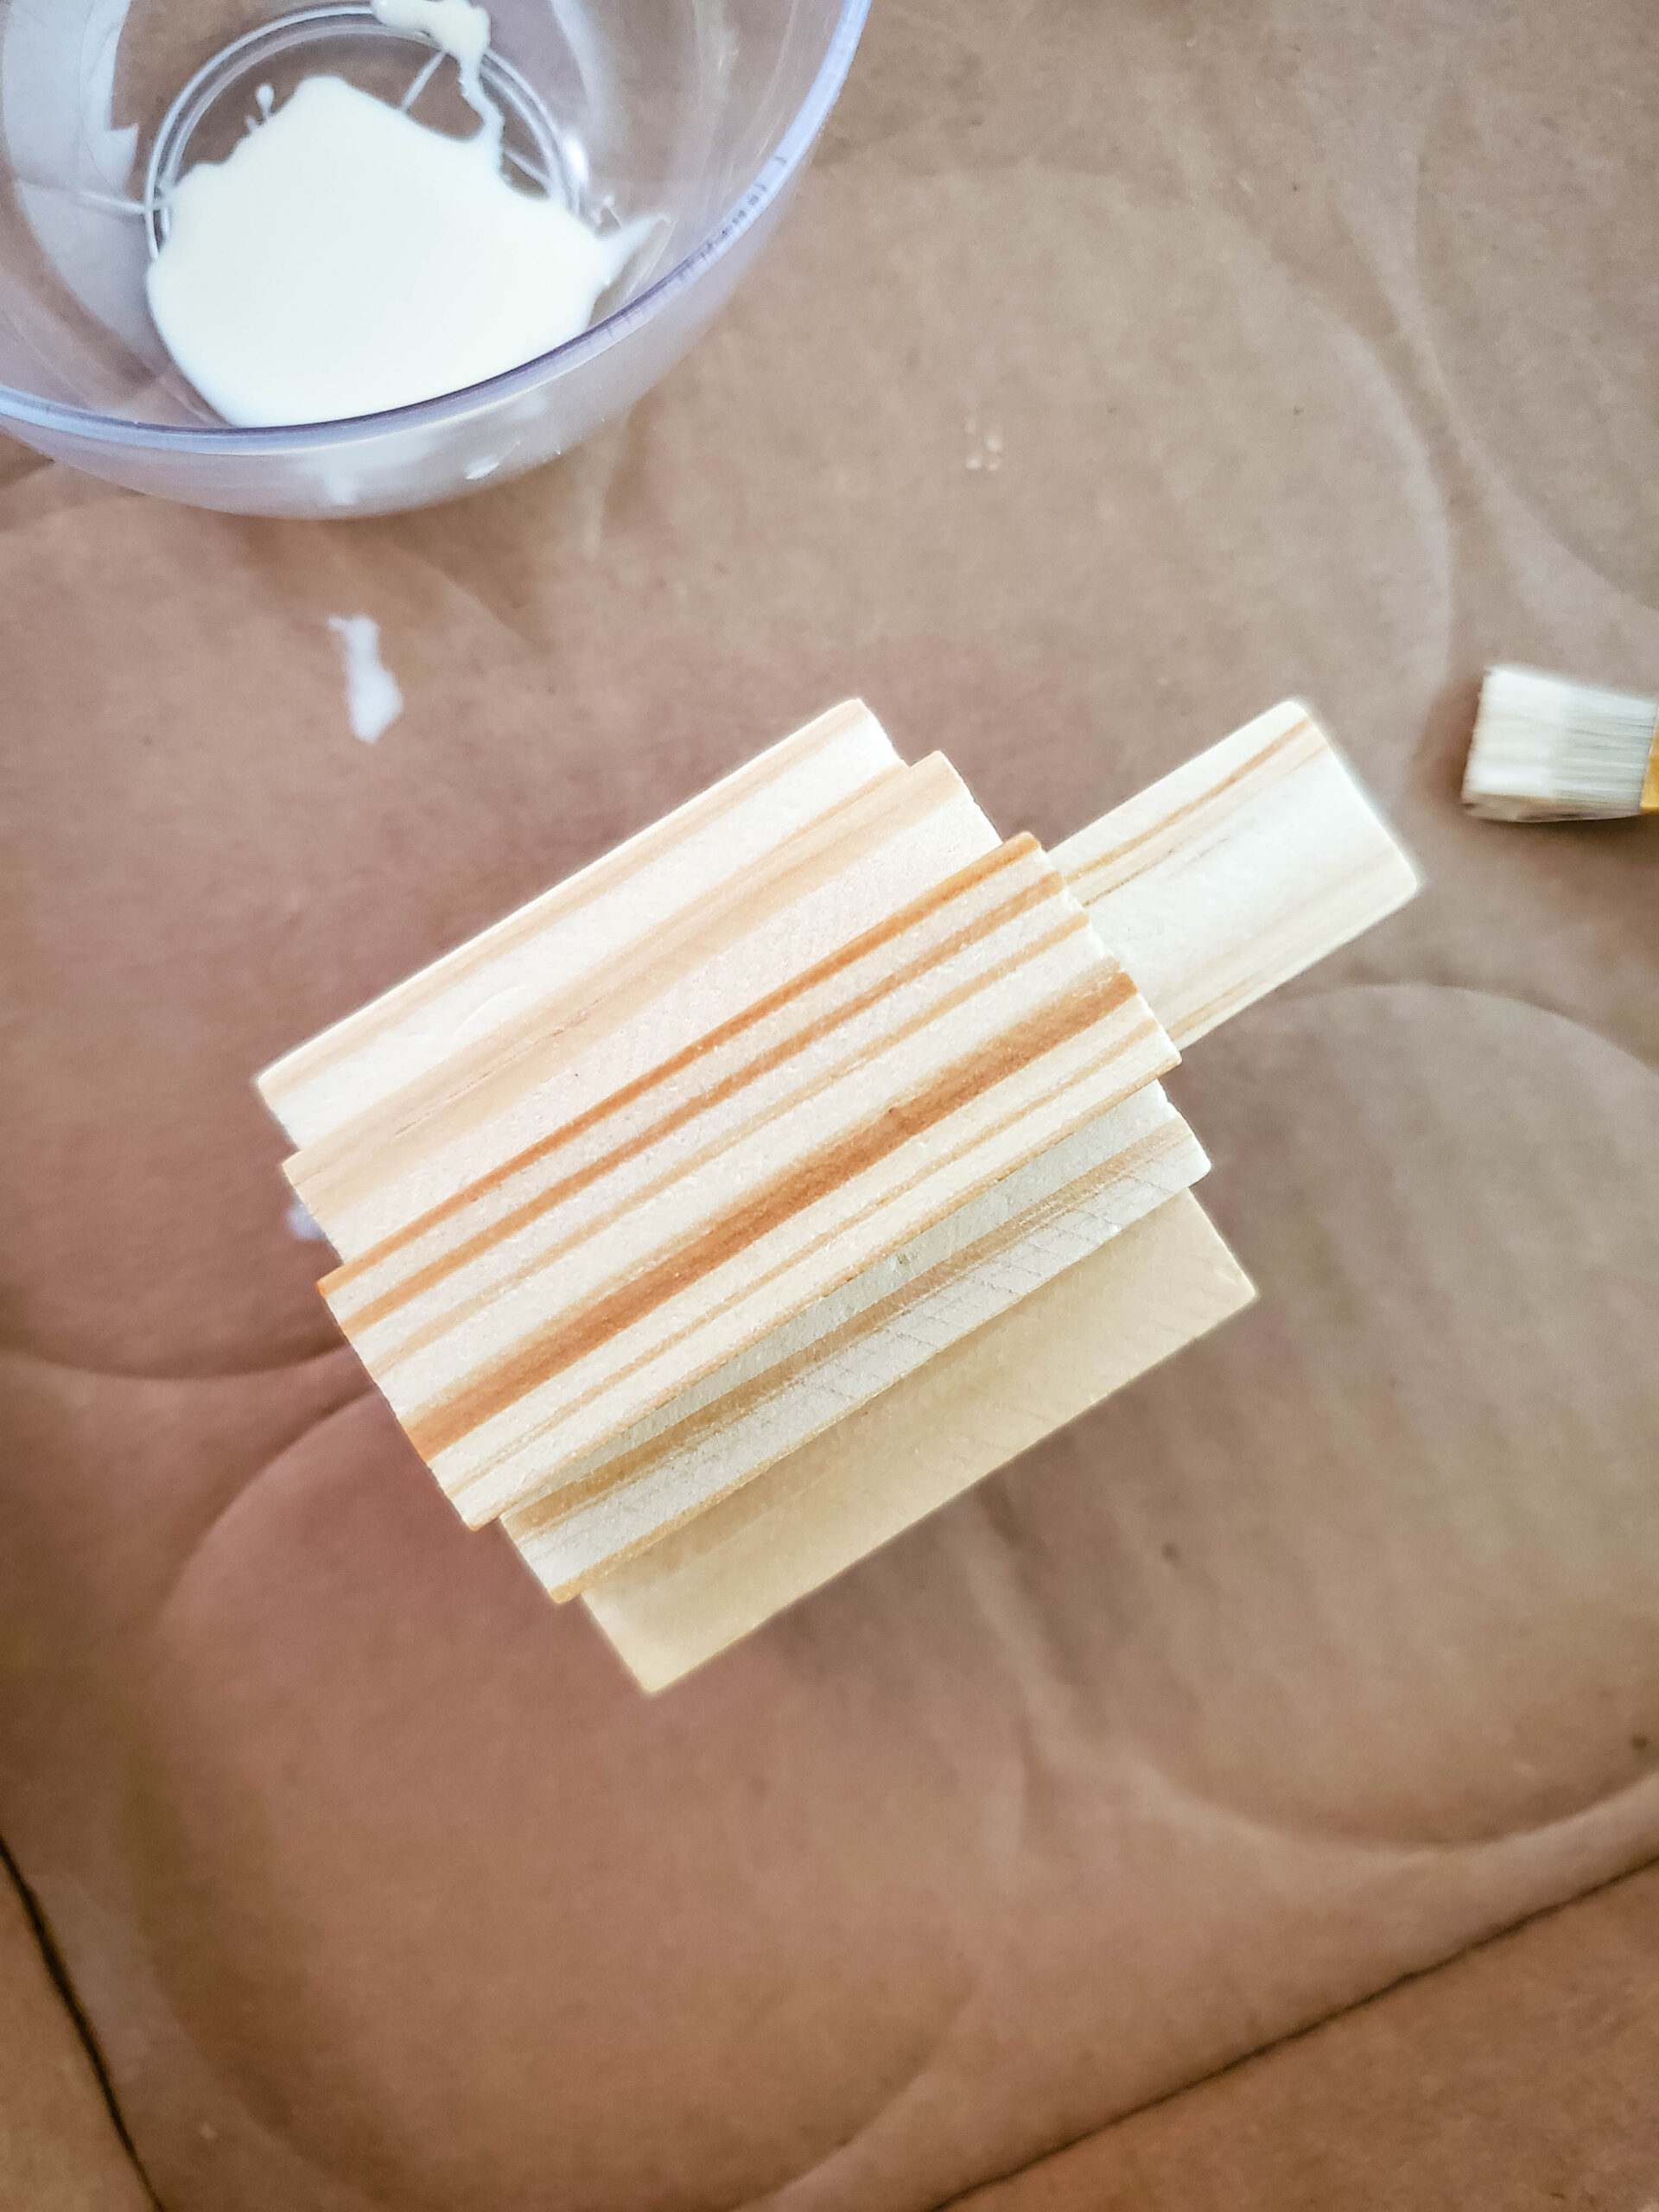
- Using the wood glue and a small paint brush, apply glue to the entire front surface of one block.
2. Set two blocks on top of that block, each half on the block, and half overhanging.
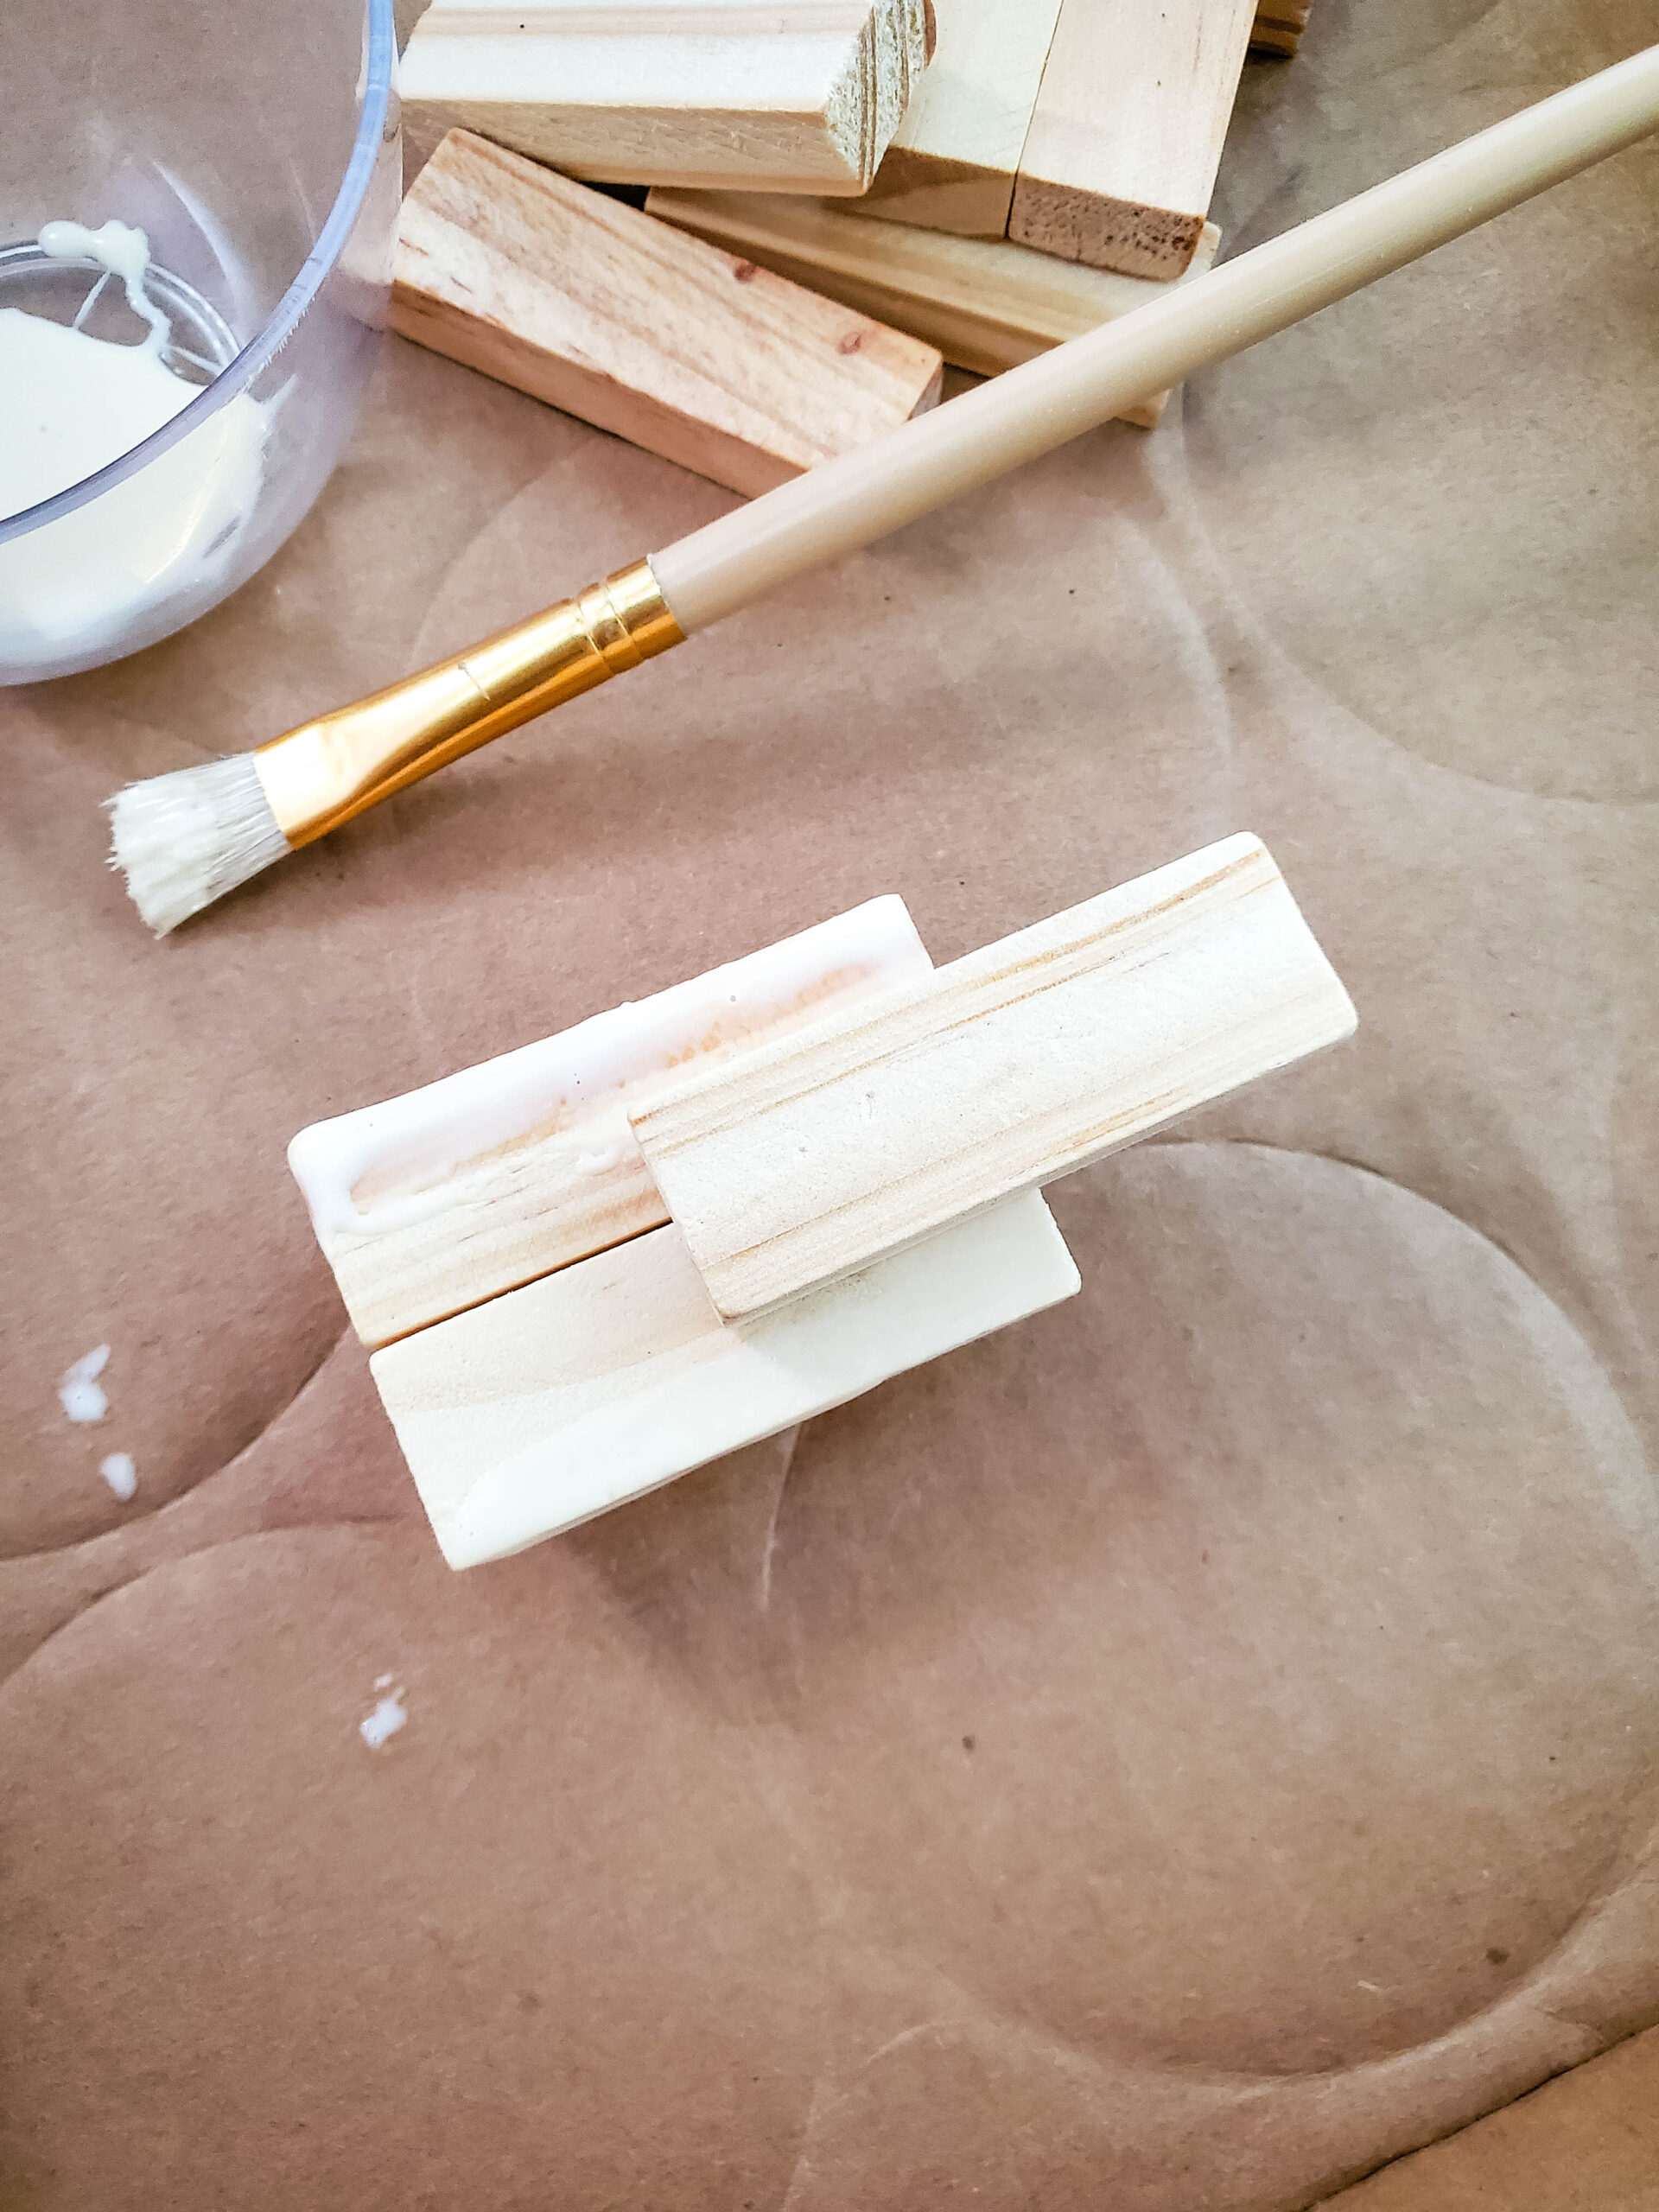
3. Apply glue to the sides and top of the two blocks that you just glued to the other block.
4. Set one block in the center of those two blocks, halfway up, on the glued portion. This will be the stem.
5. Set two more blocks on either side of that stem, flush with the top and bottom of the two blocks you glued in step 2, but overlapping the sides slightly.
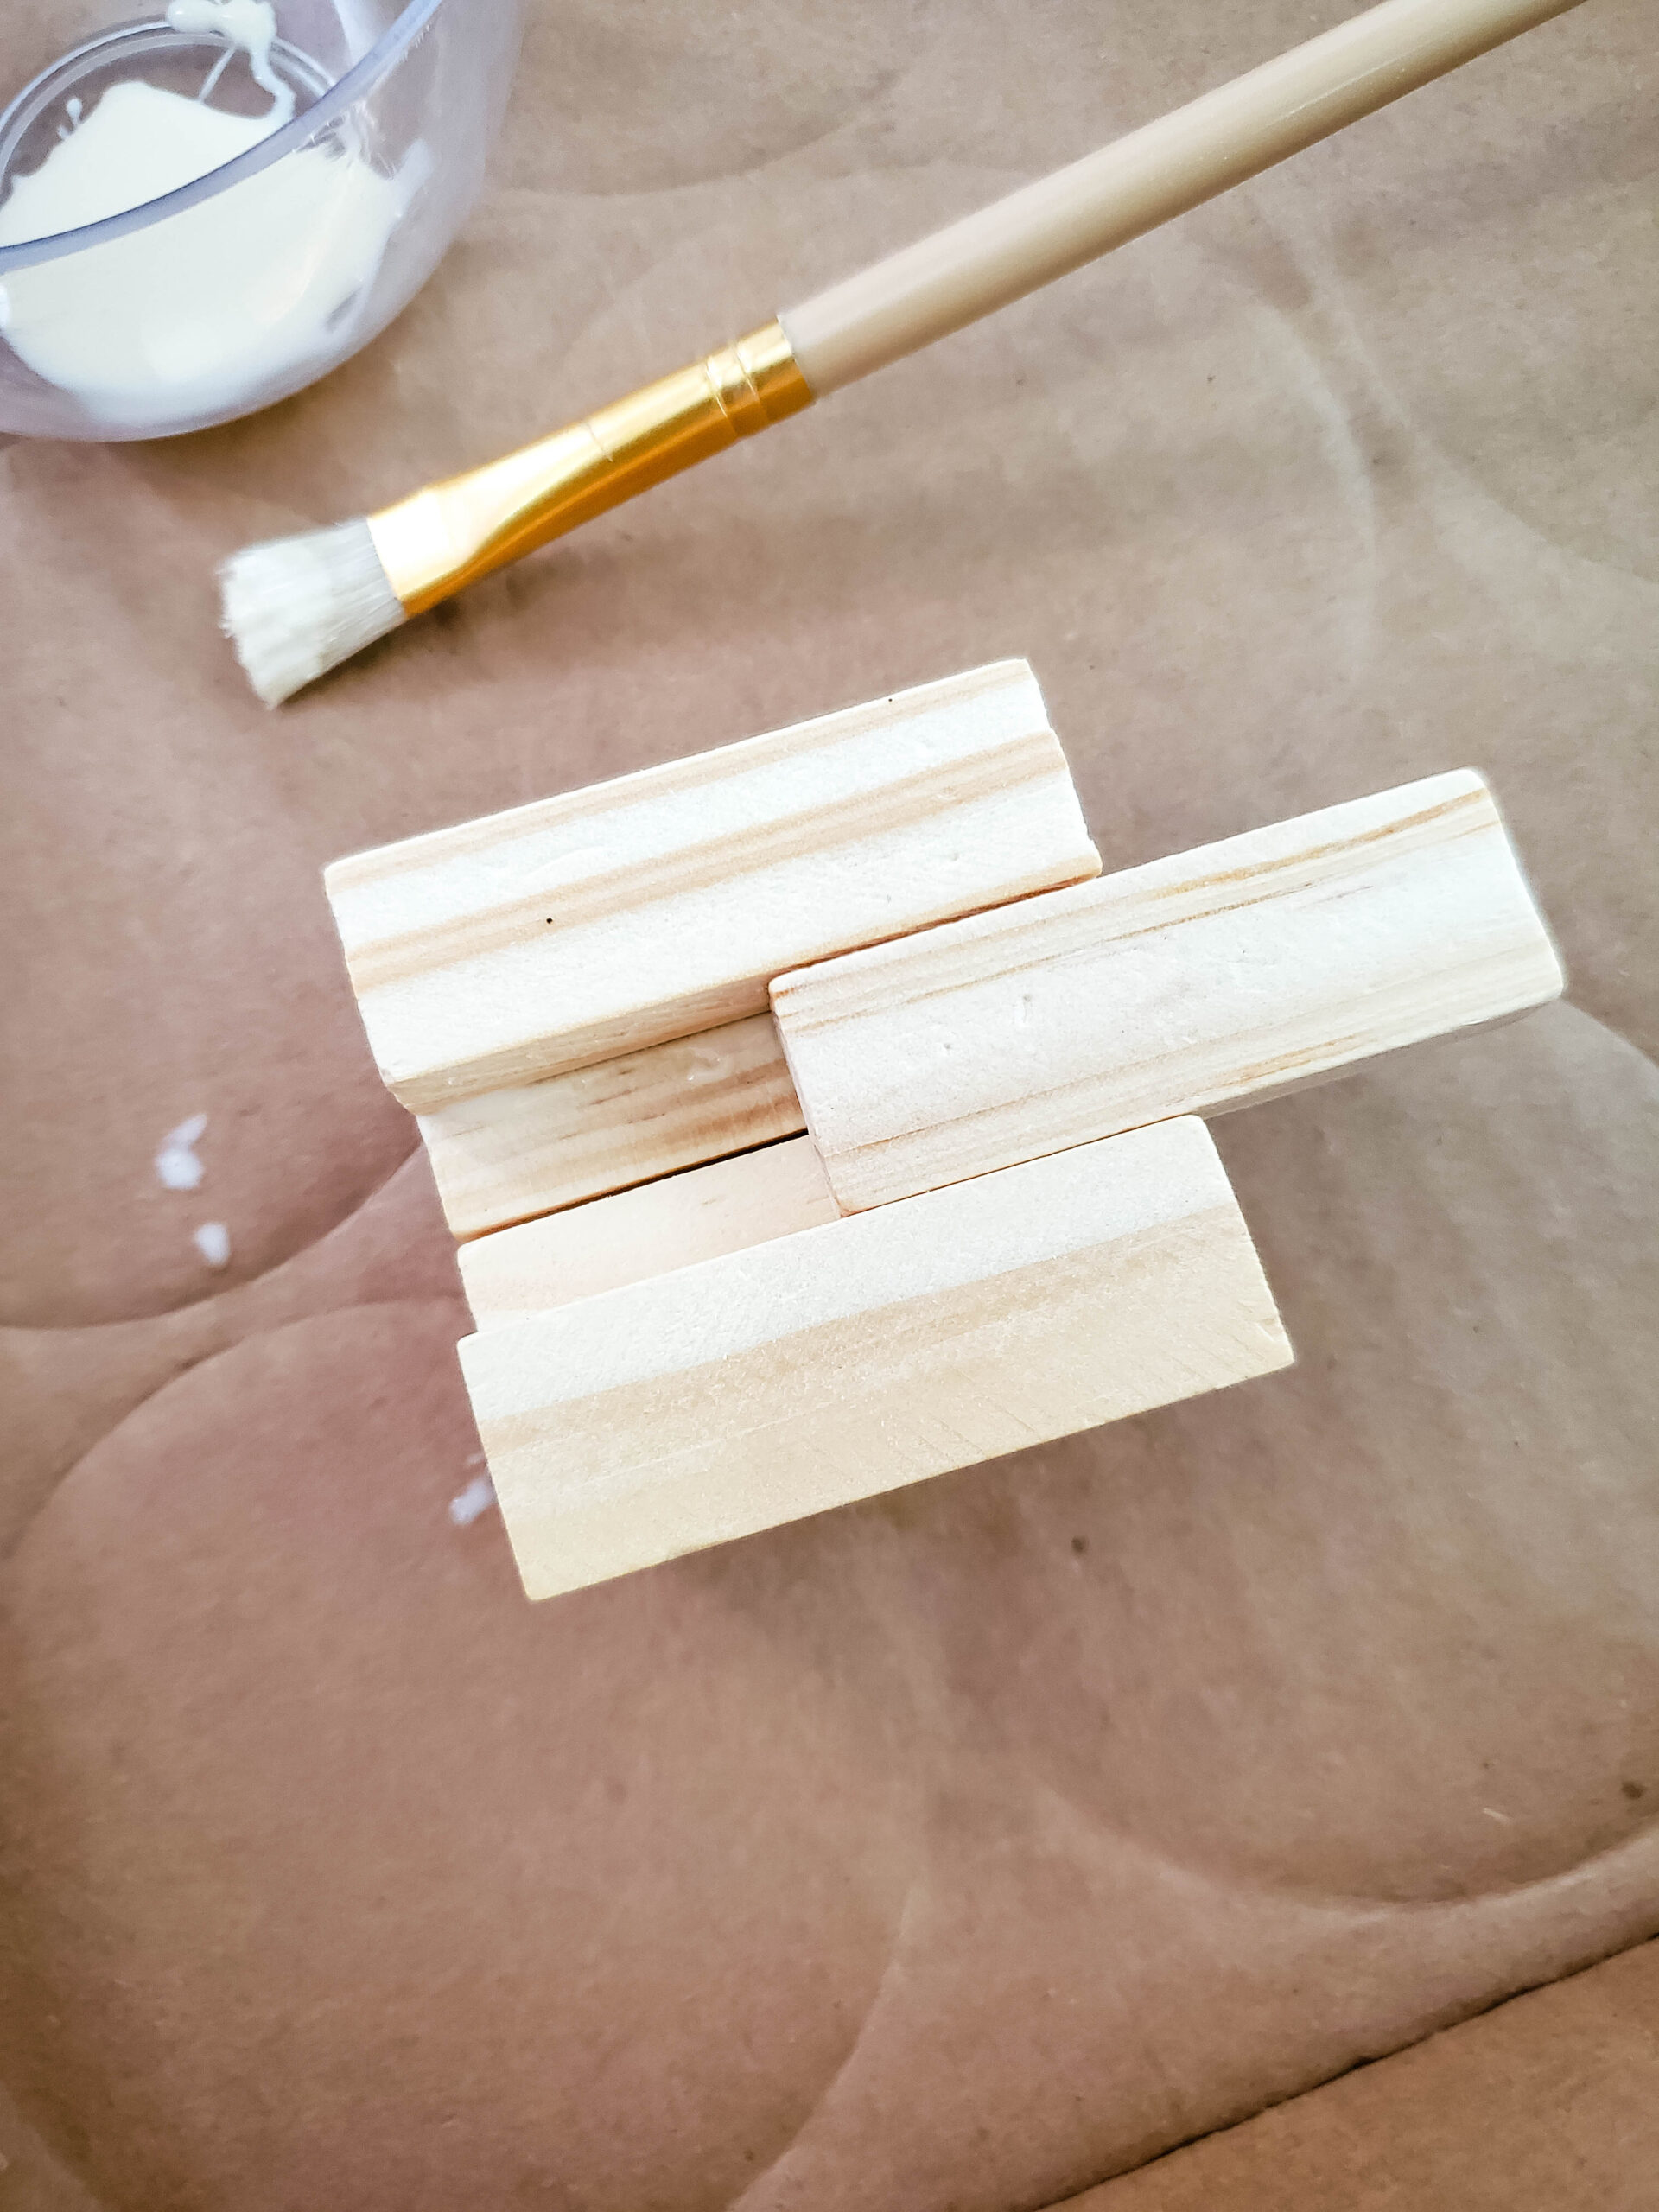
6. Apply glue to the inner sides of the two blocks you just glued and the bottom portion of the stem that sticks up from step 4.

7. Center two blocks between the three. Apply glue to the middle of the two blocks.
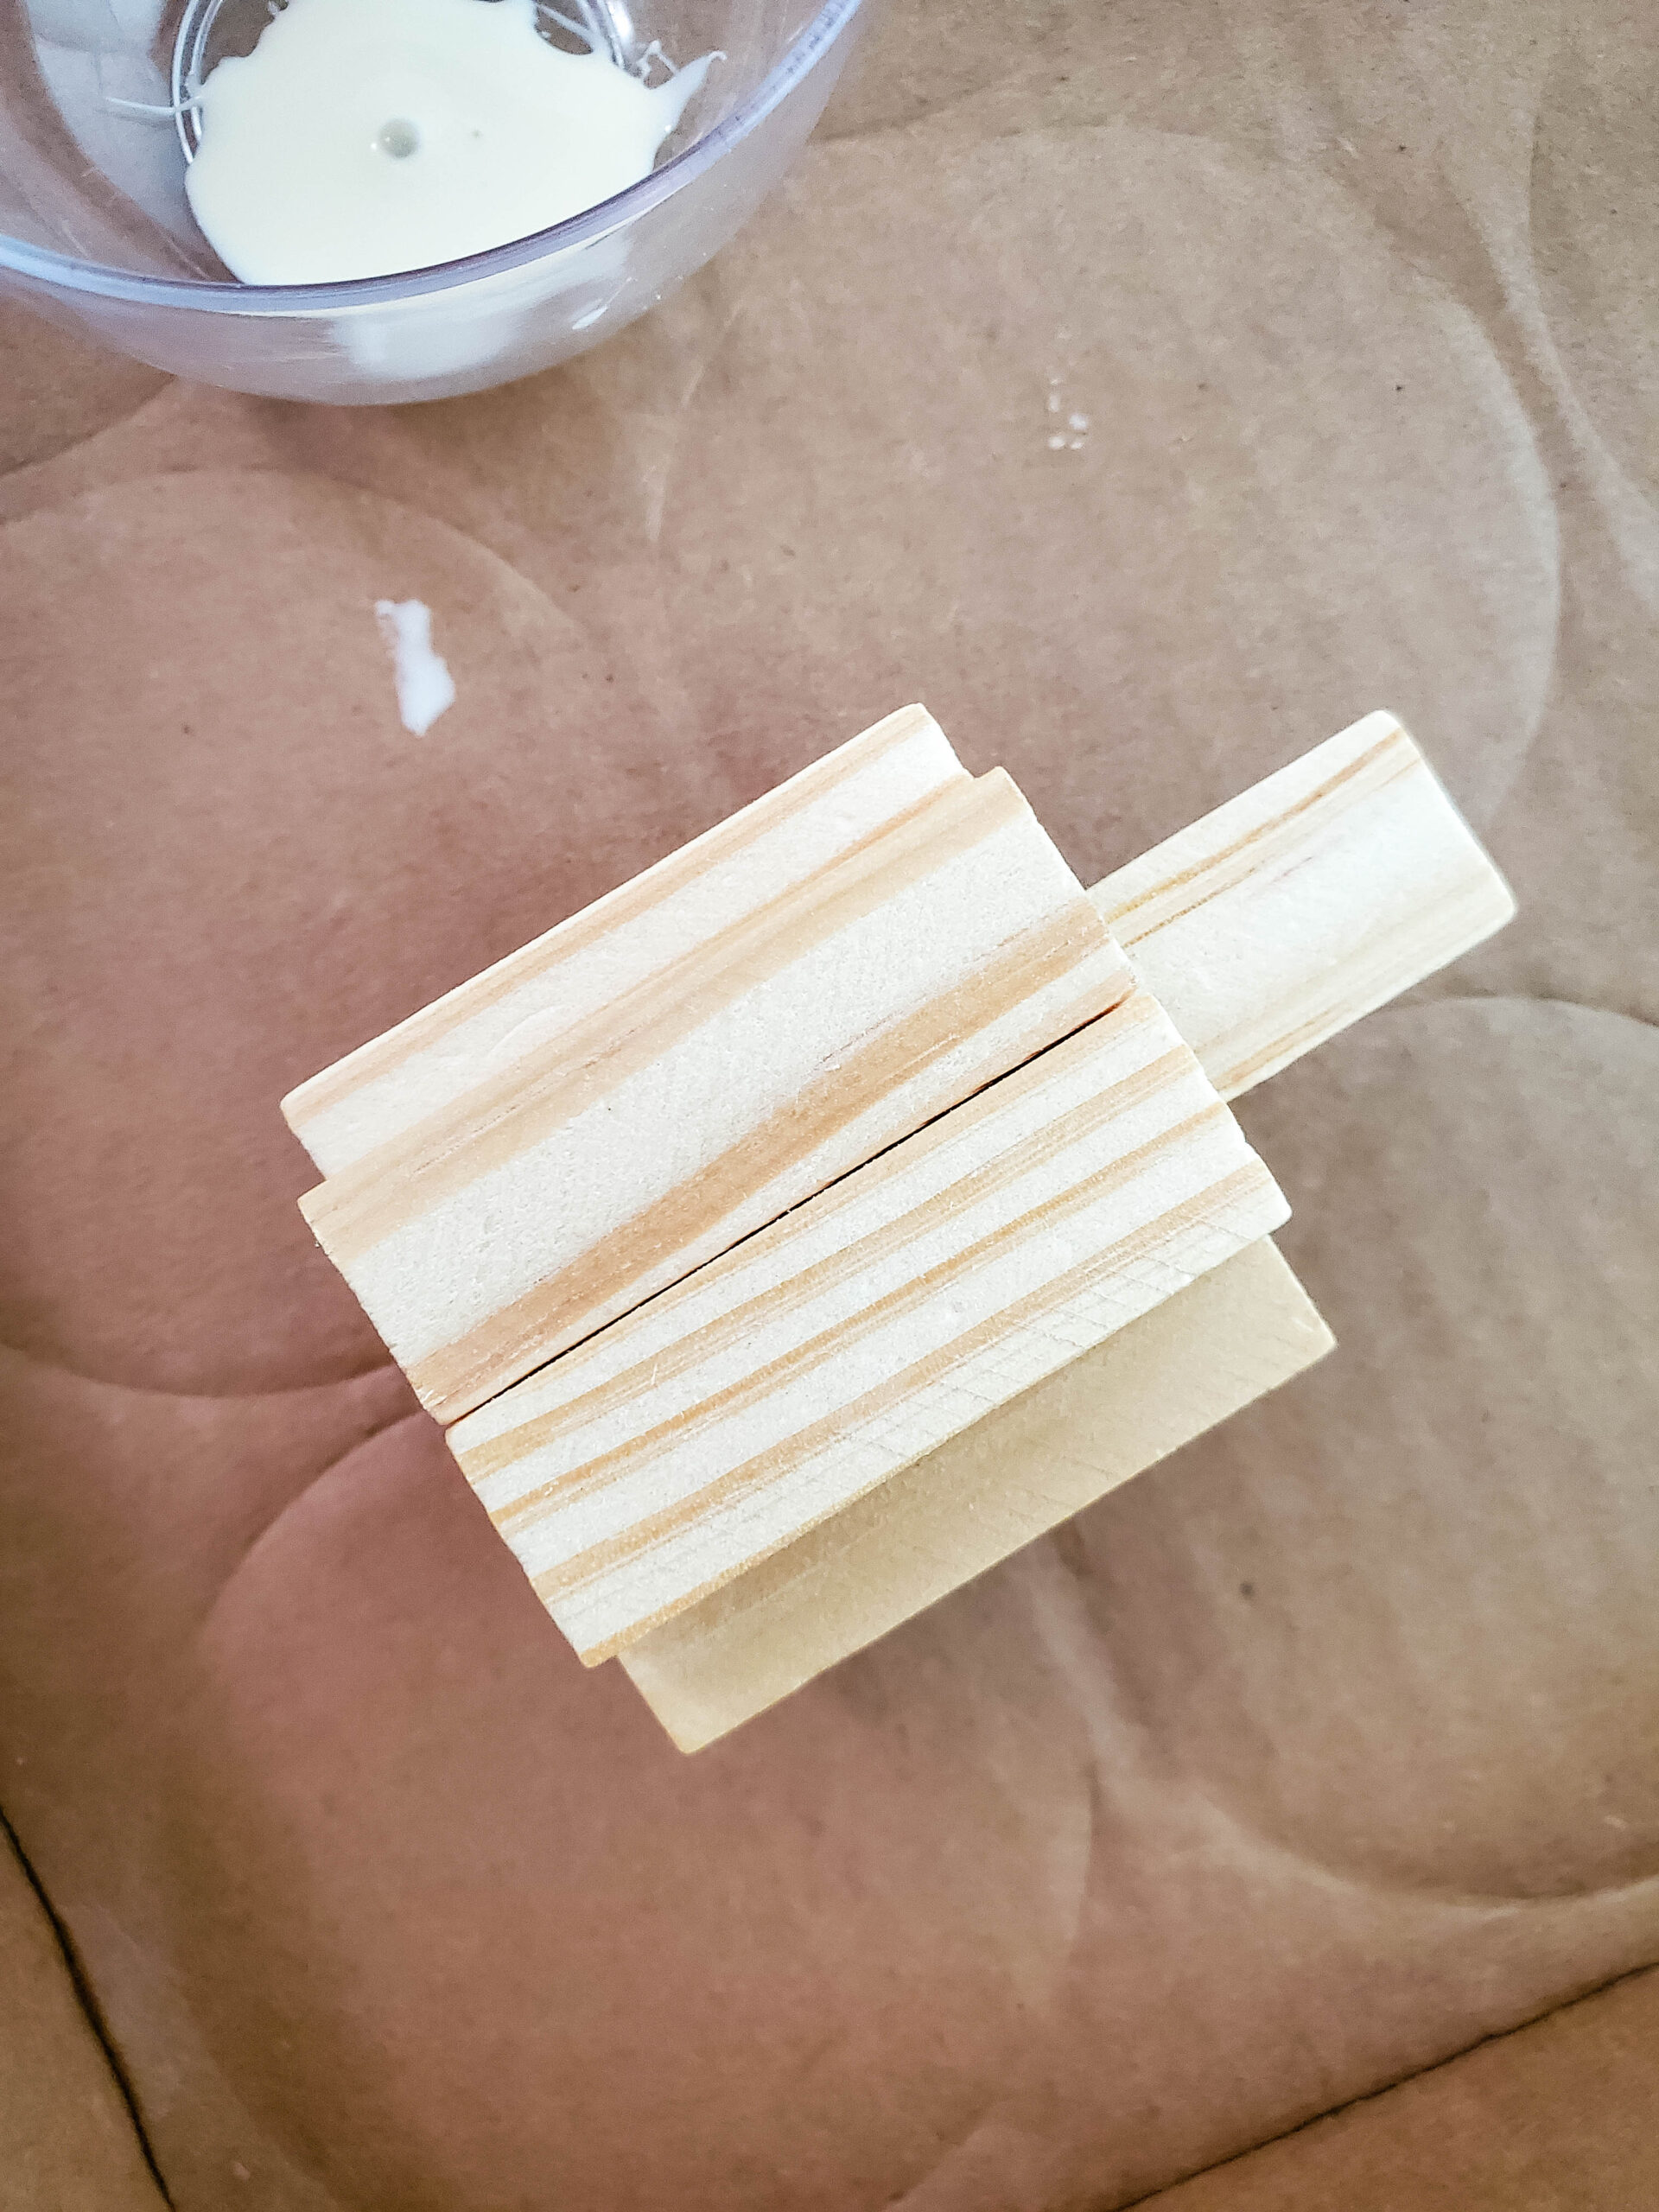
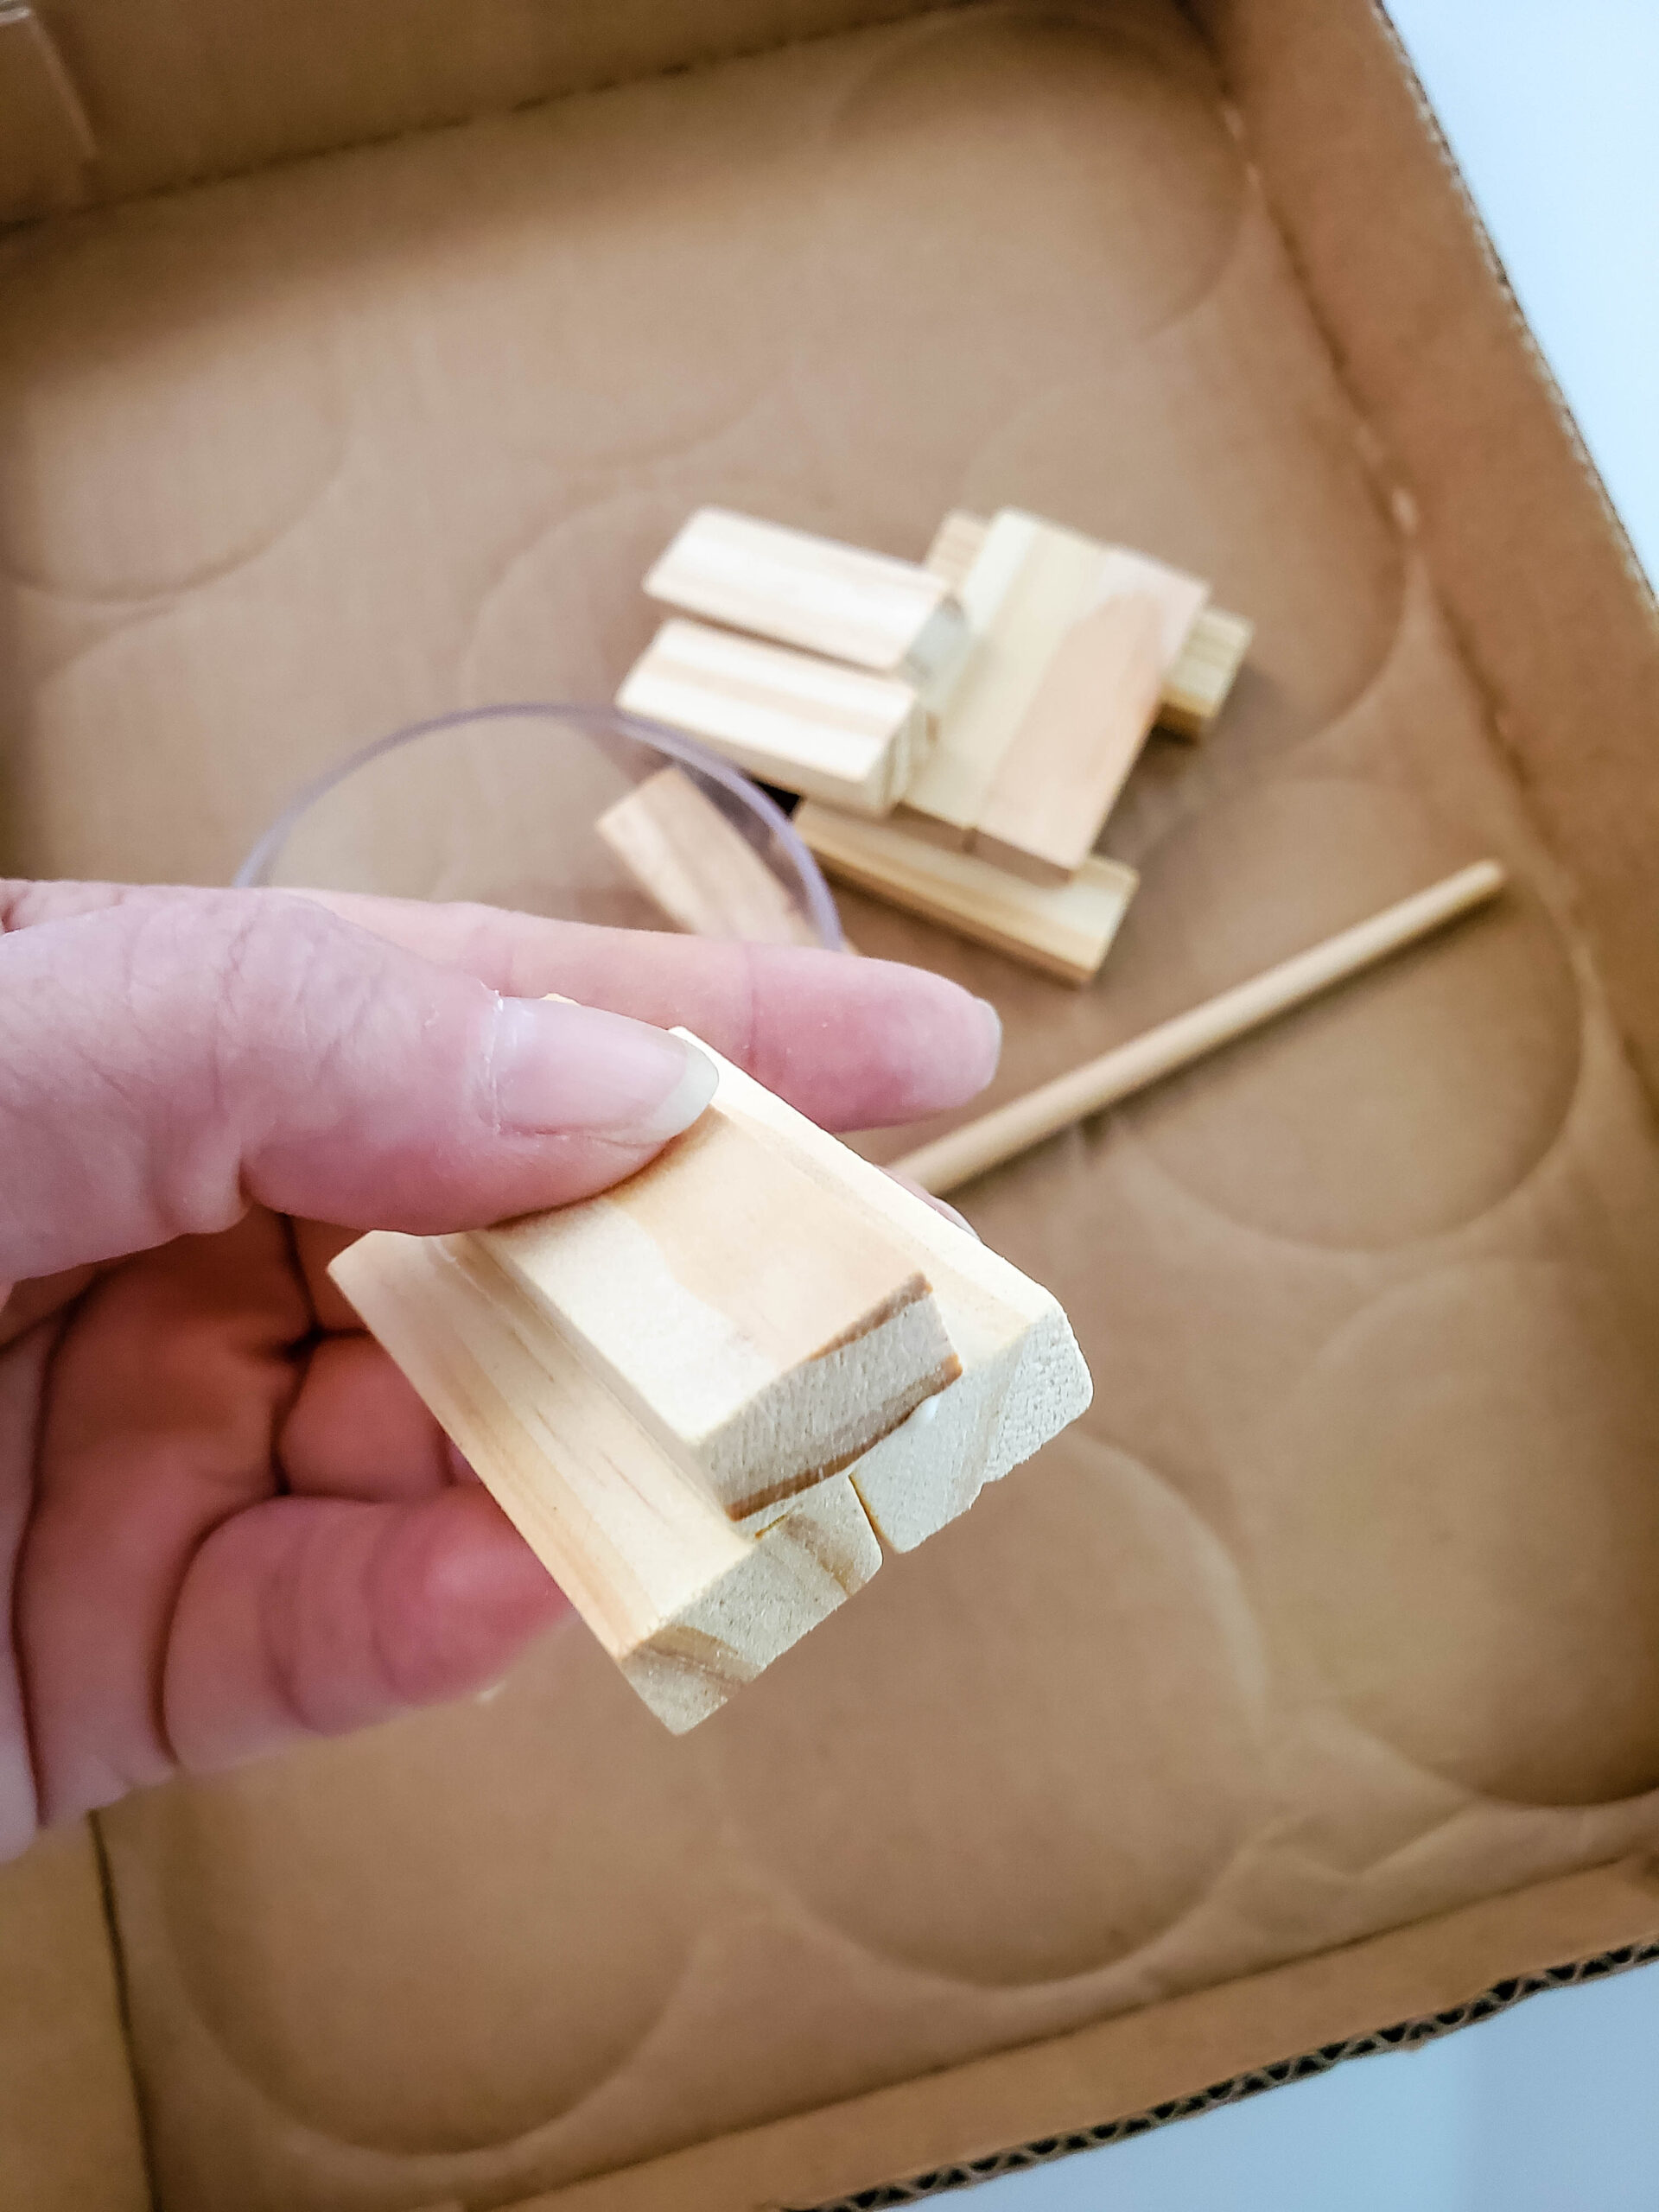
8. Set one block, centered between those two blocks. You've made the pumpkin form. Stand upright to allow the glue to completely dry.
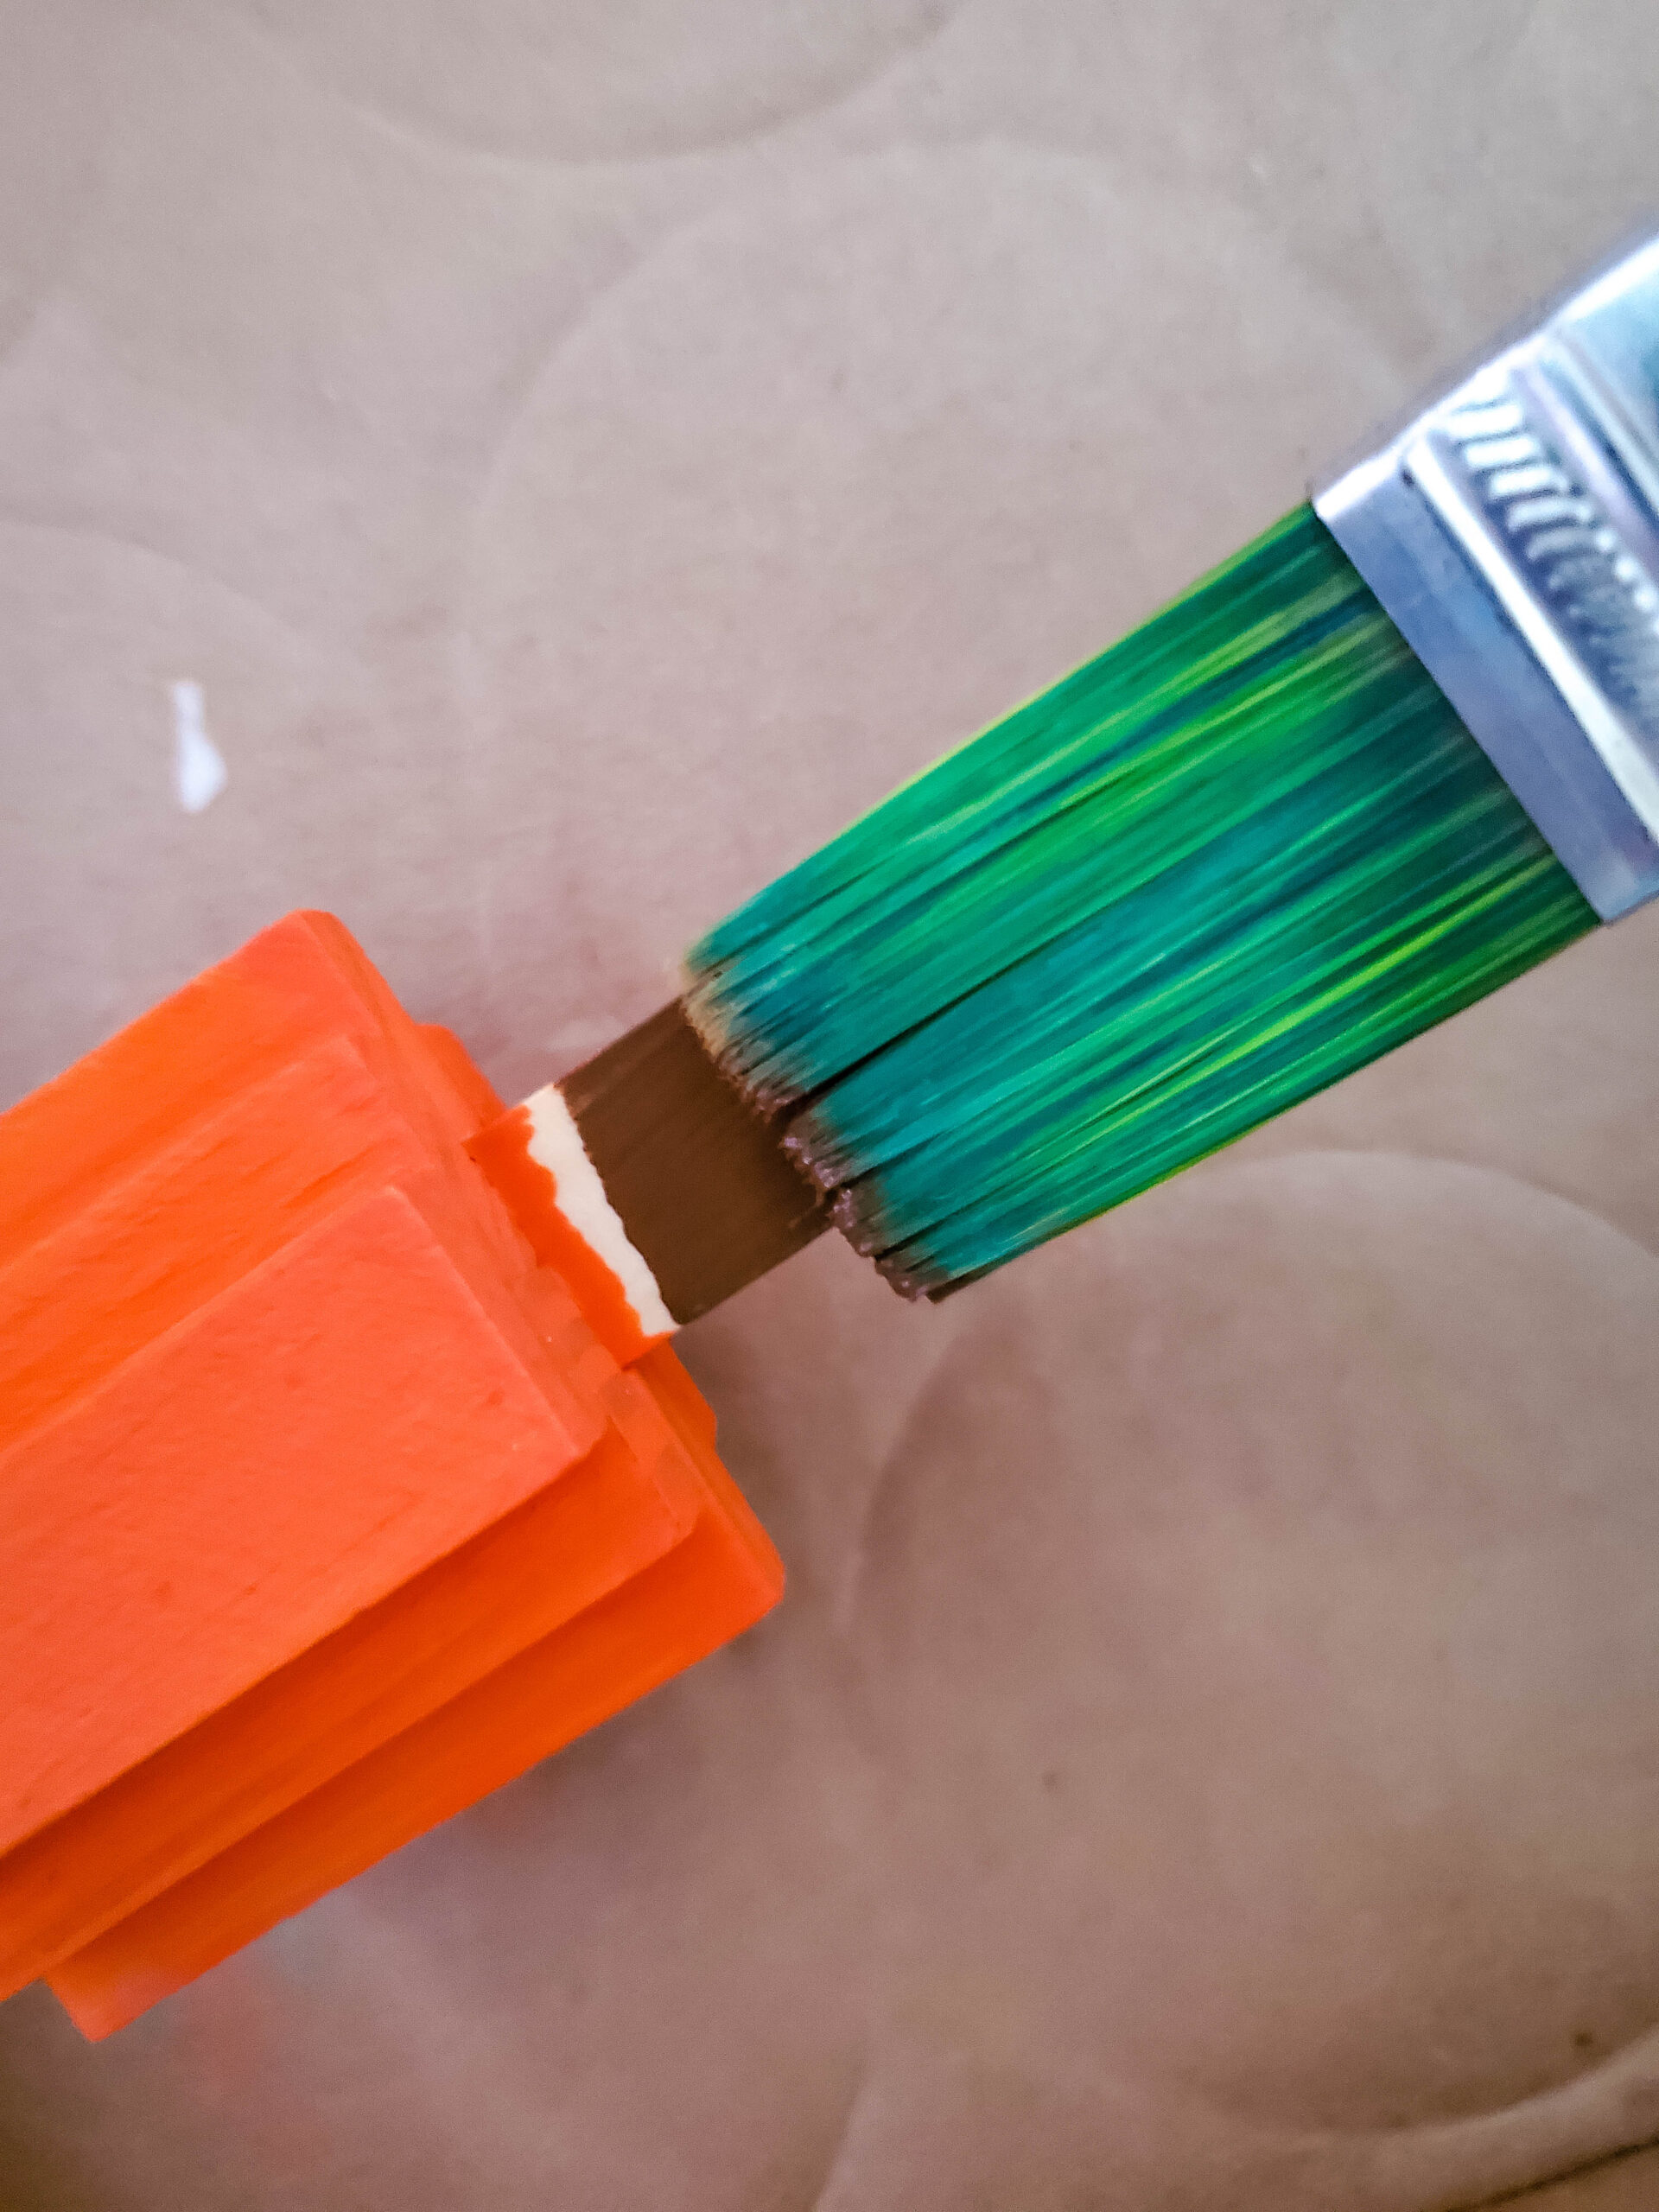
9. Paint the entire pumpkin using King’s Gold or Harvest Orange paint, except for the one block that sticks up.
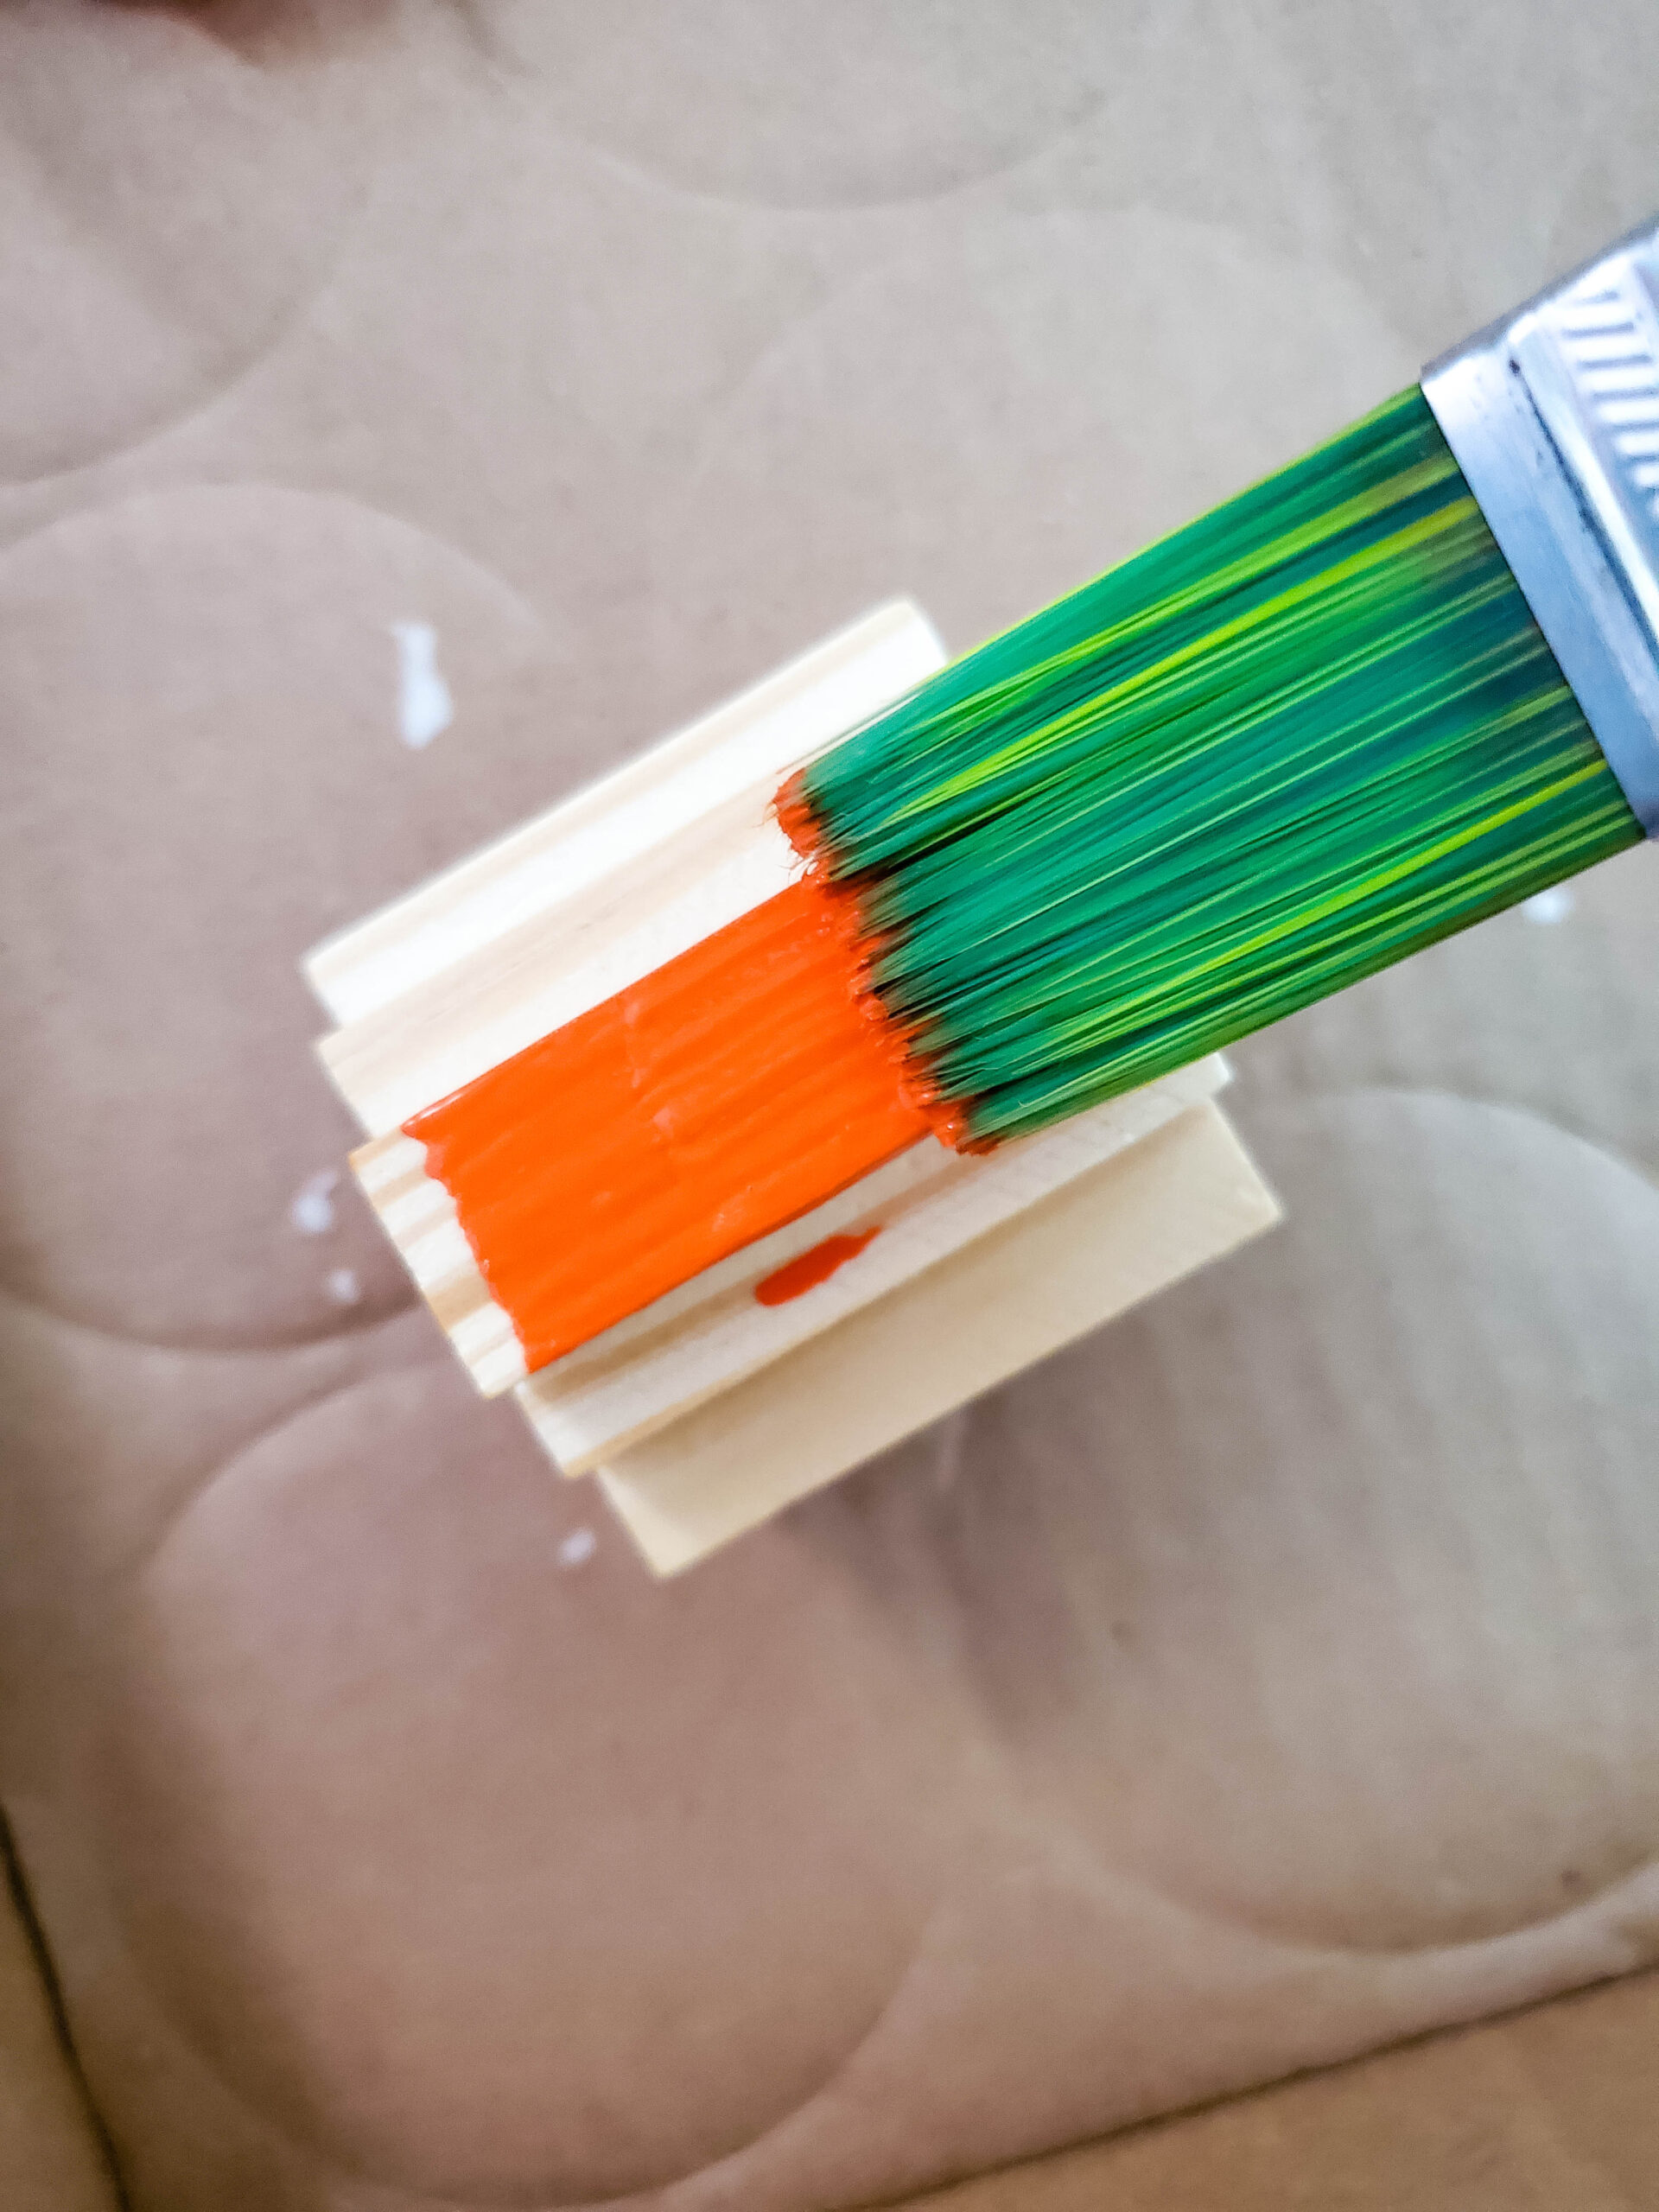
10. Using Melted Chocolate paint, paint the stem.
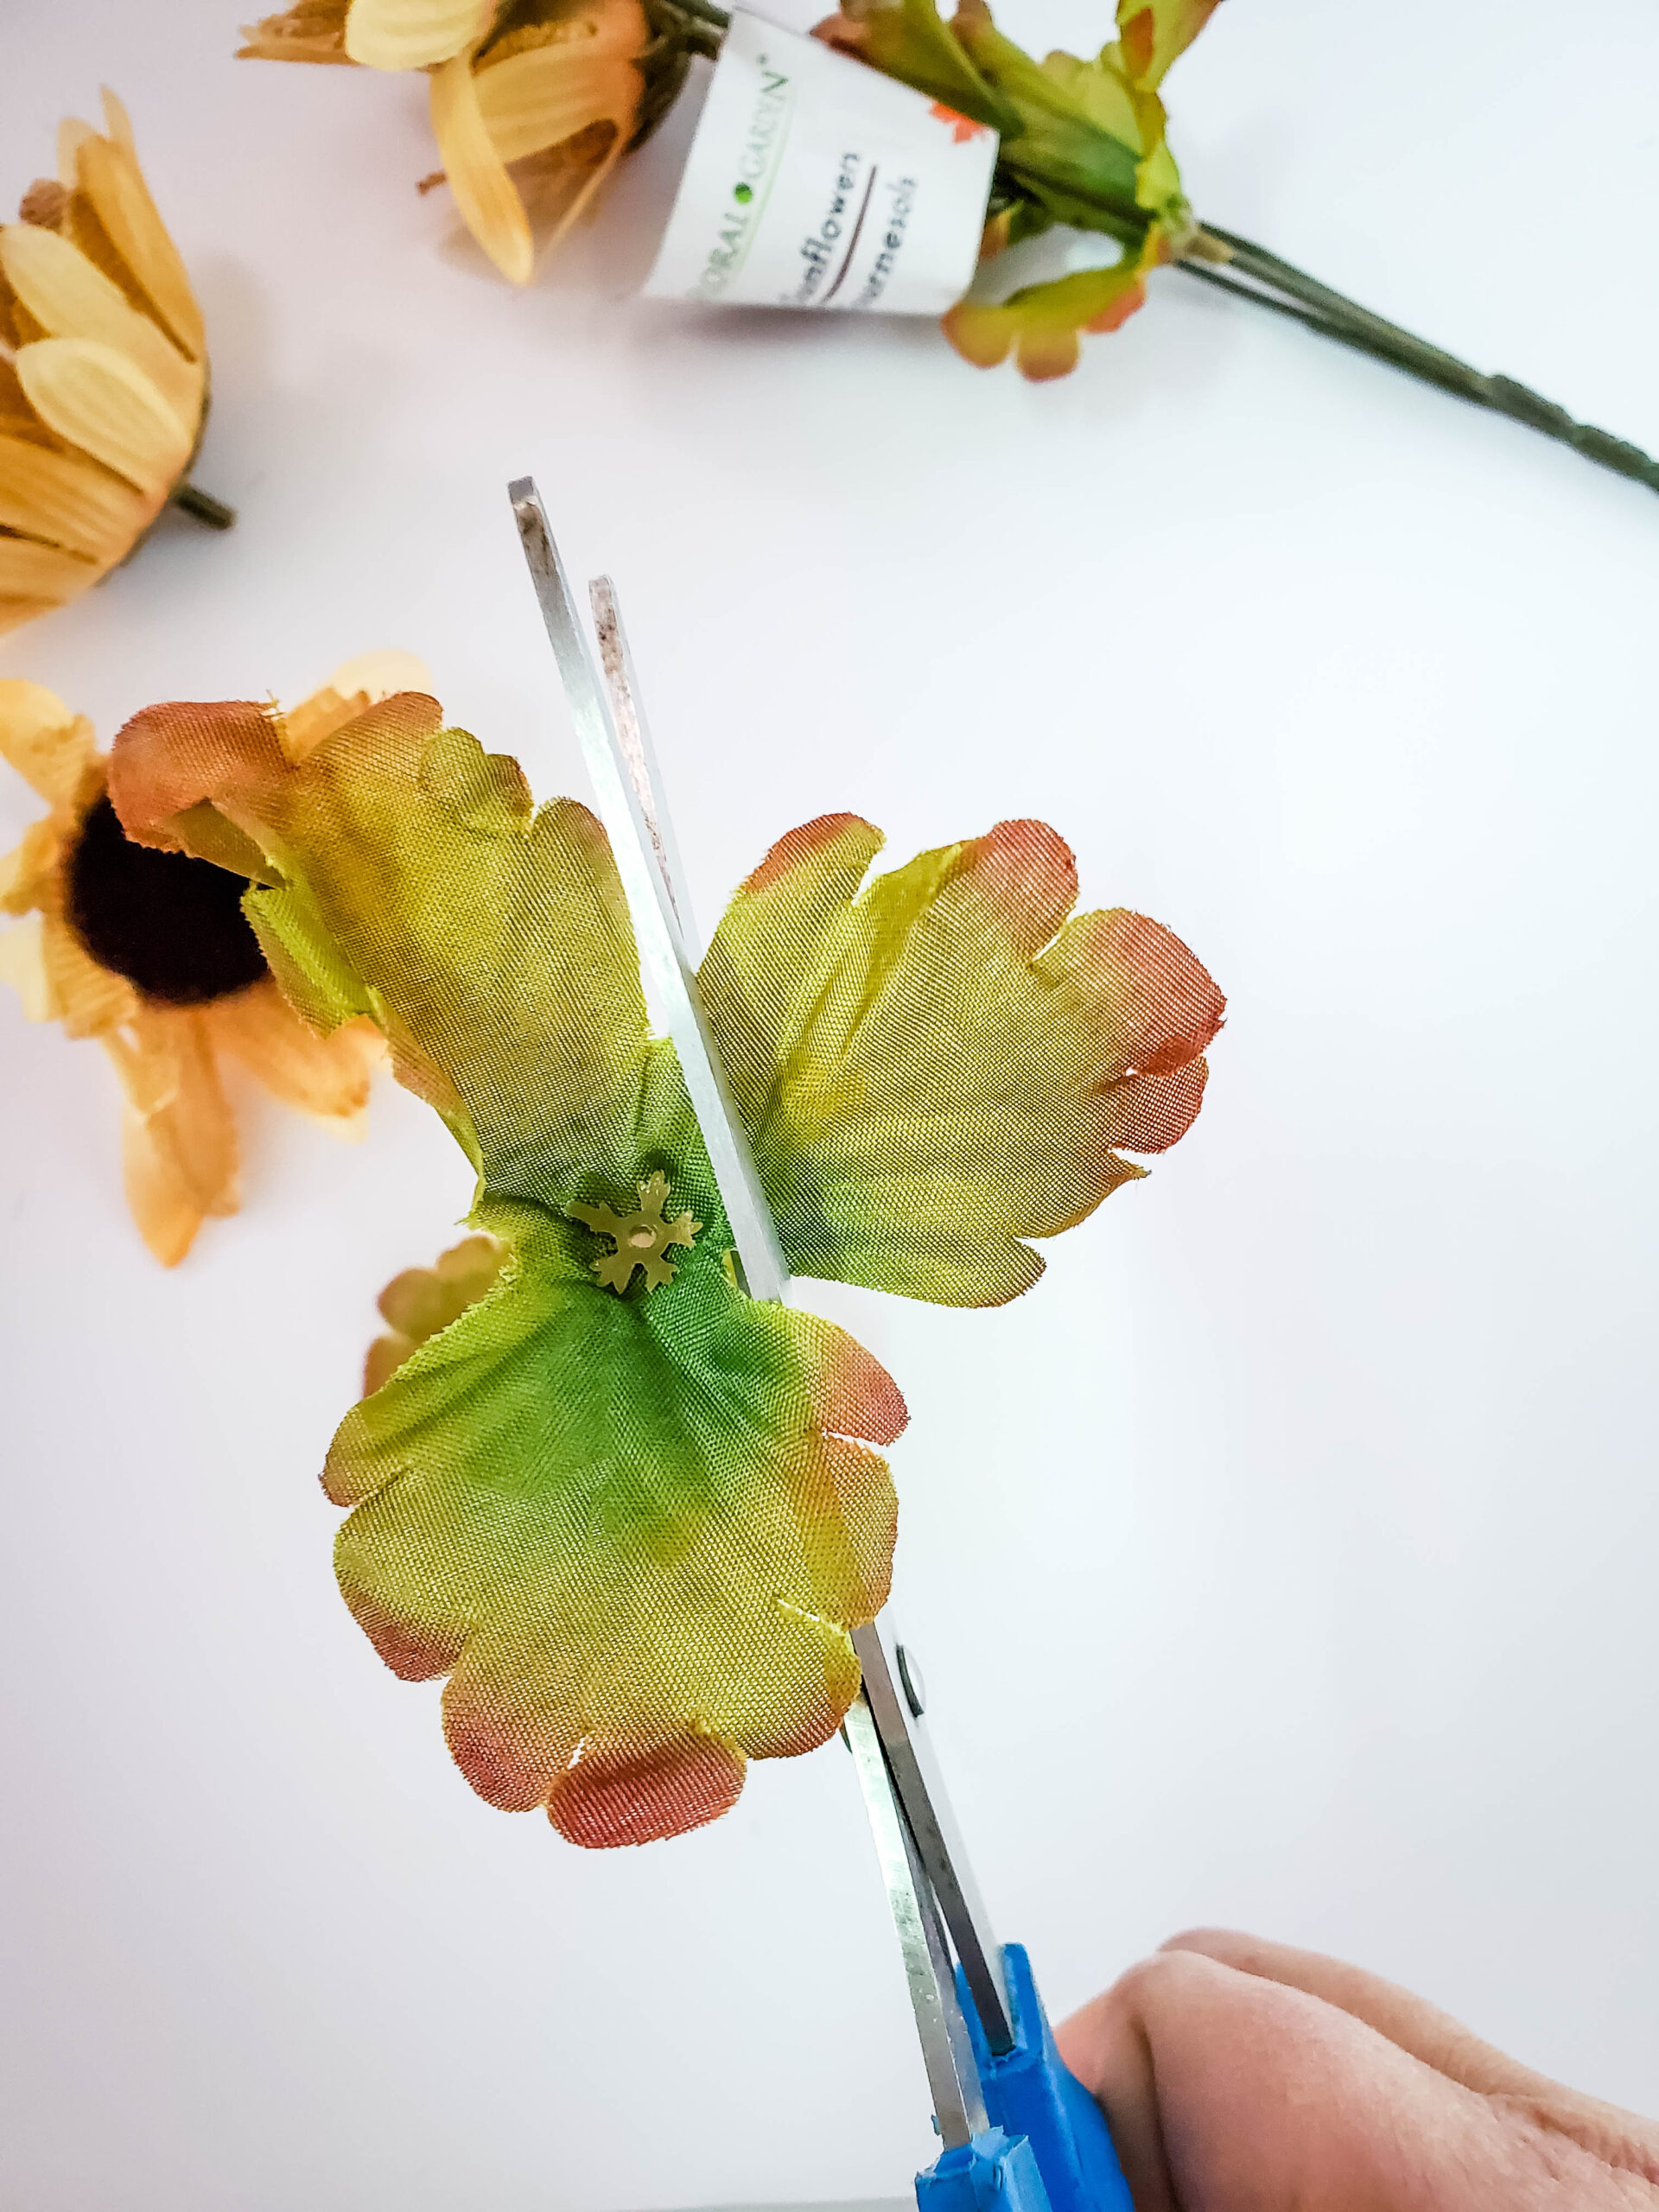
11. Remove the leaves from the flower stems.
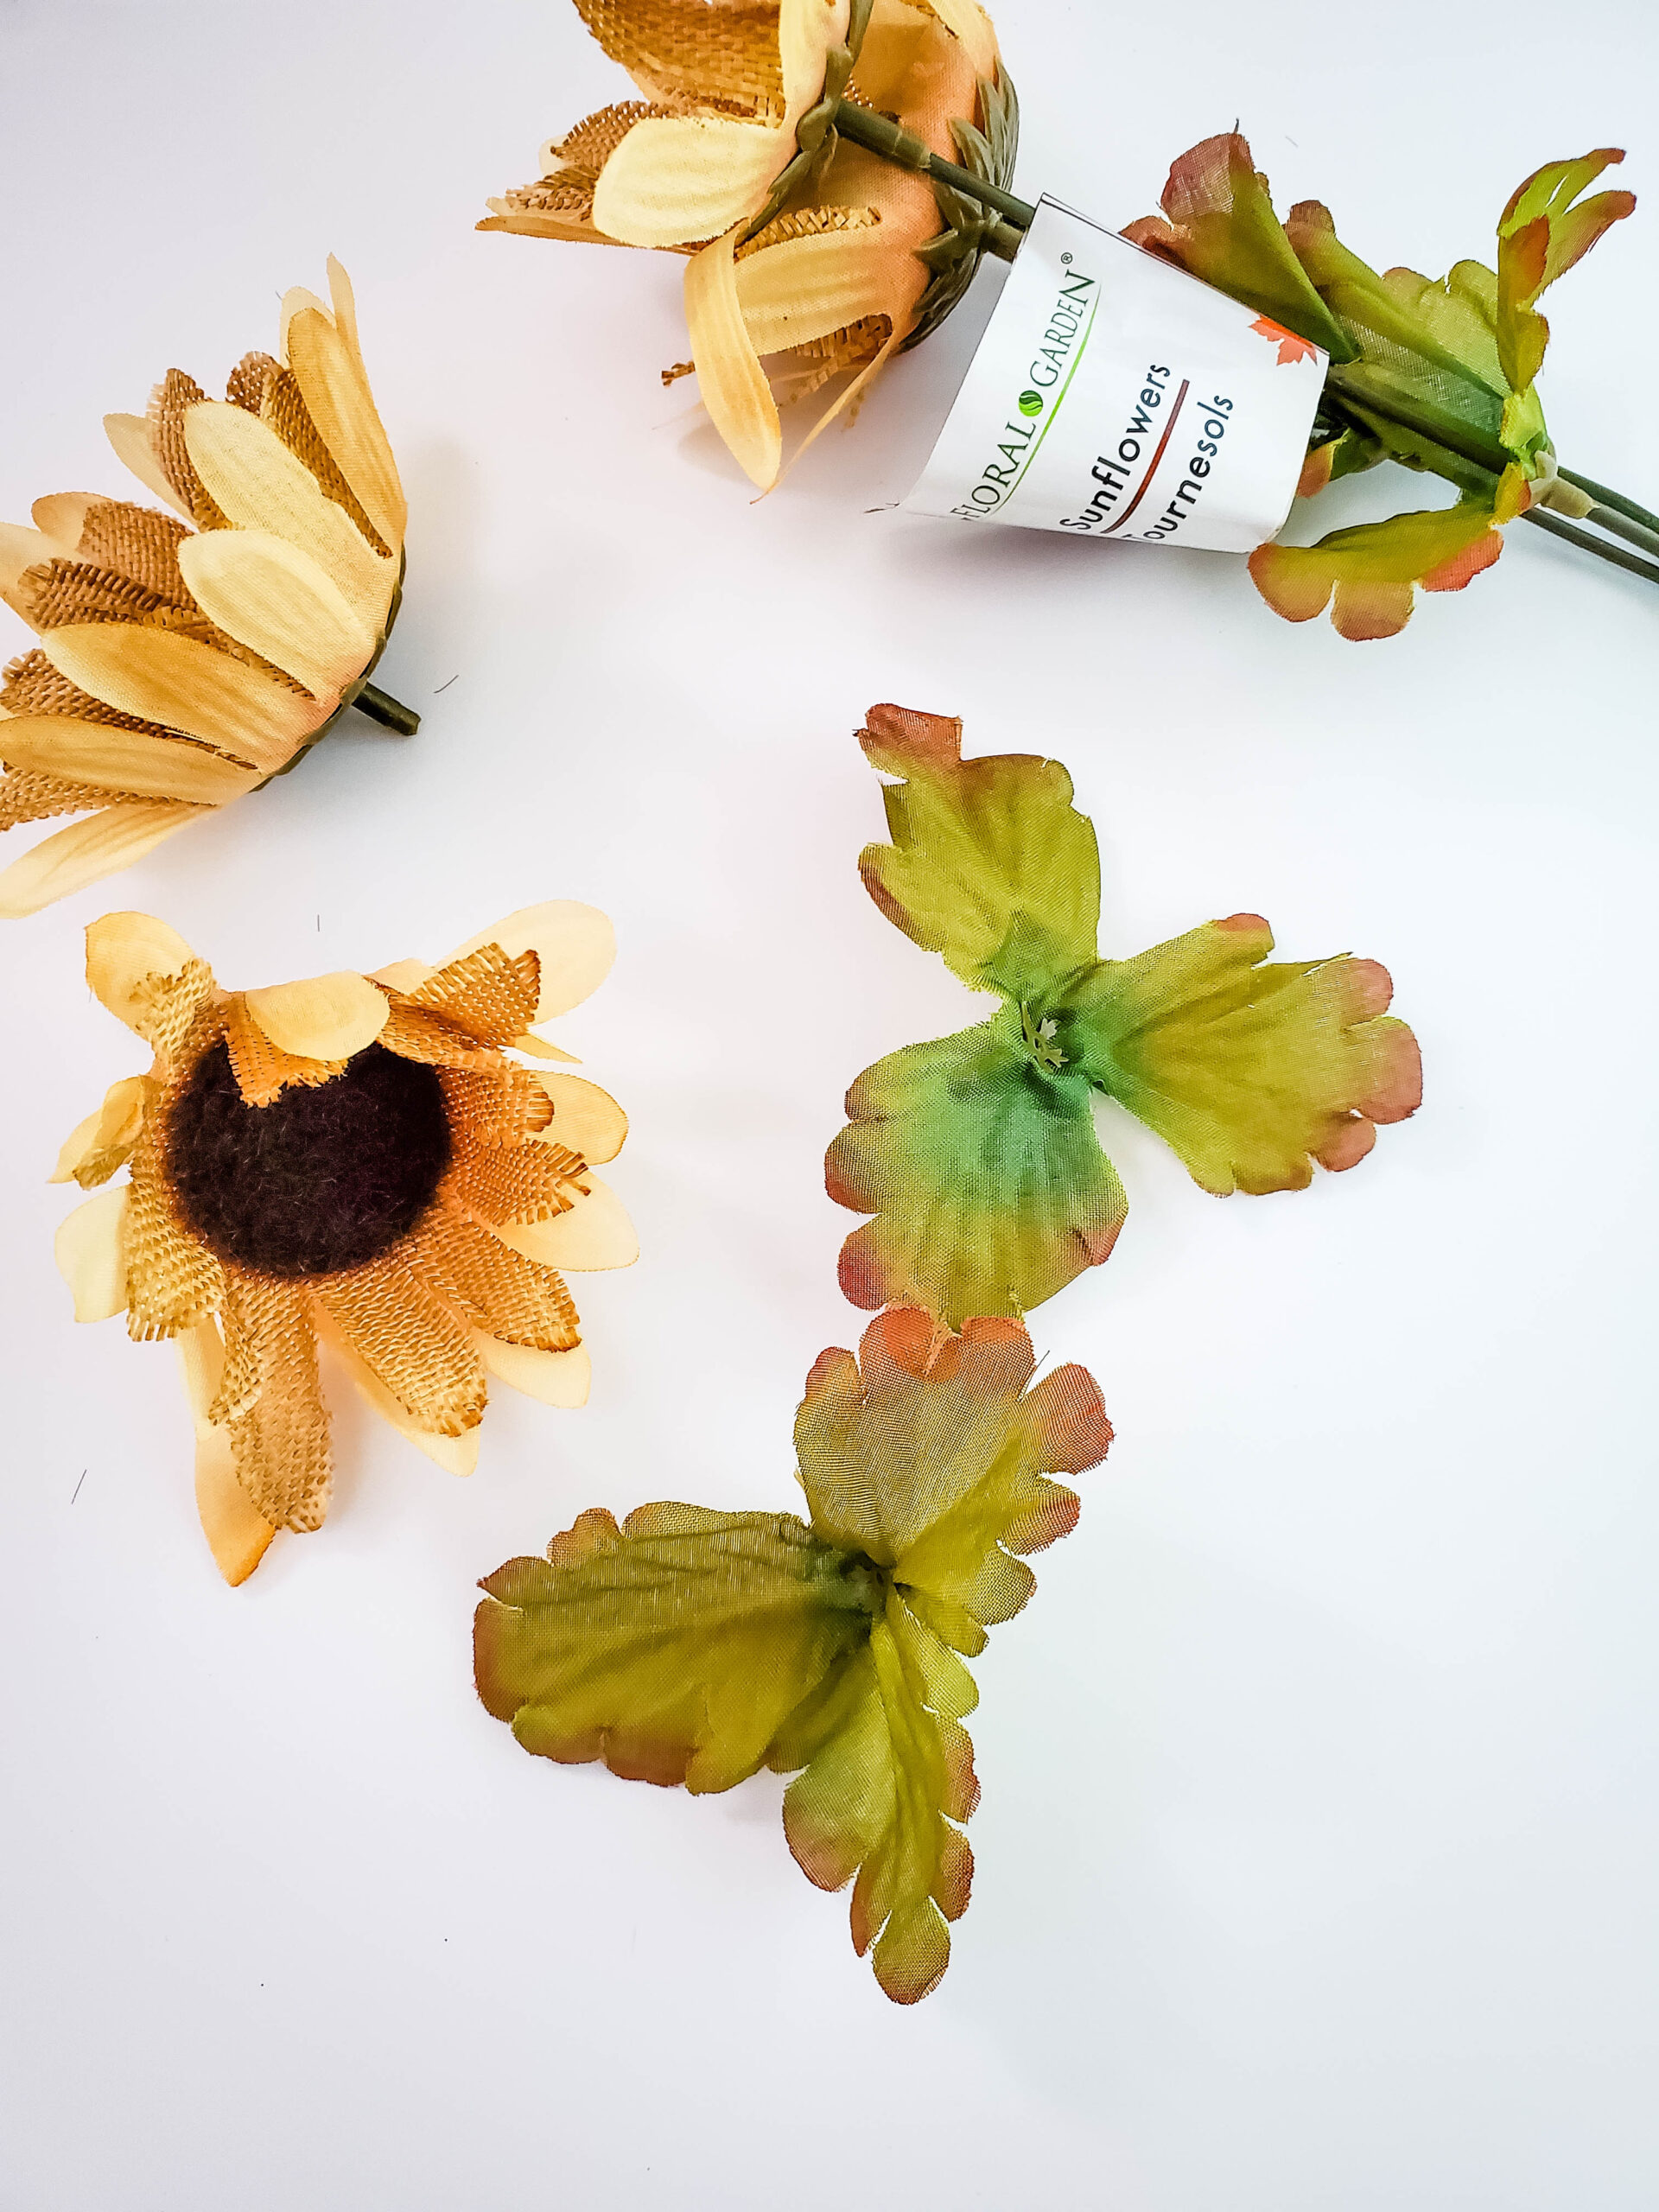
12. Cut each of the three leaves off the main leaf bunch.
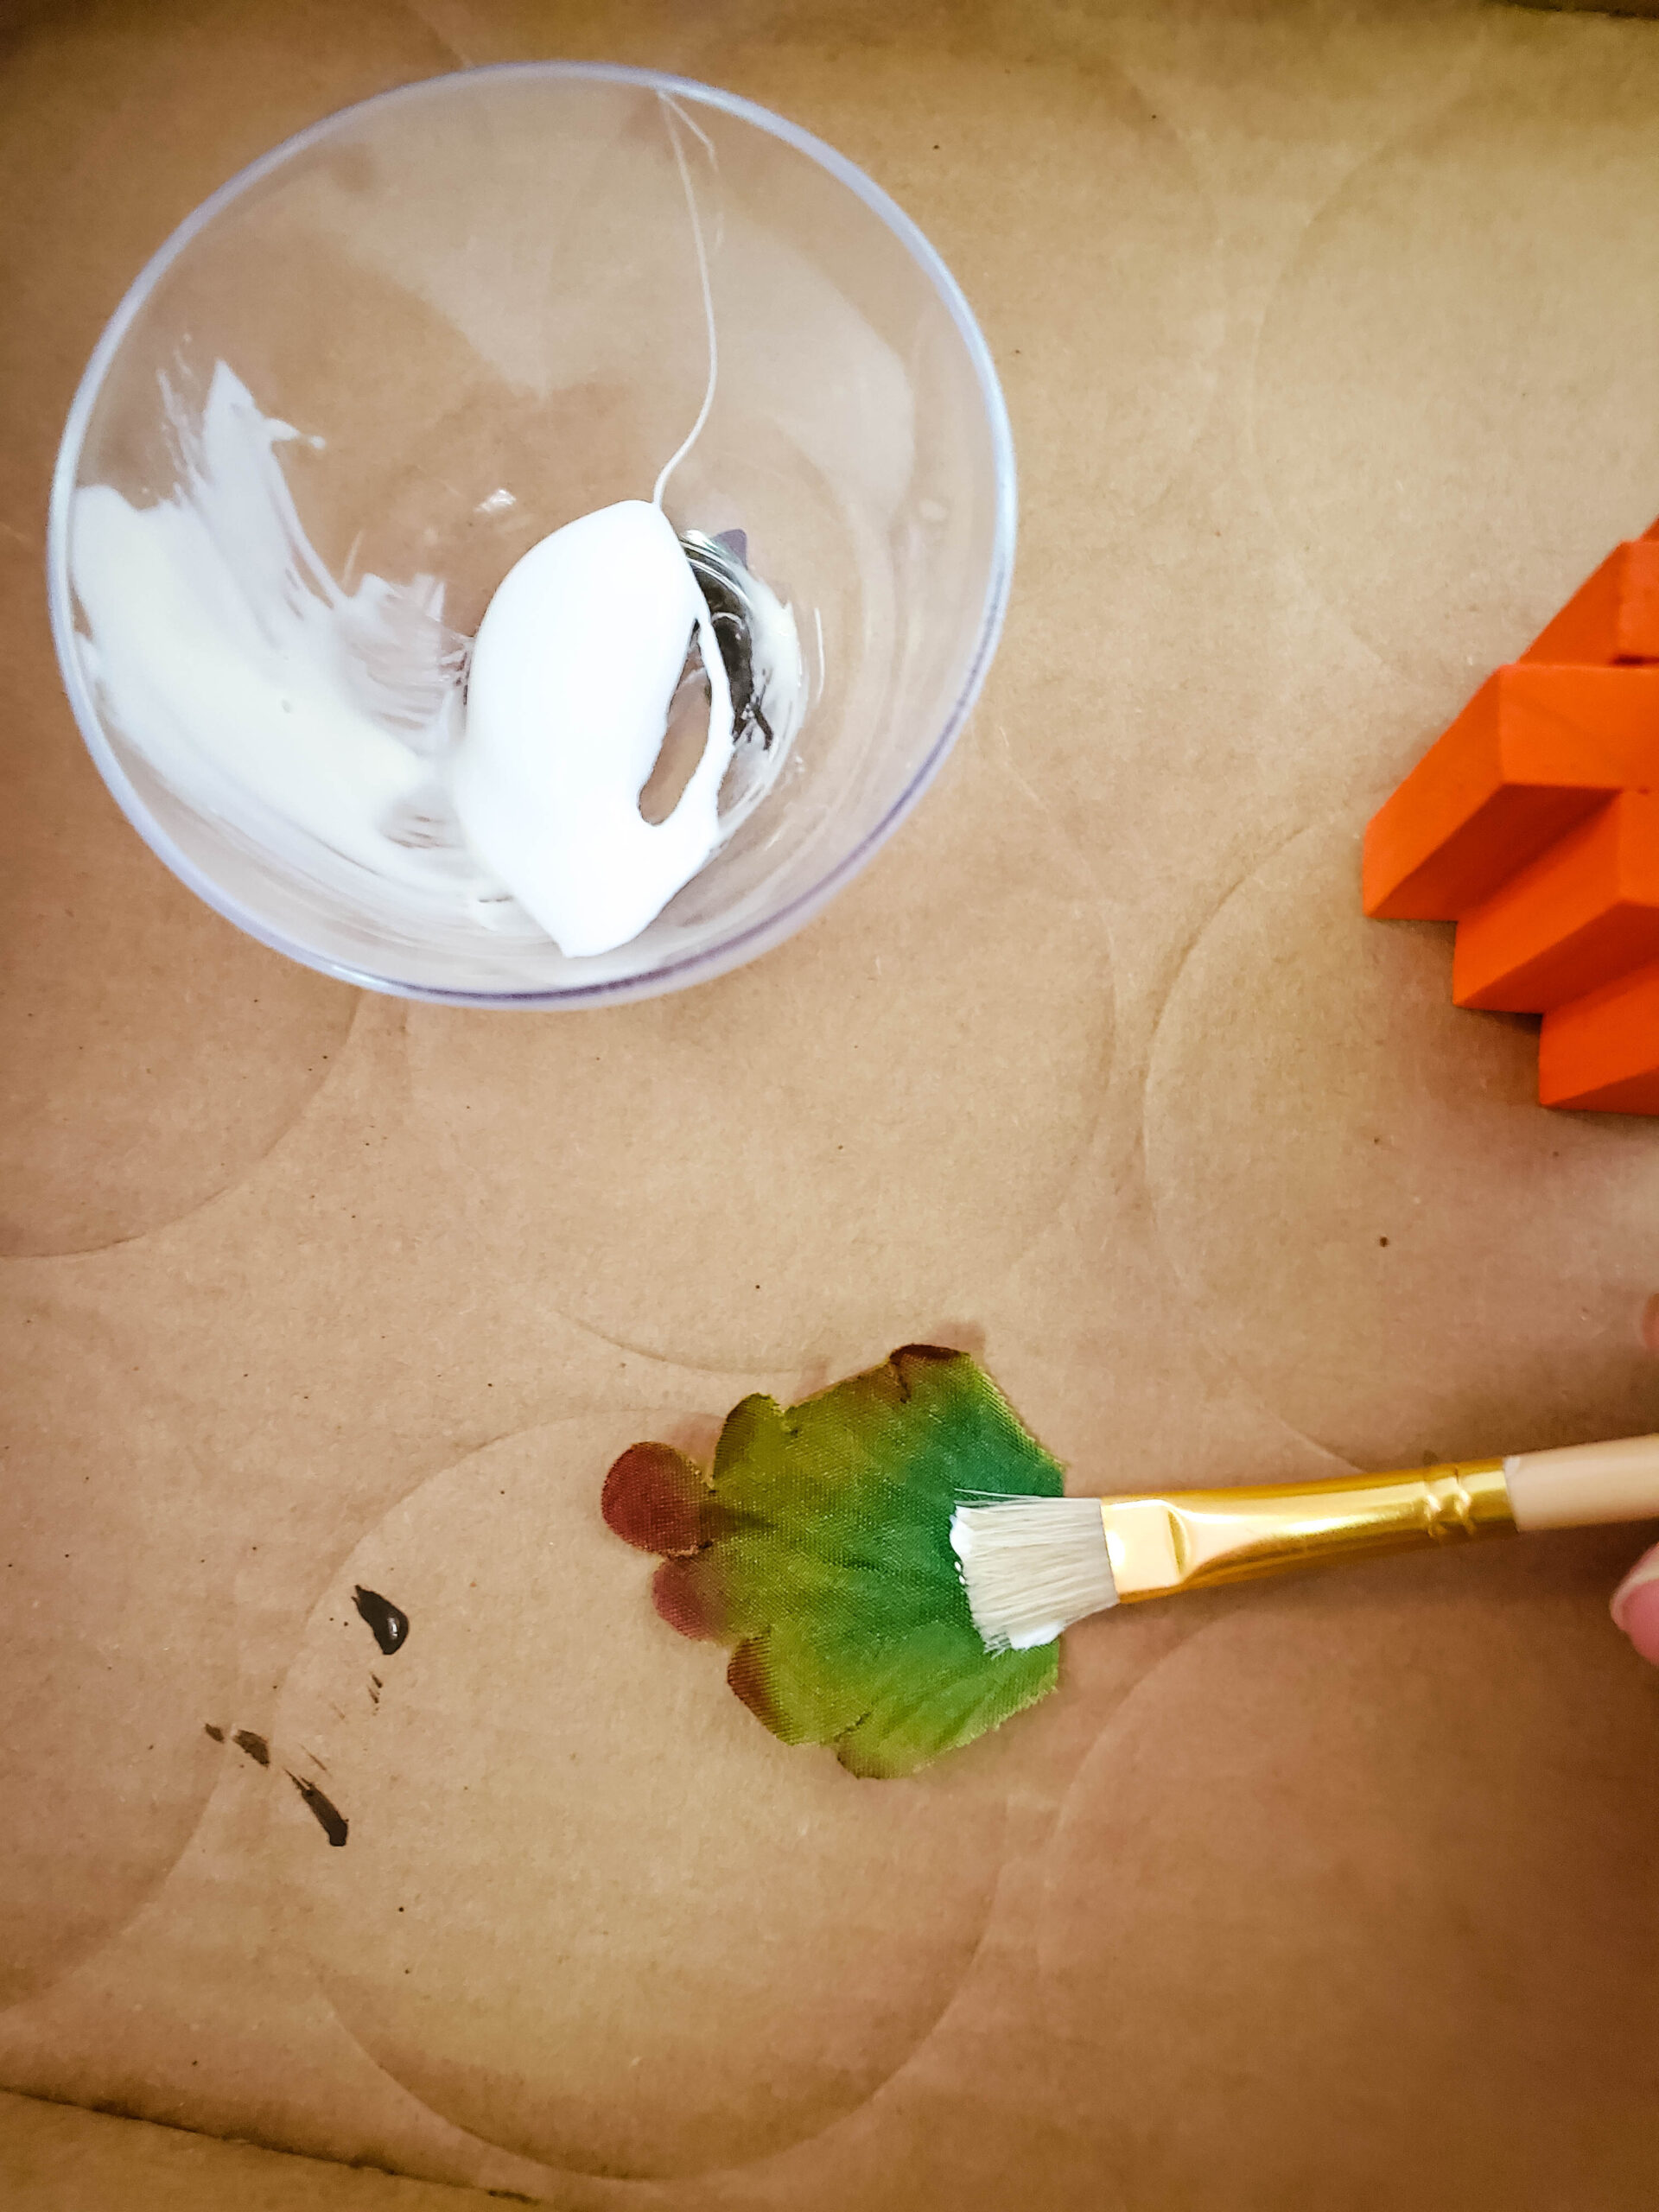
13. Using the tacky glue and small paint brush, add a small amount of glue to the bottom of the back of the leaf.
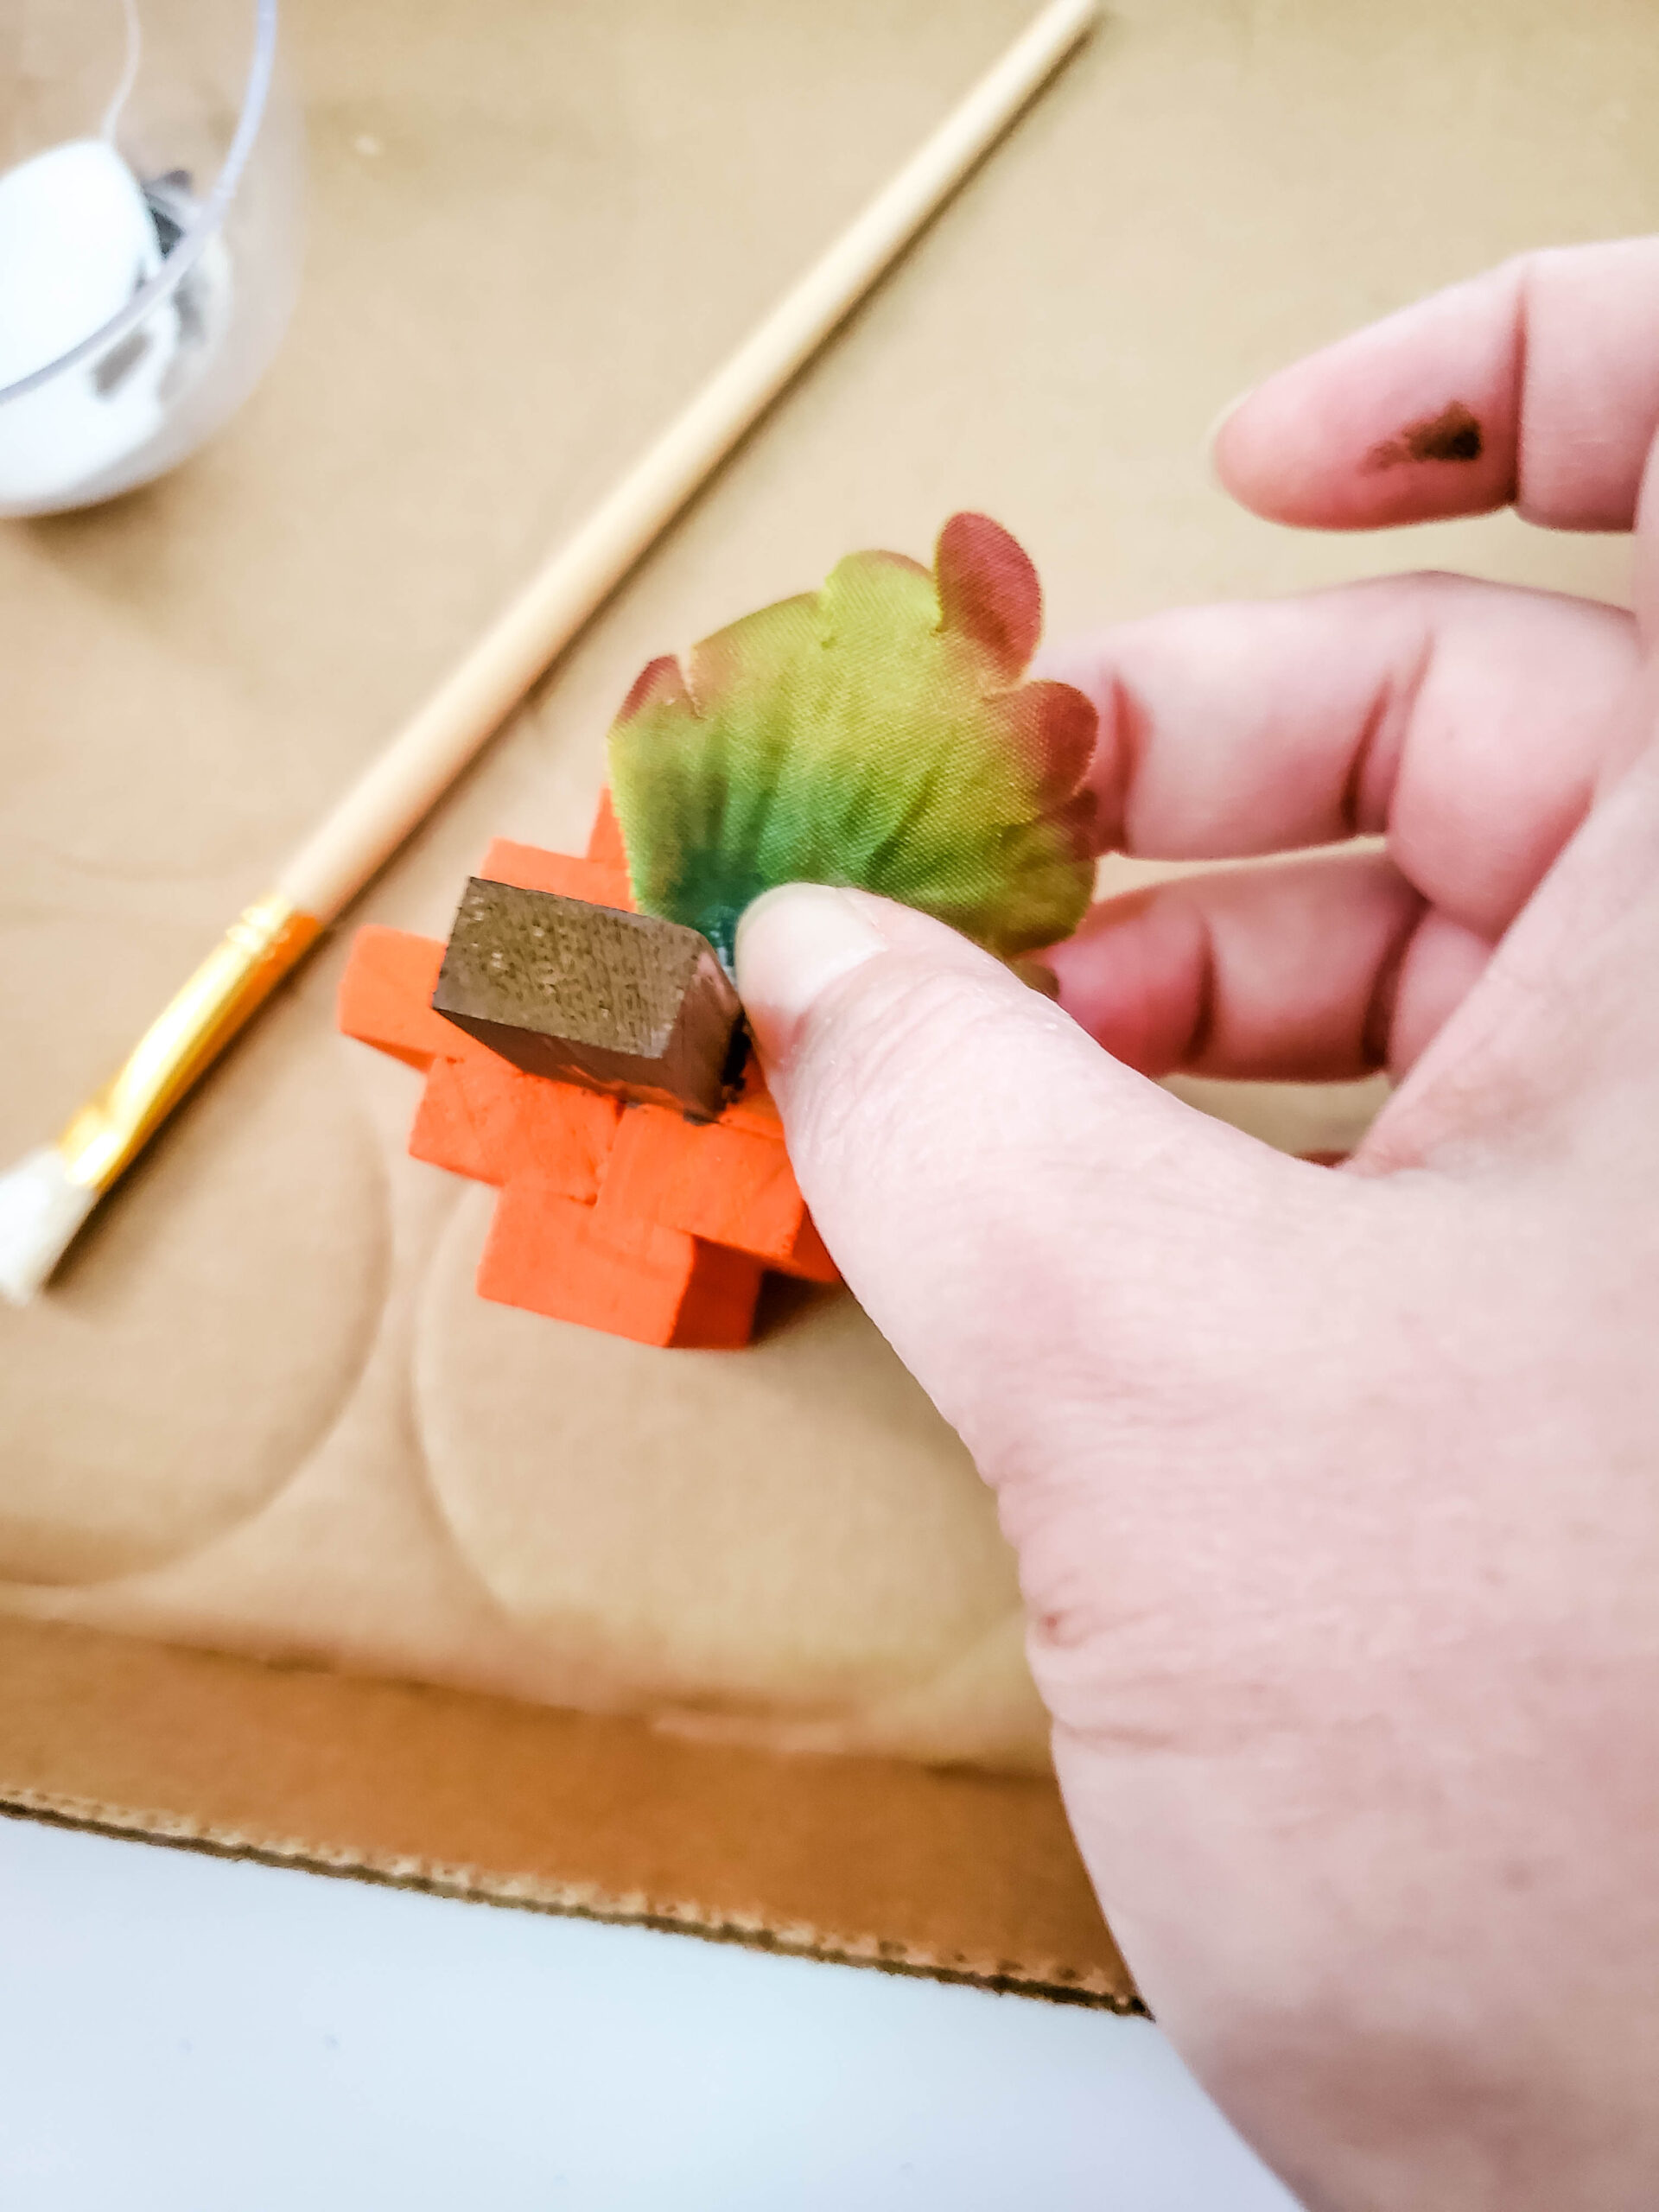
14. Attach it behind the step, slightly off to the side.
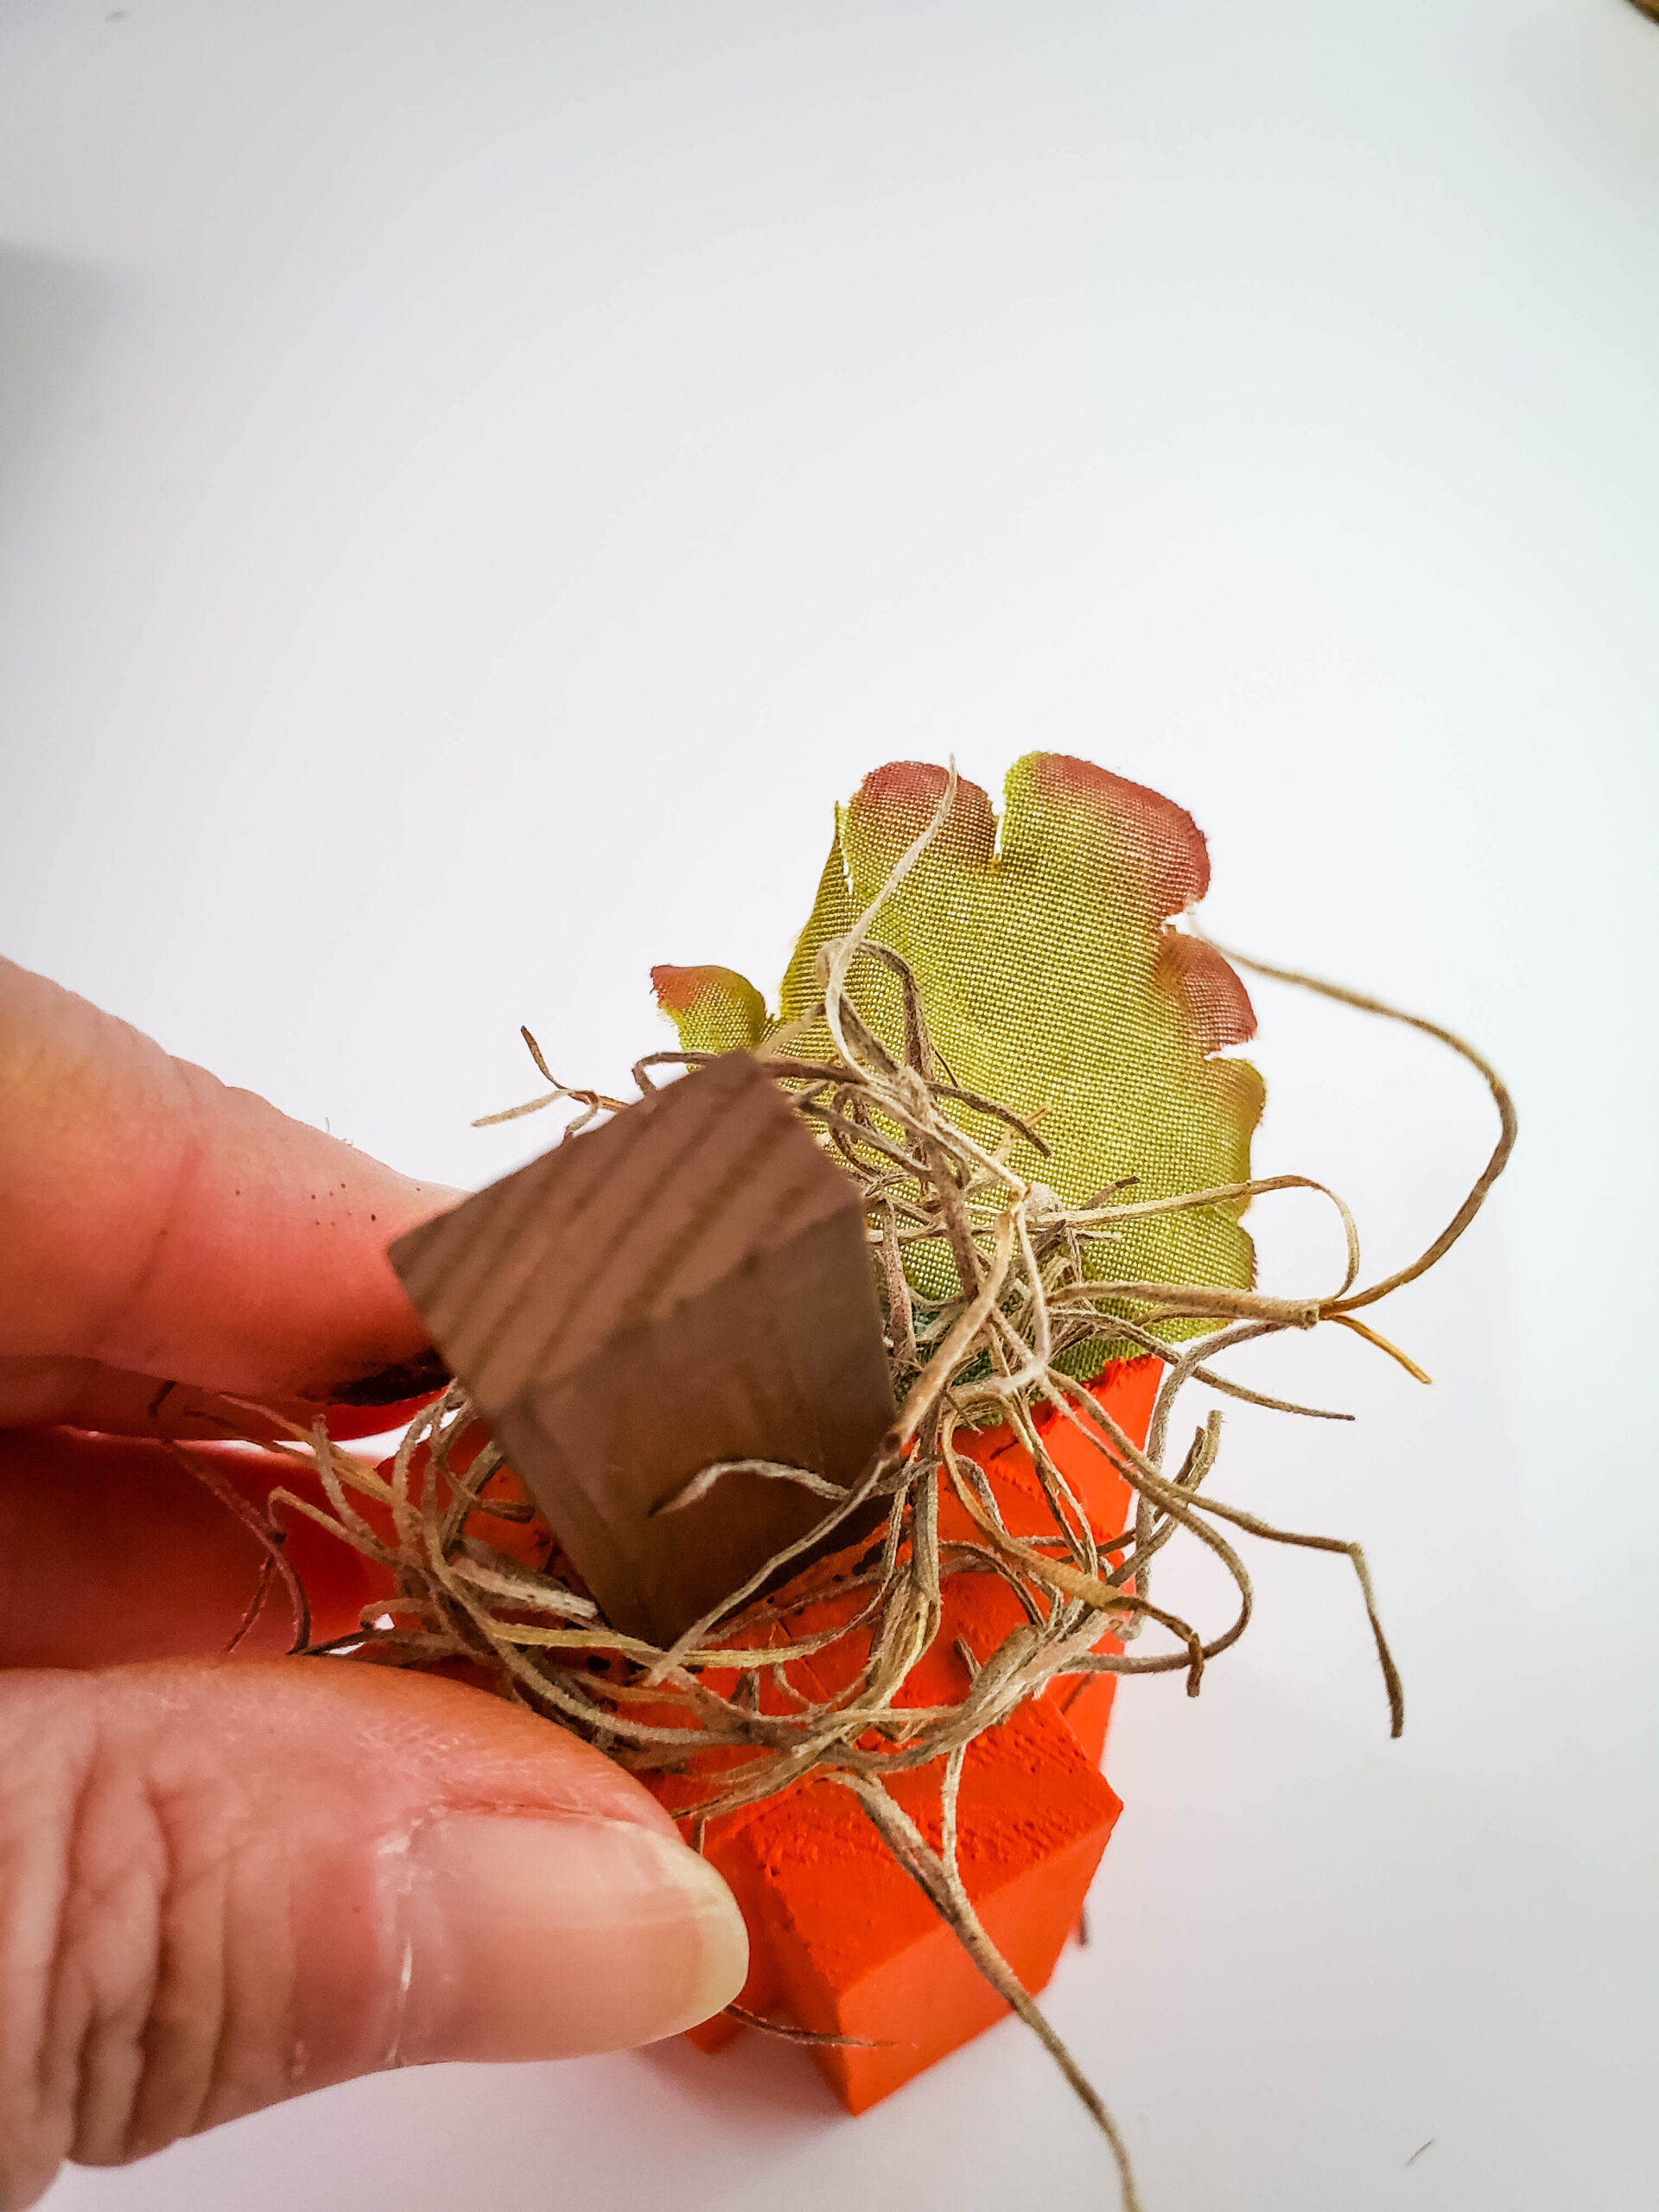
15. Gather a small amount of moss and bunch it together, then slip it over the stem.
Helpful Tips
When painting your wooden block pumpkin, start with light, even coats instead of trying to cover the whole surface at once. This prevents streaks, helps the paint dry faster, and gives you a smoother finish. Once the first coat dries, you can add a second coat for a richer, more polished look-especially with bold fall colors like orange or gold!
Why Kids Love This Craft
- Hands-on building
- Kids get to pick their favorite pumpkin shades or mix their own.
- Perfect keepsake that makes kids love showing off their handmade pumpkin as part of the fall décor.
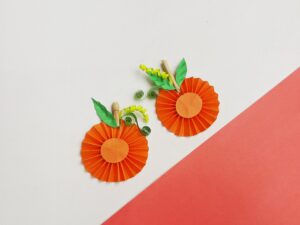
More Fall Crafts
Looking for more fun fall crafts? Check out the following:
Wooden Block Pumpkins
Learn how to turn simple tumbling tower game blocks into beautiful Wooden Block Pumpkins! With paint, glue, and a few Dollar Tree supplies, you’ll create rustic, budget-friendly fall décor that’s perfect for your home or as a gift.
Materials
- Blocks from Tumbling Tower Game (Dollar Tree)
- Wood glue
- Small paintbrush
- Paint (colors used were Apple Barrel brand: Kings Gold, Harvest Orange, and Melted Chocolate)
- Paint brush
- Tacky glue
- Moss (Dollar Tree)
- Leaves from sunflowers (Dollar Tree)
- Scissors
Instructions
- Using the wood glue and a small paint brush, apply glue to the entire front surface of one block.
- Set two blocks on top of that block, each half on the block, and half overhanging.
- Apply glue to the sides and top of the two blocks that you just glued to the other block.
- Set one block in the center of those two blocks, halfway up, on the glued portion. This will be the stem.
- Set two more blocks on either side of that stem, flush with the top and bottom of the two blocks you glued in step 2, but overlapping the sides slightly.
- Apply glue to the inner sides of the two blocks you just glued, and the bottom portion of the stem that sticks up from step 4.
- Set two blocks centered between those three blocks. Apply glue to the middle of those two blocks.
- Set one block, centered between those two blocks. You’ve made the pumpkin form. Stand upright to allow the glue to completely dry.
- Using King's Gold or Harvest Orange paint, paint the entire pumpkin, except for the one block that sticks up.
- Using Melted Chocolate paint, paint the stem.
- Remove the leaves from the flower stems.
- Cut each of the three leaves off the main leaf bunch.
- Using the tacky glue and small paint brush, add a small amount of glue to the bottom of the back of the leaf.
- Attach it behind the step, slightly off to the side.
- Gather a small amount of moss and bunch it together, then slip it over the stem.


Leave a Reply