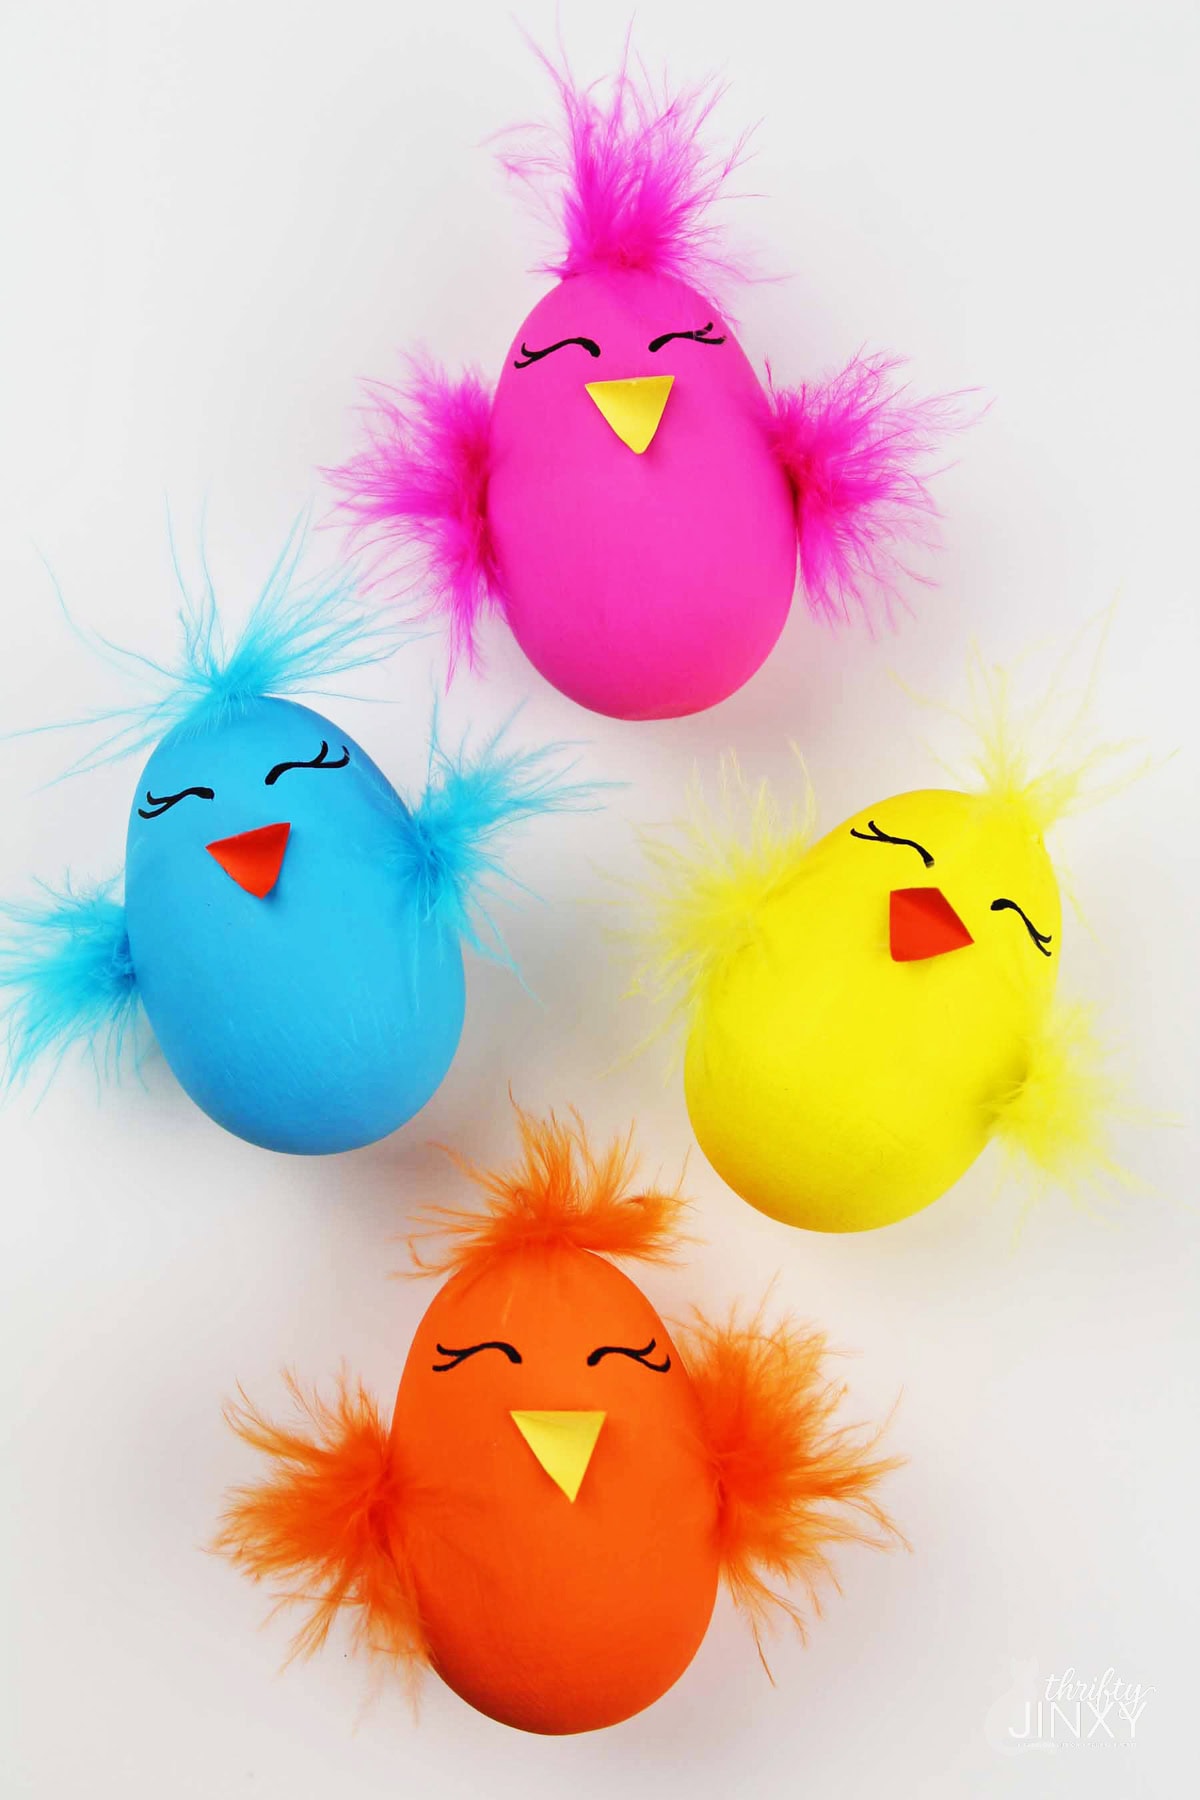
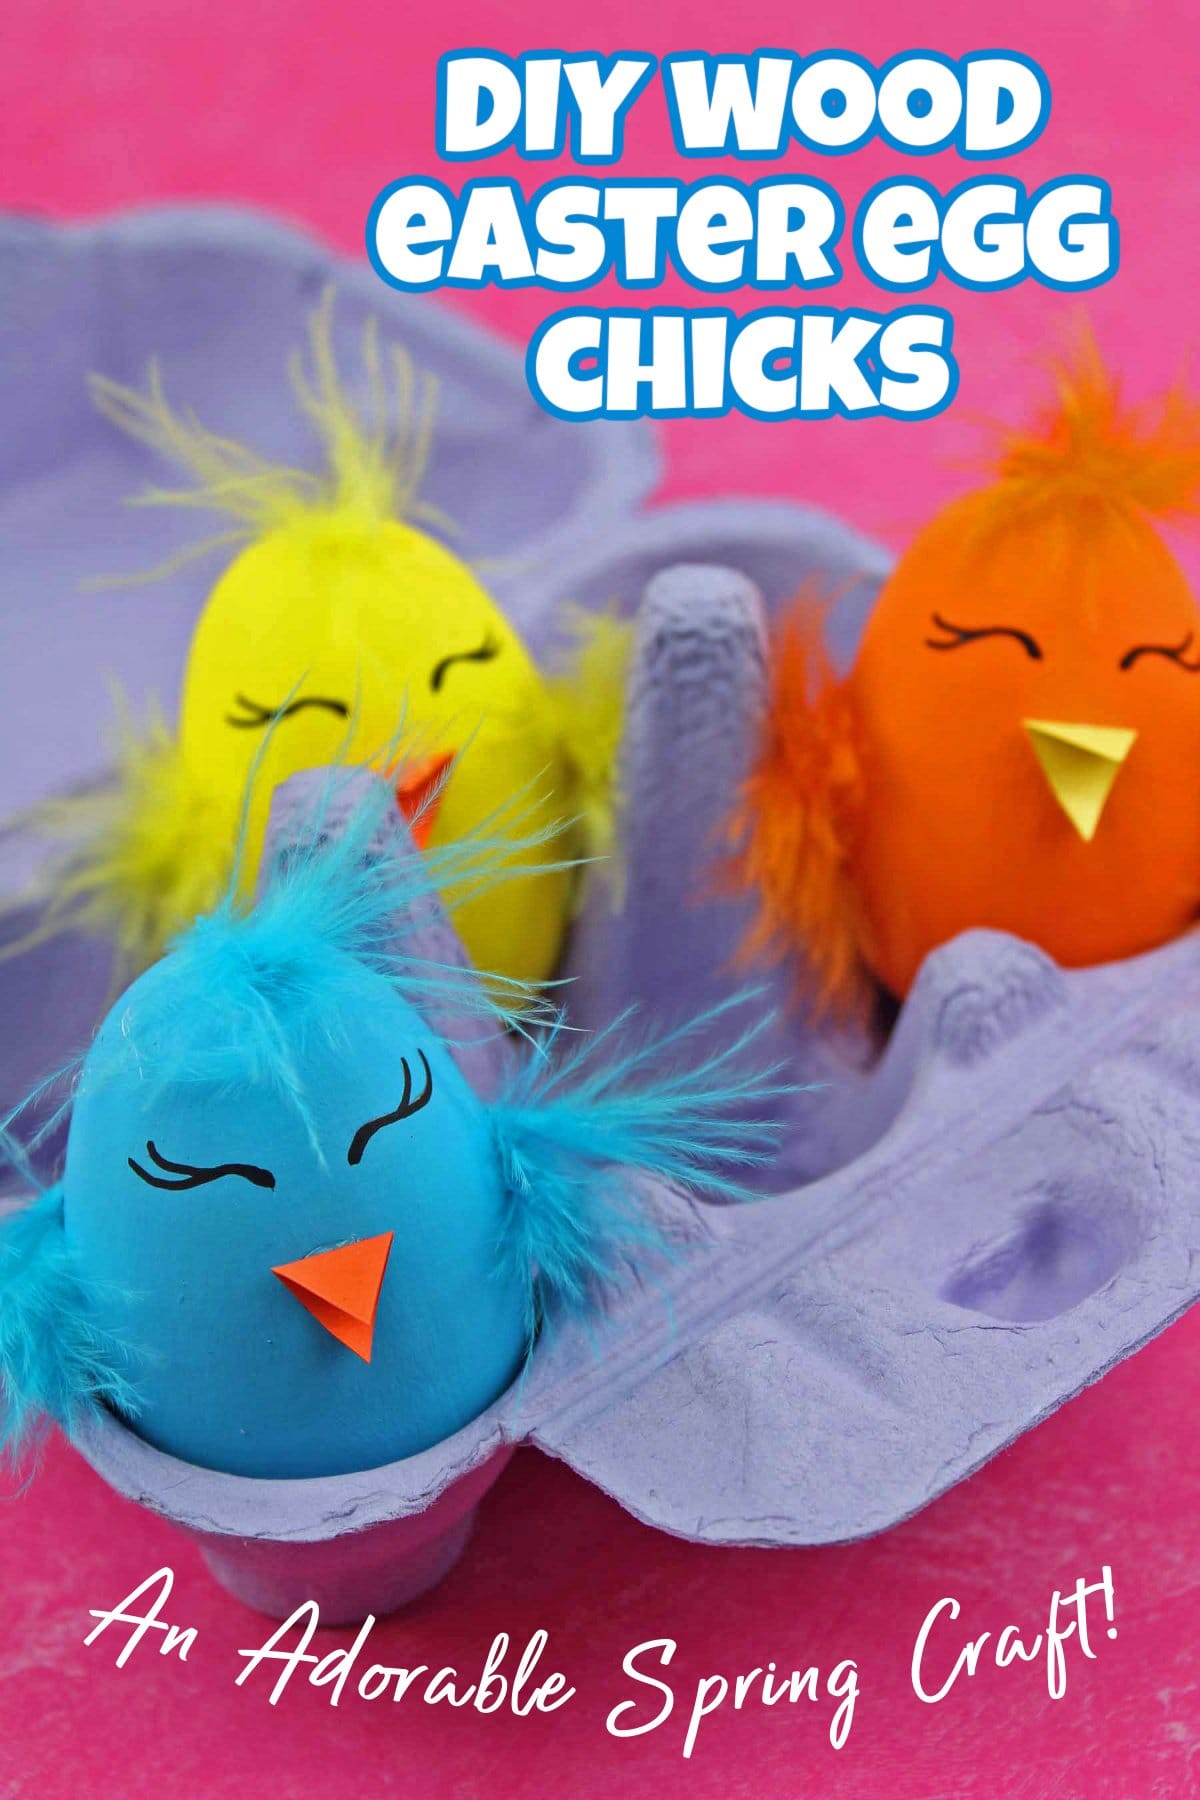
Spring is the perfect time for a simple craft that's fun for both kids and adults! These Wooden Easter Egg Chicks are an adorable way to welcome the season and make the cutest little decorations for your home, Easter basket fillers, or handmade gifts.

As a kid, my favorite decorations for any holiday were always Easter decorations. We used to blow out fresh eggs each year to decorate and hang on our Easter Tree which my mom made from a lilac branch that would sprout buds as Easter Day came closer.
For a more sturdy take on cute Easter egg decorations, I now have this version made with plain wood Easter eggs from the craft store or, if you prefer you can opt for paper mache or even plastic eggs if you like.
Using just a few basic craft supplies, you can transform your eggs of choice into bright and cheery little chicks. With fluffy feather wings, tiny beaks, and hand-drawn eyes, each one has its own unique personality.
🧰 Supplies You’ll Need:
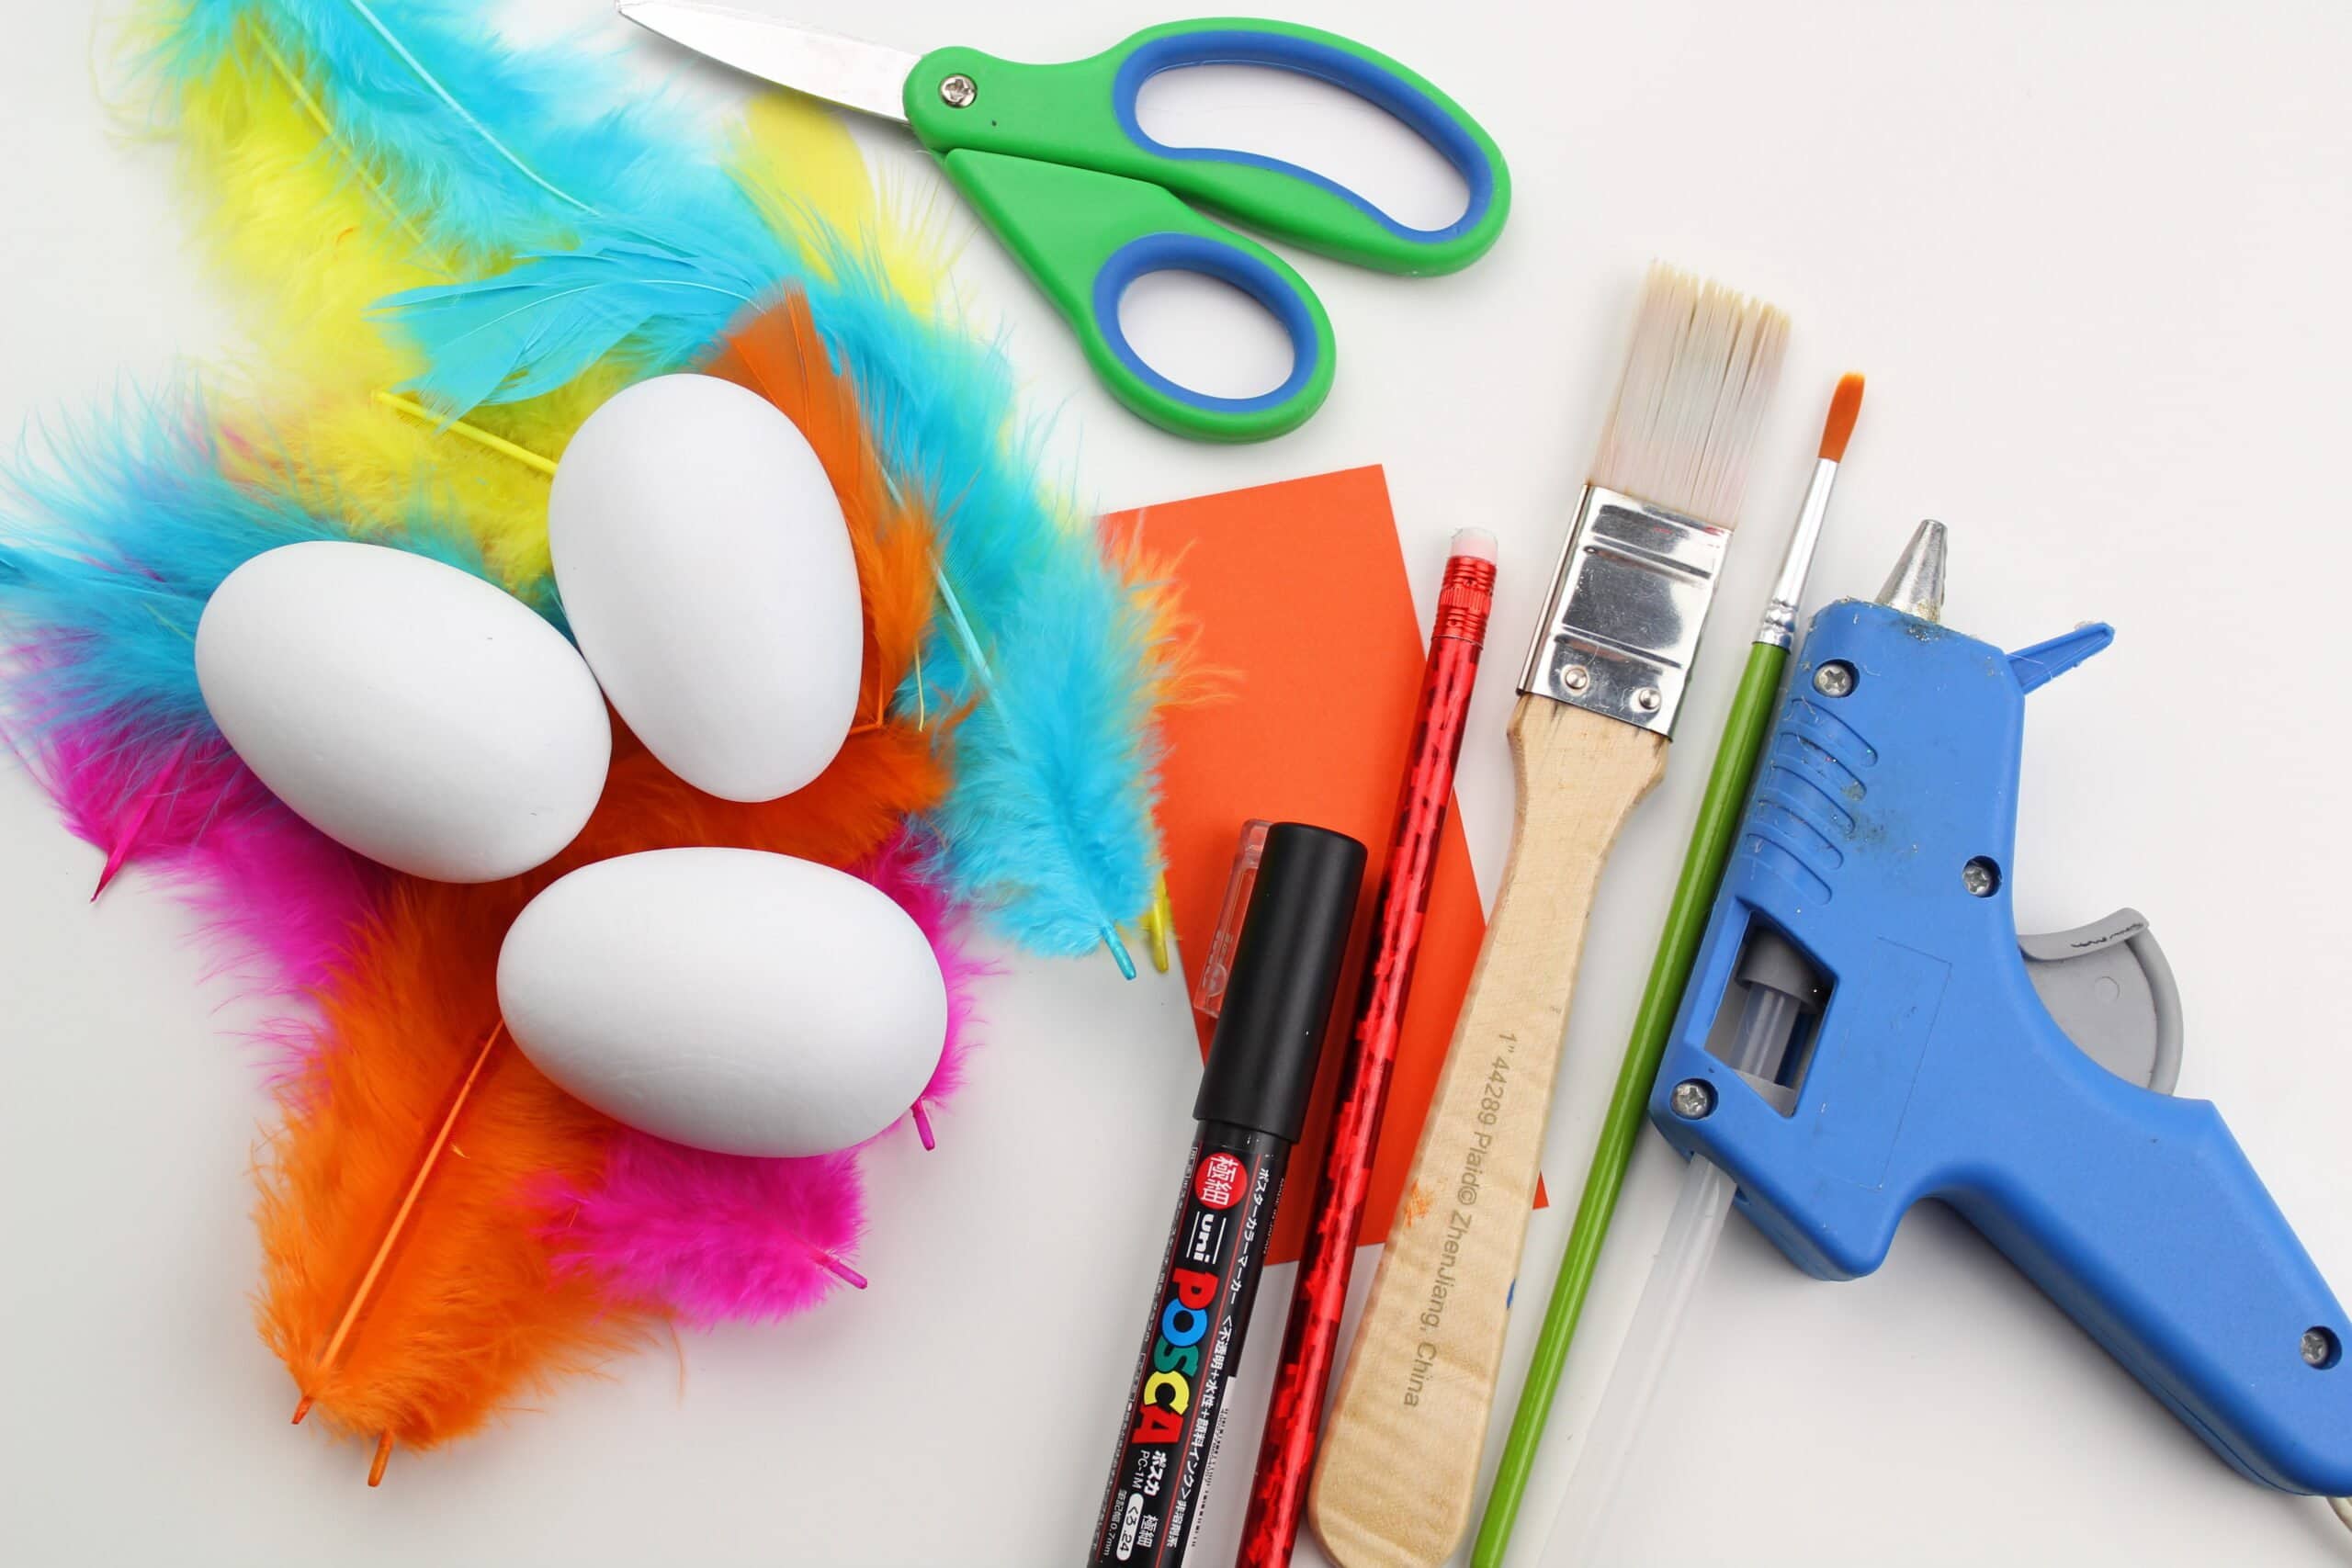
- Wooden or Paper Mache Eggs
- Acrylic Paint (yellow or any spring colors you like)
- Paintbrush
- Cardstock (orange or yellow for beaks)
- Hot Glue Gun and Glue Sticks
- Pencil
- Black Paint Pen or Permanent Marker
- Scissors
- Craft Feathers
✨ How to Make
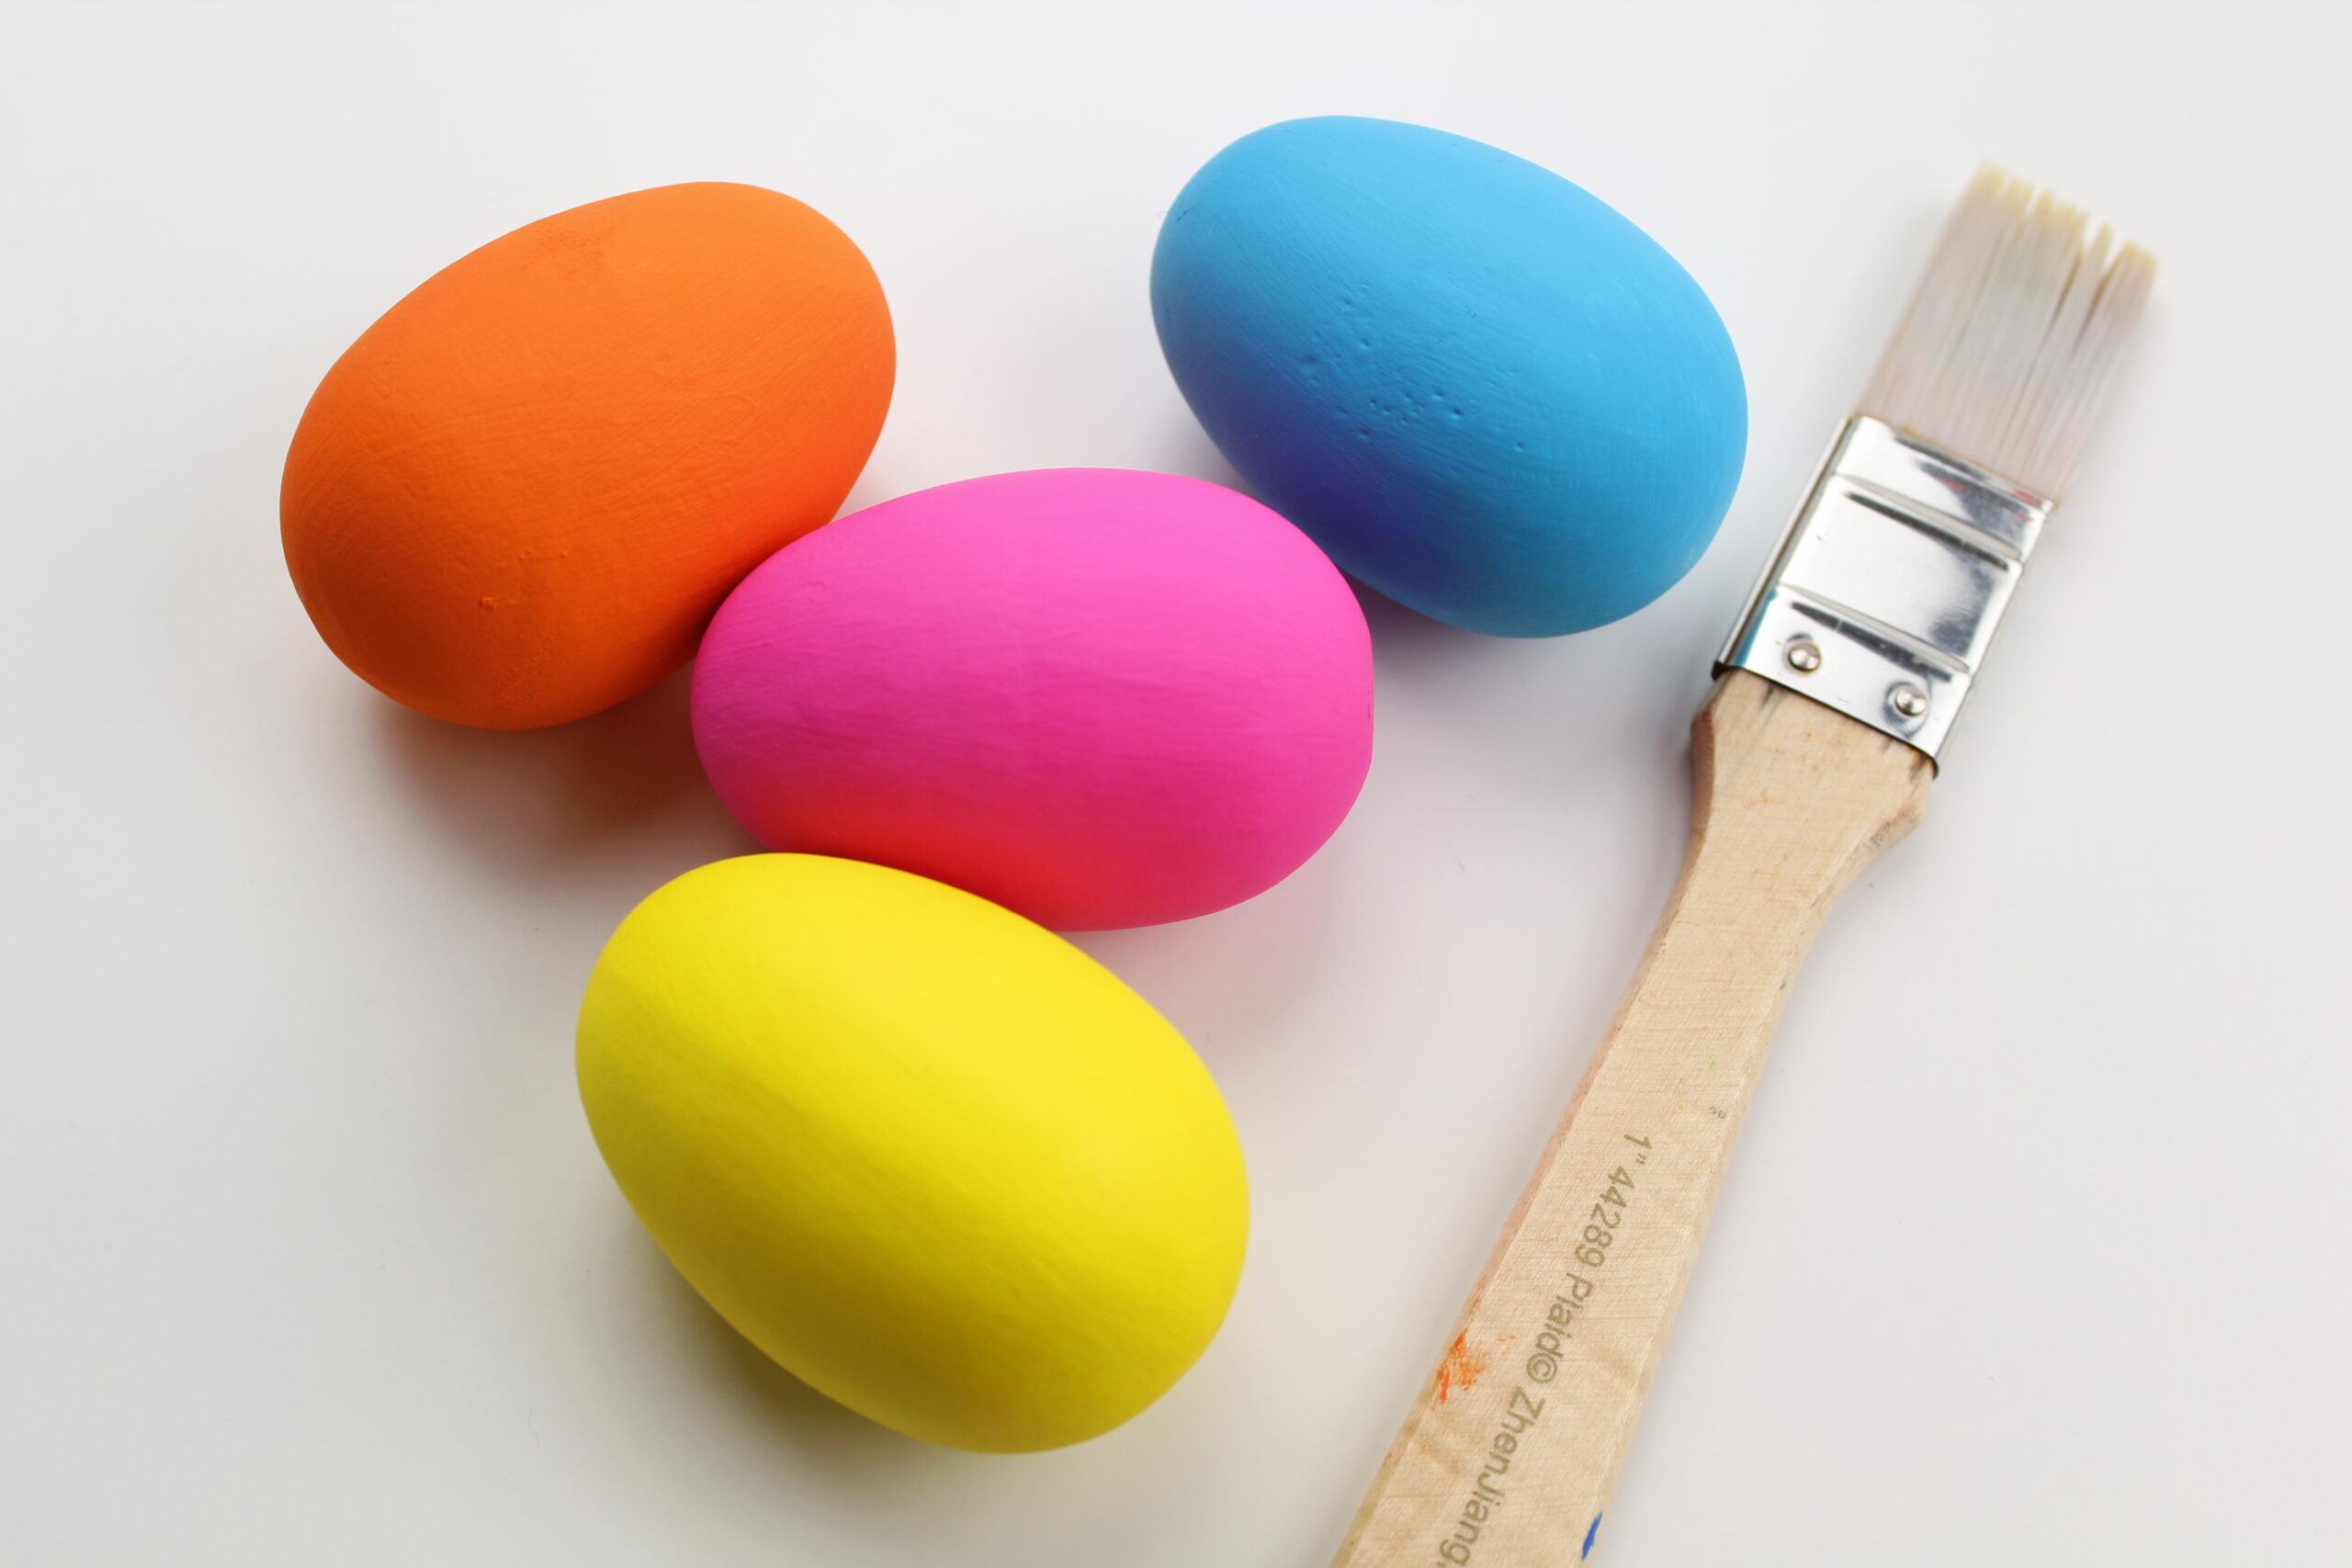
Step 1: Paint the Eggs
Paint each egg with your chosen acrylic paint color. You'll likely need 2-3 coats for full coverage. Let the paint dry completely between coats.
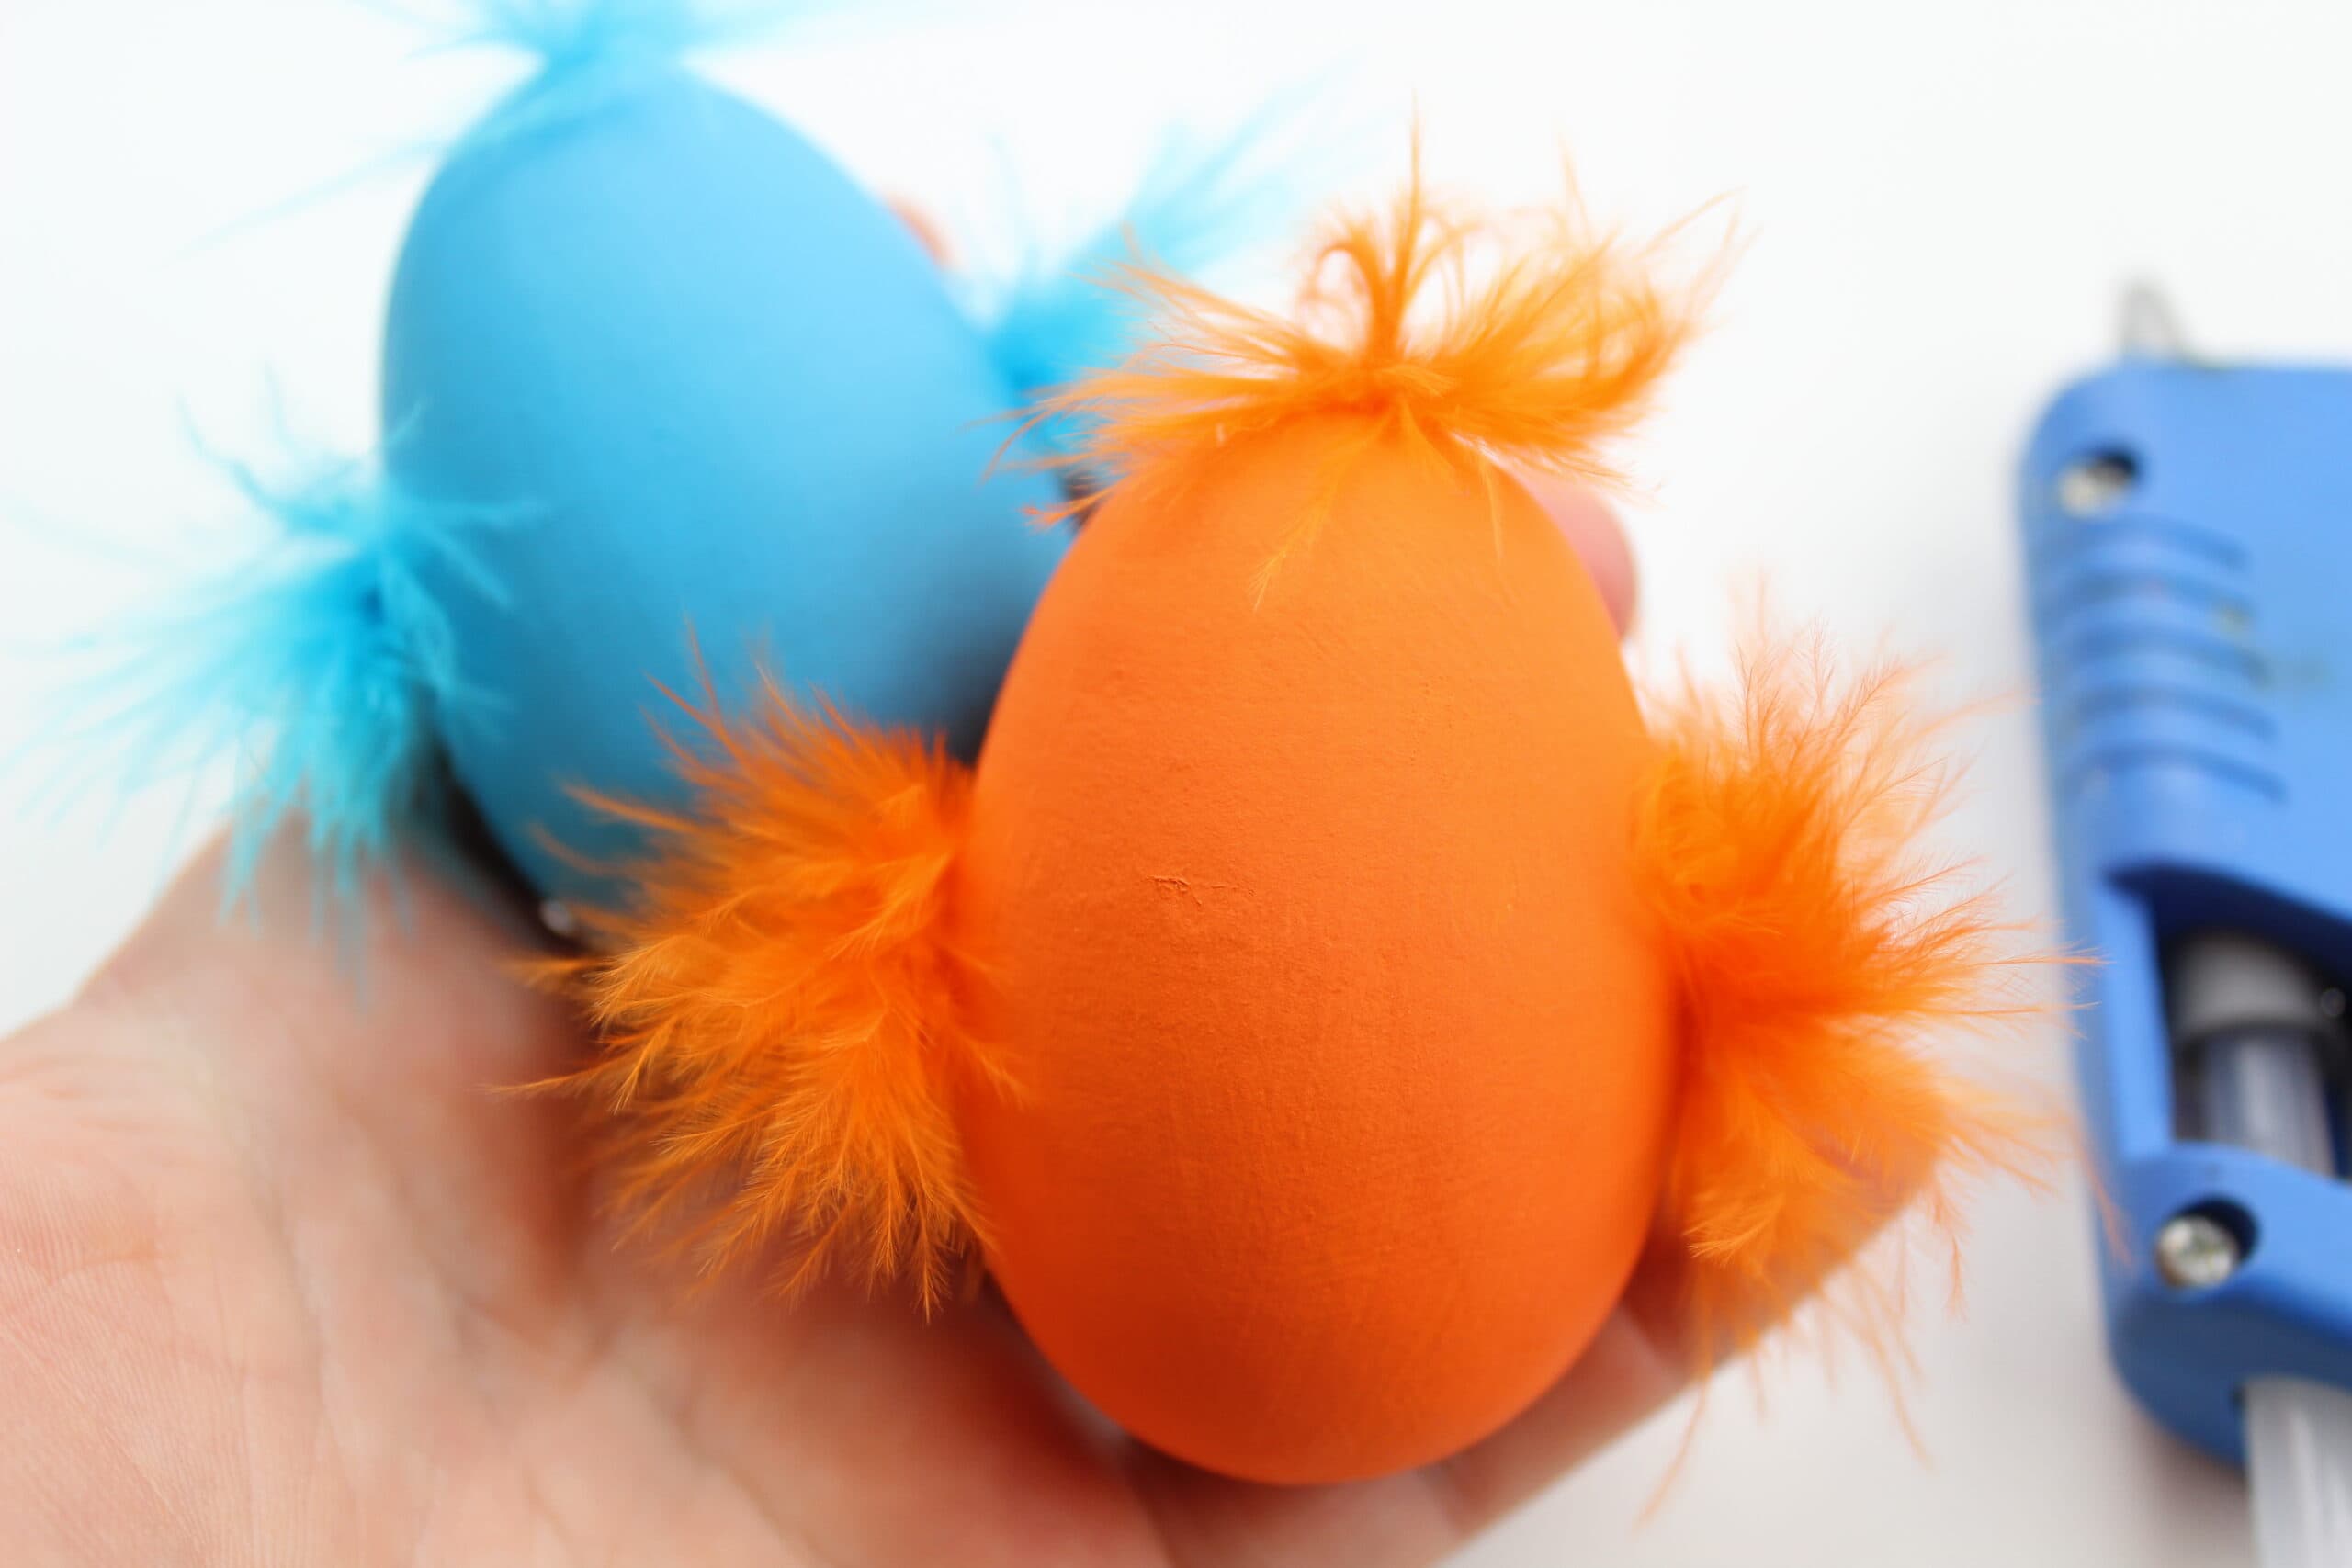
Step 2: Add Feathers
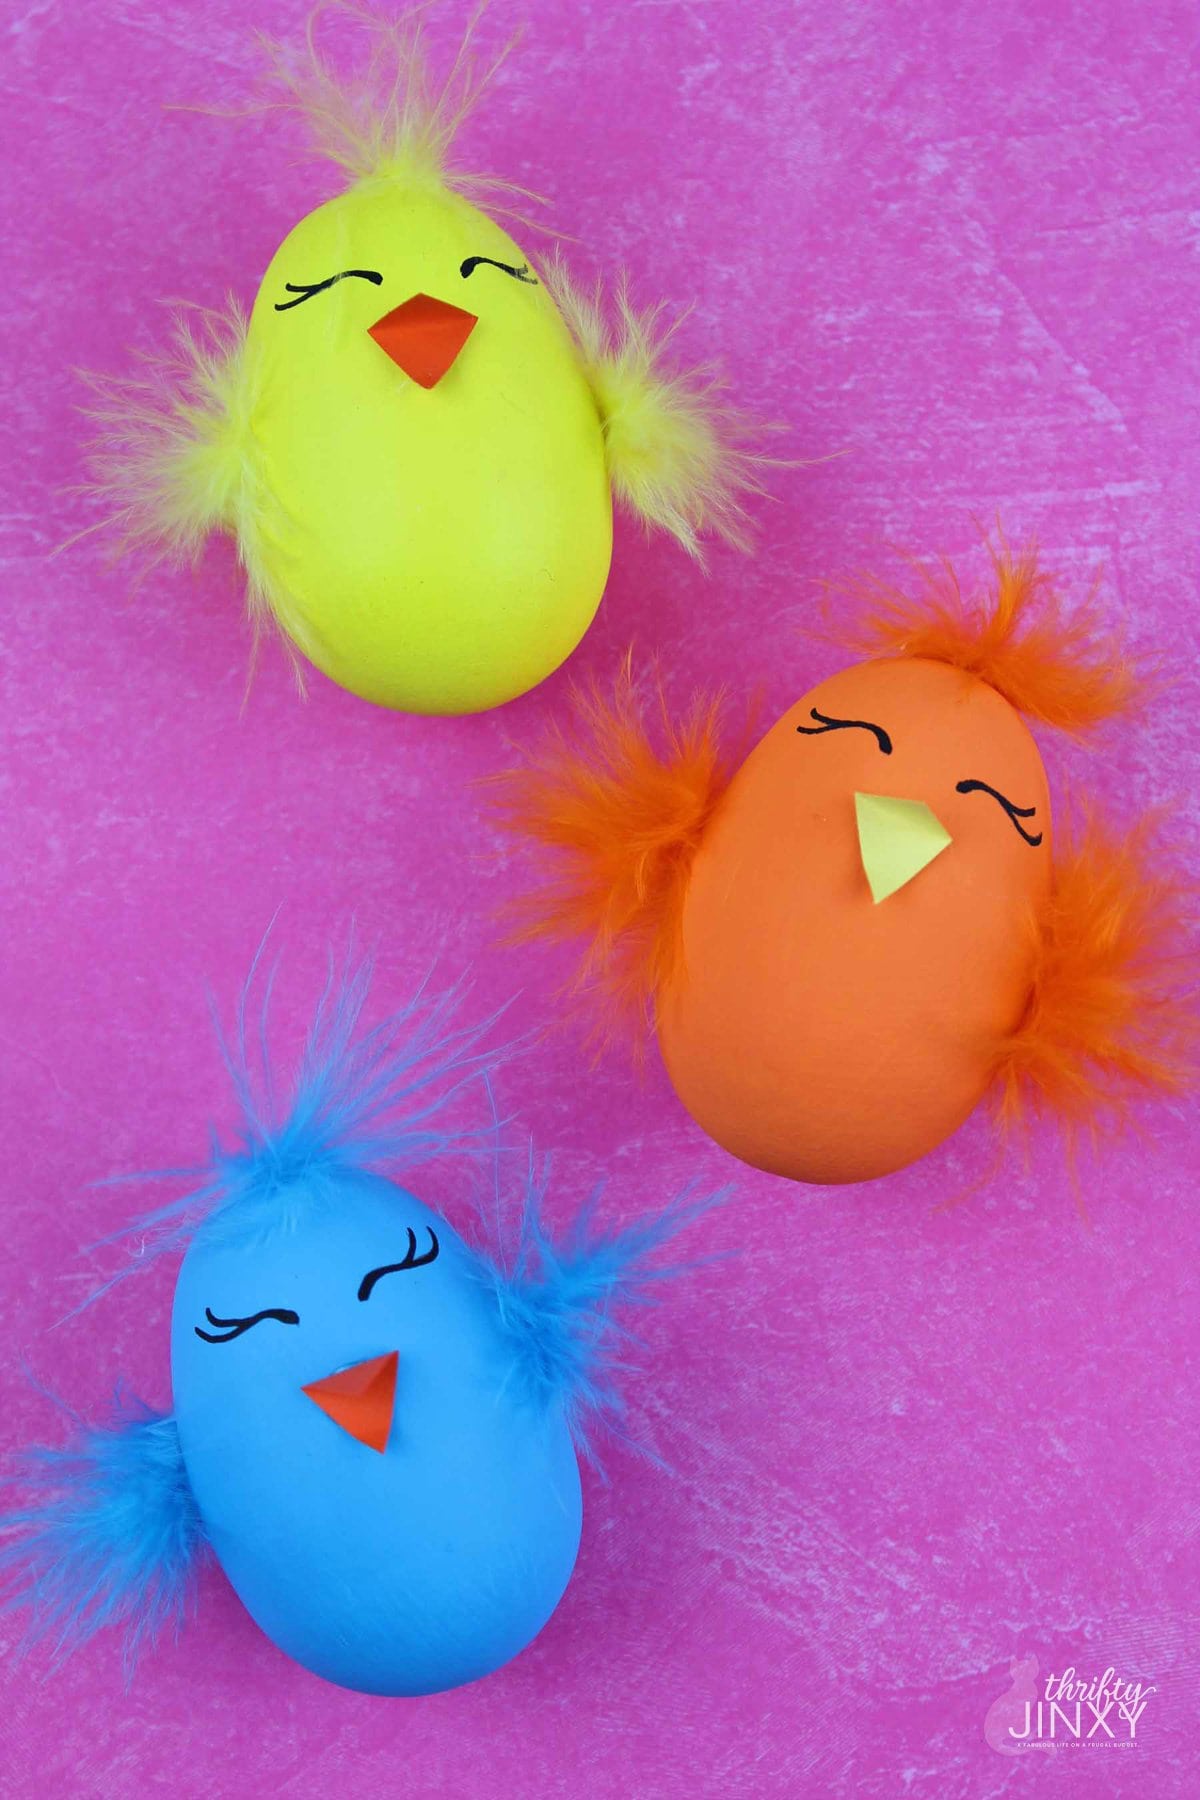
Cut small pieces of feathers and glue them to the sides of the egg to create wings. Add a little fluff to the top of the egg as well. Keep adding until you're happy with how full the wings look.
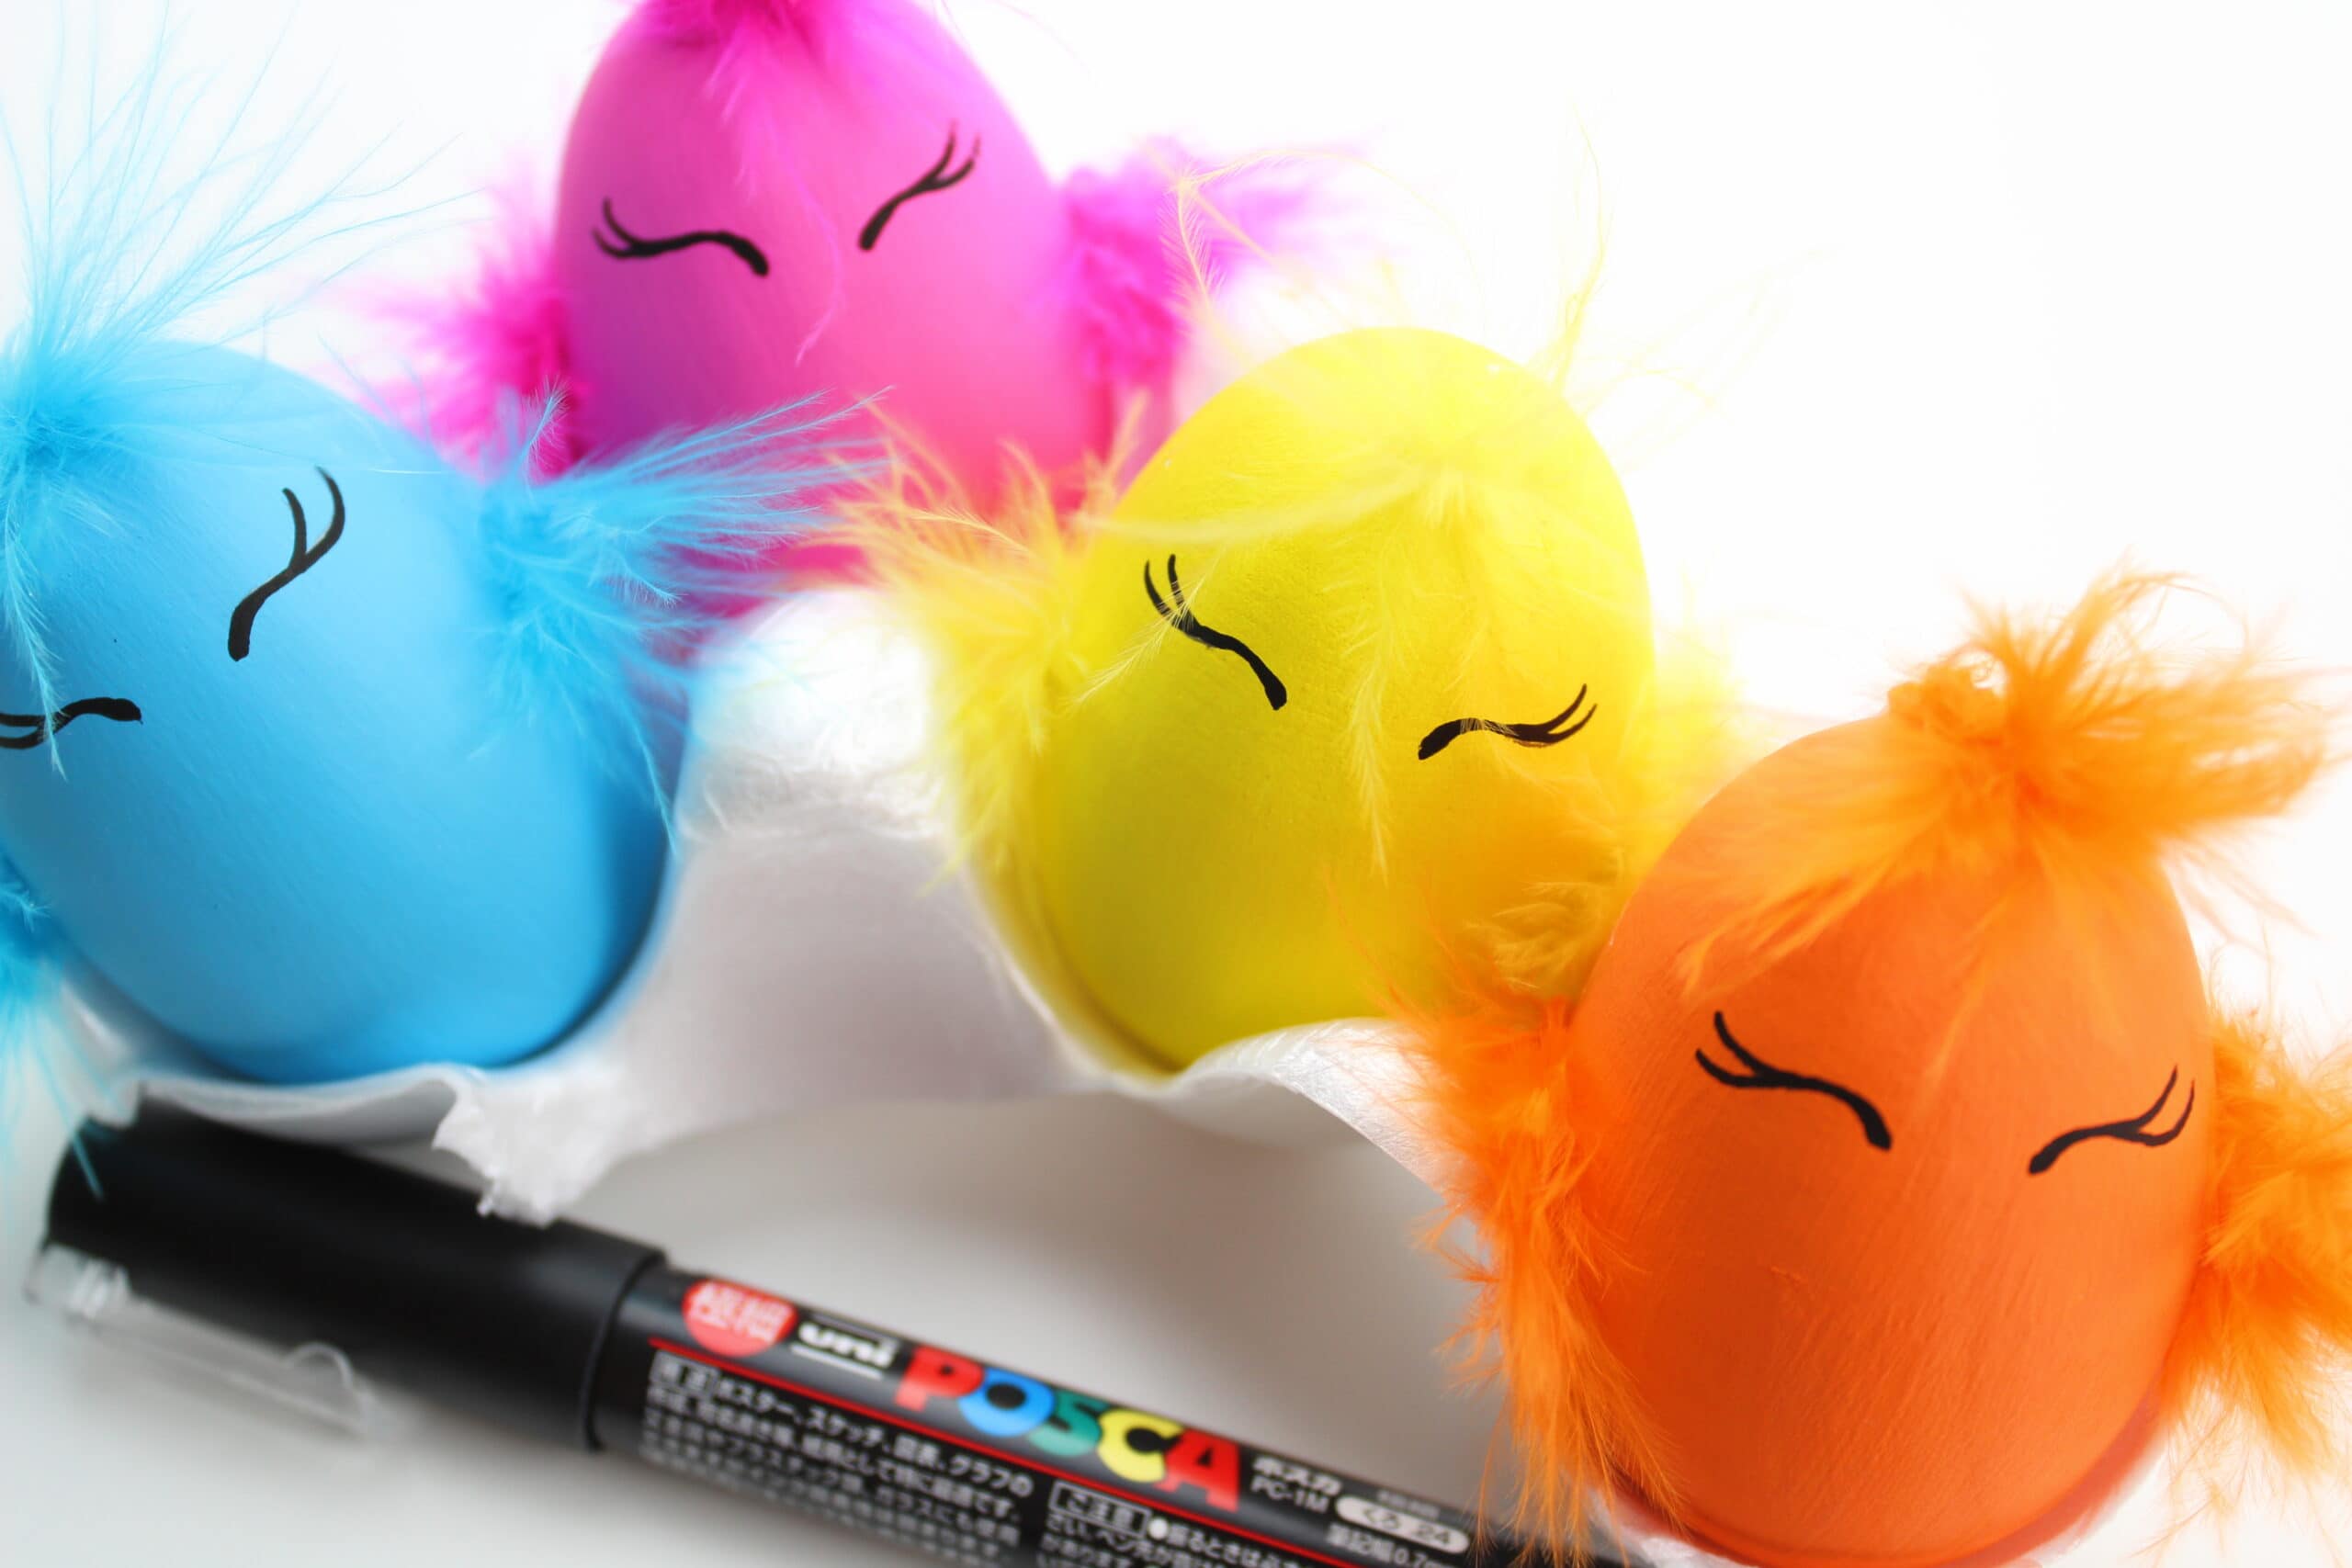
Step 3: Draw the Eyes
Use a pencil to lightly sketch the eyes onto the egg. Once you're happy with the shape and placement, trace over them with a black paint pen or permanent marker.
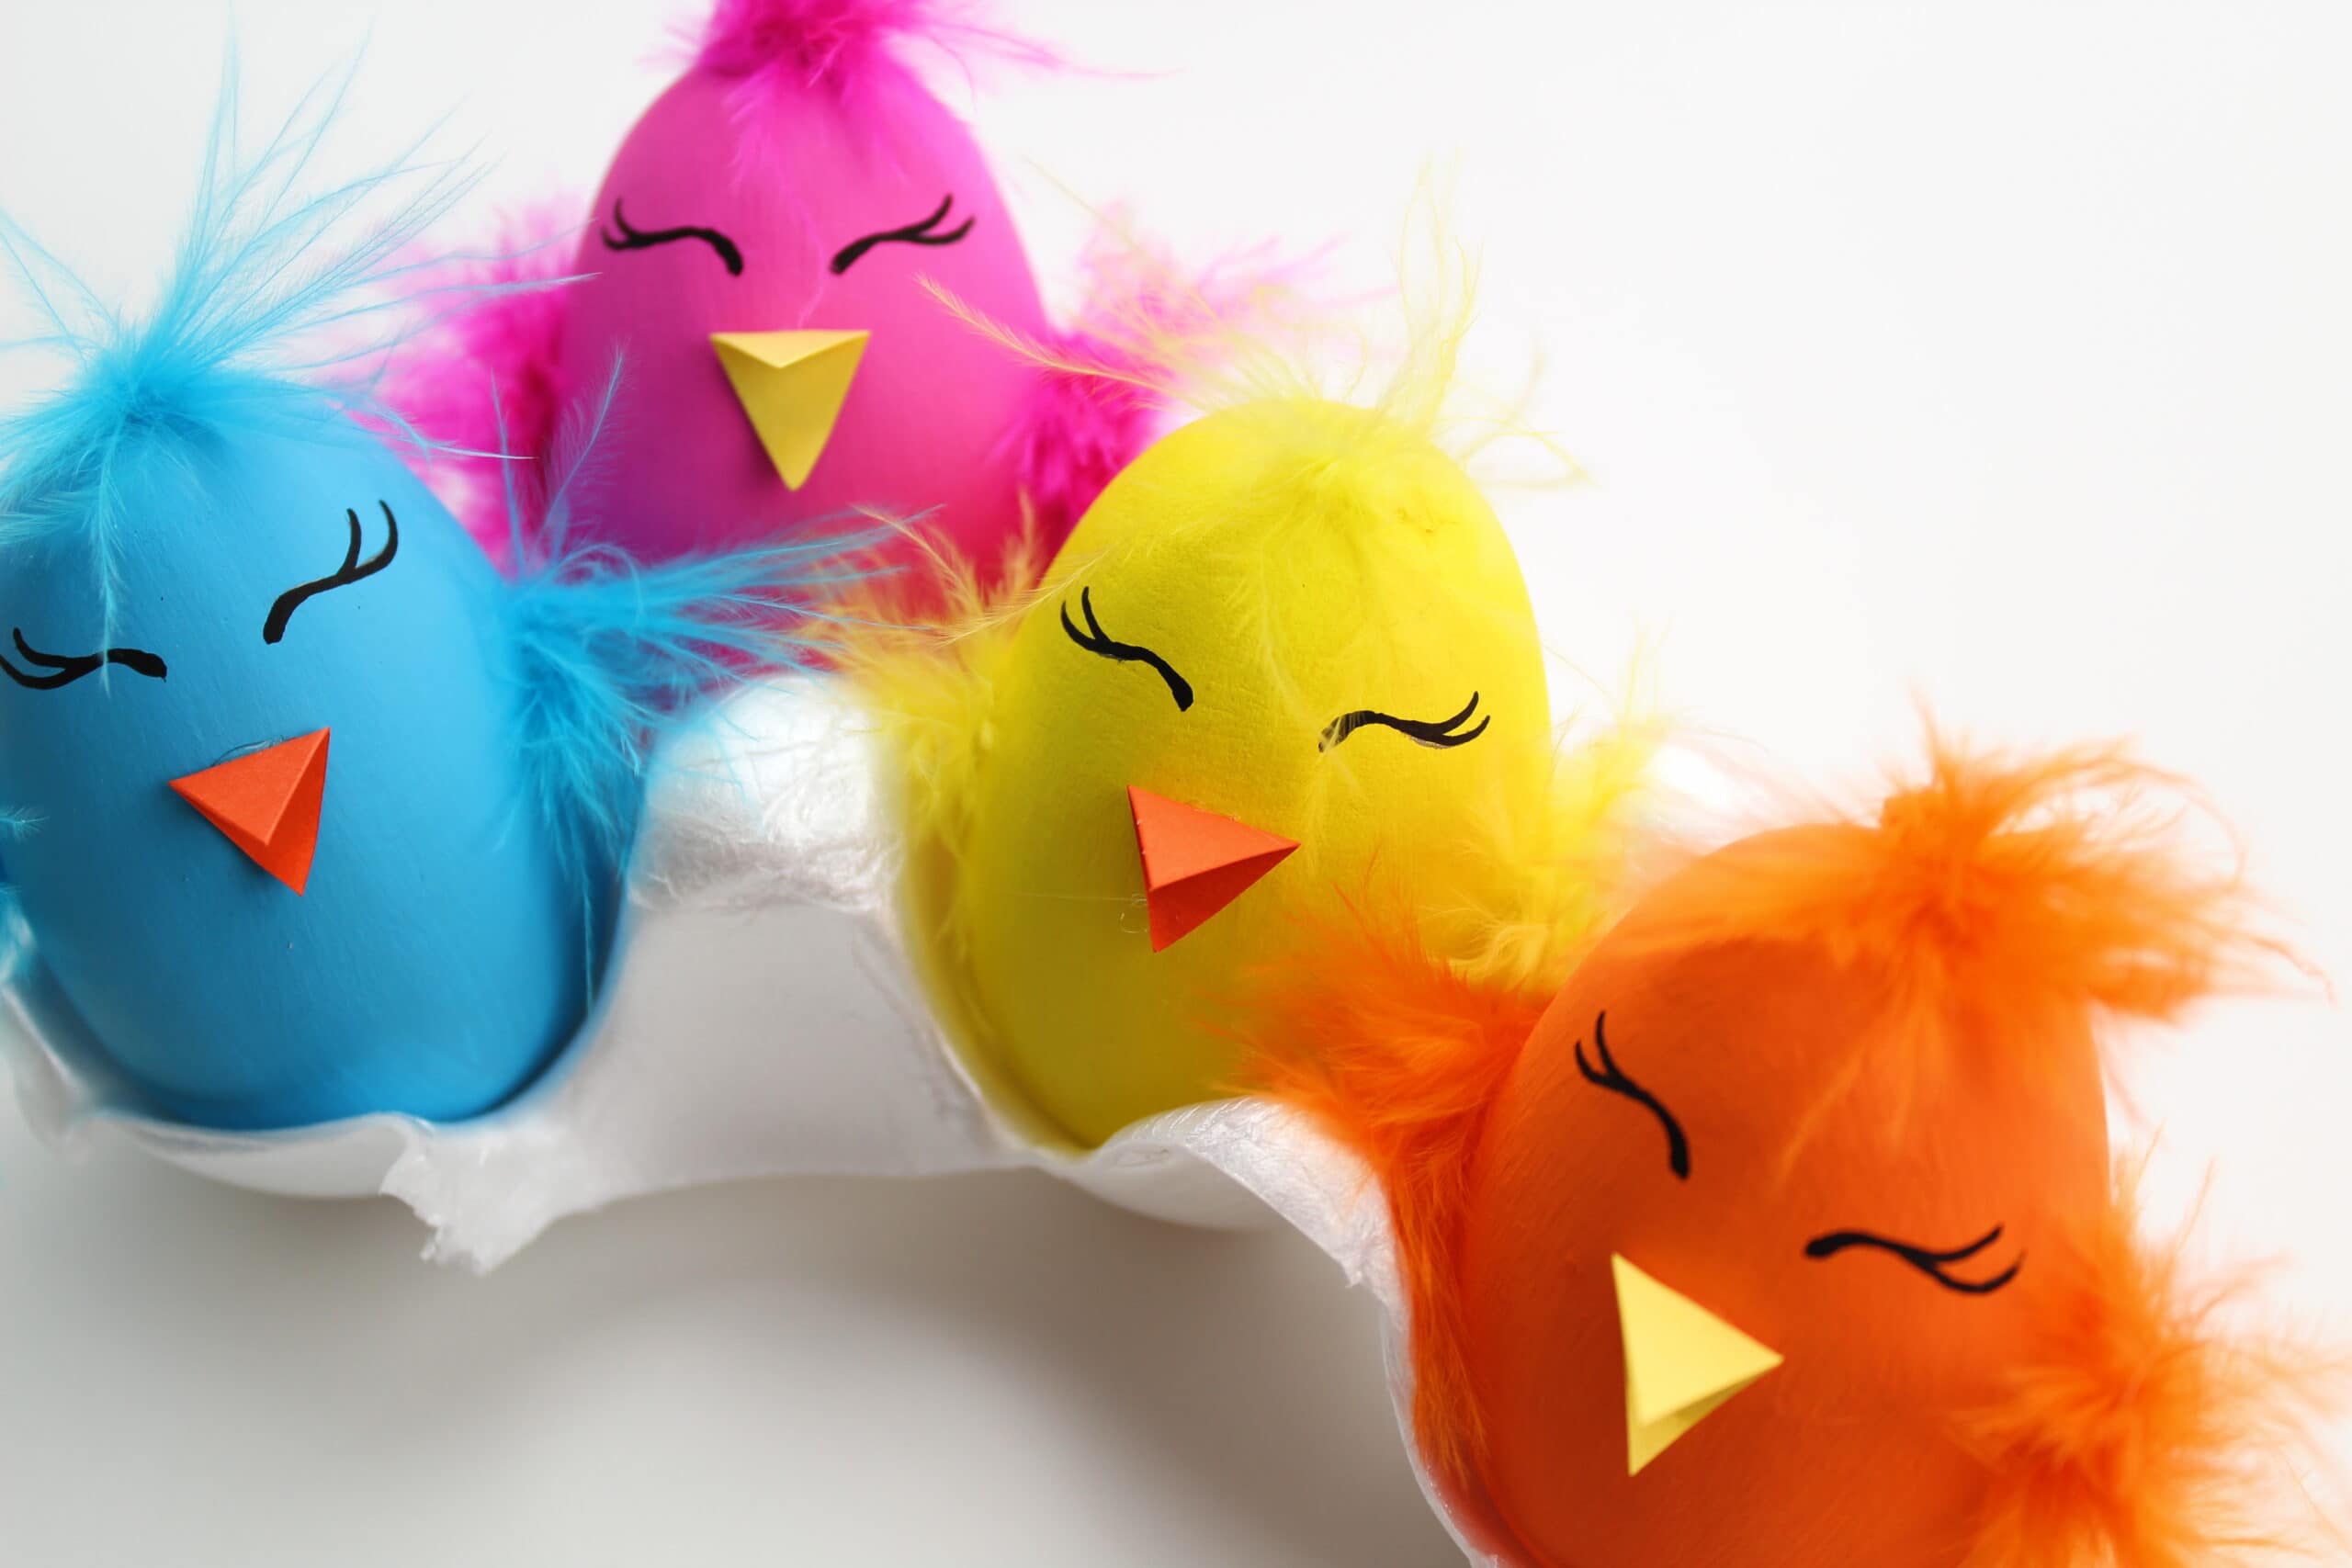
Step 4: Make the Beak
Cut a small diamond shape from orange or yellow cardstock. Fold it in half to make a triangle and glue it to the front of the egg to form the beak.
Now It’s Time to Show Them Off!
Let the glue dry, and your chicks are ready to brighten up your Easter celebration!
🐥 Tips & Variations:
- Use pastel paint colors for a softer spring vibe.
- You can glue one whole feather per side for a quick and easy wing!
- Add tiny cardstock feet or pipe cleaner legs for extra personality.
- Hosting a classroom or group activity? Use craft glue instead of hot glue for a kid-safe version (with a little extra drying time).
These DIY Easter Egg Chicks are so simple to make, and the results are just too cute not to share! They add an adorable homemade touch to your Easter décor-and they're a perfect project to do with the kids or grandkids.
📸 If you try this craft, we'd LOVE to see it! Tag us @ThriftyJinxy on Instagram or Facebook so we can feature your creation!
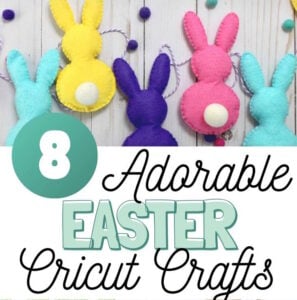
🌷 More Easter Fun!
Looking for even more springtime fun? Check out our full collection of Easter crafts, treats, and DIY ideas to make this season extra special!


Leave a Reply