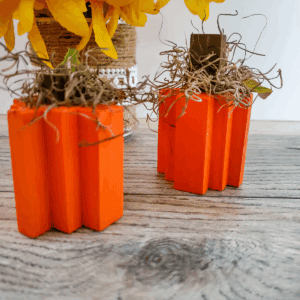
Celebrate fall with this adorable Paper Pumpkin Craft made from simple supplies like craft paper, glue, and a small twig. It's a fun and easy paper craft project for kids OR adults that will put you in the autumn spirit!


There's something extra special about crafting in the fall, especially when pumpkins are involved! When we made these Paper Pumpkin craft, the kids couldn't wait to fold, glue, and add their tiny twig stems. The kids loved watching their paper strips transform into plump little pumpkins right before their eyes. We lined them up on the windowsill afterward, and it instantly brought a warm autumn feeling to the room! It was so cozy!
What I enjoy most about this activity is its easy preparation. Kids can make their own version of a fall favorite with just a few supplies and creativity. This simple craft is a wonderful way to spend a cozy afternoon together while encouraging fine motor skills, patience, and creative expression, all without spending so much!
The finished pumpkins make fun decorations, whether you use them at place settings on your Thanksgiving dinner, add them as gift tags to presents, or just place them around your home.
Supplies Needed

- Craft paper - orange and green
- Craft glue
- Scissors
- Quilling strips
- Slotted quilling tool
- Dry twig – small
How to Make
- Cut a long strip (12 inches long and 1.5 inches wide) from orange colored craft paper.

2. Create small and even accordion folds on the strip lengthwise.

3. Cut out 1 or 2 leaf patterns from green colored craft paper. Prepare loose coils and a spring shape with green colored quilling strips. Use different shades of green for each of these items.

4. Take the accordion-folded paper prepared in step two. Glue both ends of the folded strip to form an accordion-folded ring.

5. Hold one end of the accordion-folded ring and press it towards the center. Flatten the piece towards the center.

6. Cut out 2 round shapes from orange colored craft paper and glue them to the center of the flattened accordion-folded piece, on both sides. This will secure the flattened shape.

7. Have you created all the items? It’s time to create the pumpkin! Don't forget to grab a small piece of dry twig as well.

8. Glue the twig on the round accordion-folded piece (the pumpkin), keeping half of the twig’s end facing outside the pumpkin. Stick the leaves on both sides of the twig, or however you want to.

9. Finally, stick the loose coils and the spring shape with the pumpkin; these are the vines. Once you are happy with the pumpkin design, allow the glue to dry for a while.
Helpful Tips
To make your pumpkin sturdier, use slightly thicker craft paper or cardstock. Encourage kids to experiment with different pumpkin sizes. They can make a small patch of mini pumpkins! Pre-folding or helping with the cutting steps for younger children will make the process smoother and safer. You can also replace the quilled vines with green yarn or pipe cleaners for an easier variation.
Why Kids Love This Craft
- Kids love using their hands to fold, cut, and glue while bringing their pumpkin to life.
- Kids enjoy customizing their pumpkins, whether bright orange or deep autumn tones!
- The accordion folding feels like magic when the paper transforms into a round pumpkin shape.
- Using a real piece of nature makes the paper pumpkin craft extra special.
- Cutting, folding, and gluing help strengthen coordination and focus.
- Easy for younger kids but fun for older ones who like adding creative details.
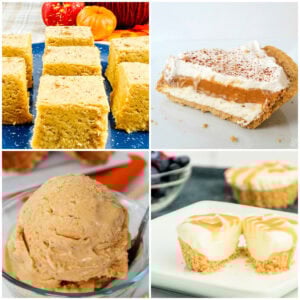
More DIY Seasonal Crafts
Keep those little hands busy this fall! Here are more ideas for your next family crafts or fun school activities:
- 20 Thanksgiving Crafts for Kids
- Wooden Block Pumpkins
- Easy Fist Bump-kins Pumpkin Craft
- DIY Fall Harvest Corn Mason Jar Craft
Easy French Toast for One
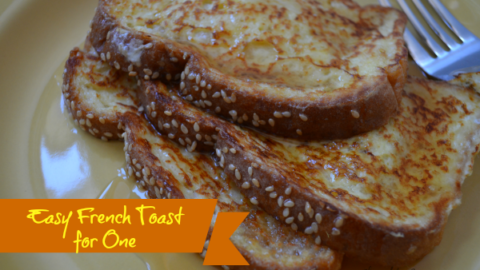
This Easy French Toast for One Recipe cooks up in five minutes and is perfectly sized for just one person.
Instructions
- Heat a griddle or frying pan over medium high heat.
- In a small, flat bottomed bowl, beat the egg.
- Add in milk, salt and vanilla. Stir.
- Melt butter on the griddle.
- One at a time, coat the bread slices in the egg mixture, placing each on griddle as soon as it is coated.
- Sprinkle each slice with cinnamon.
- Cook 1-2 minutes or until golden brown.
- Flip and cook the other side.
- Serve immediately with fruit, powdered sugar or syrup.


Leave a Reply