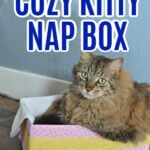
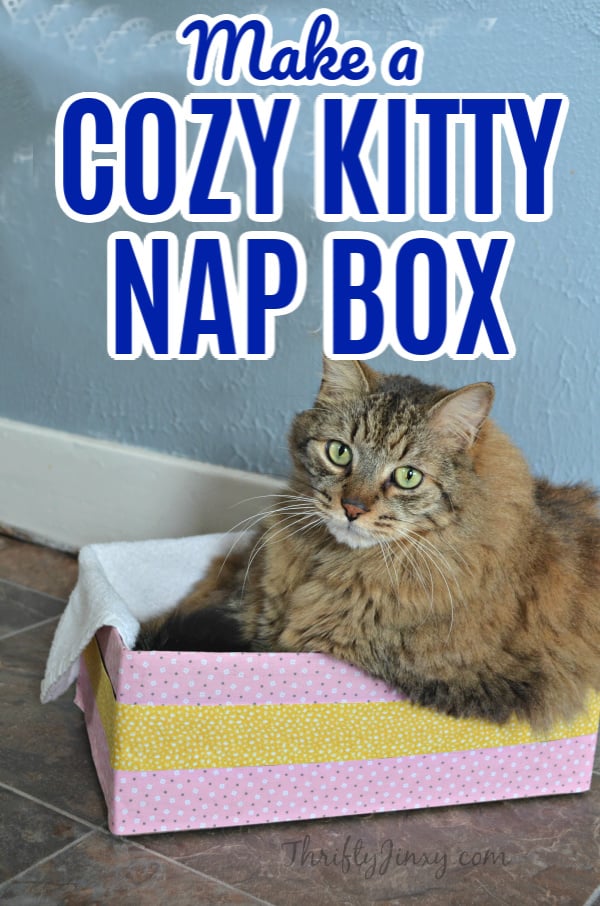
Make your cat a cozy place to sleep with this DIY Kitty Nap Box project! It’s easy to finish and decorate with Washi tape.

This is a Sponsored post written by me on behalf of Duck Brand for SocialSpark. All opinions are 100% mine.
UPDATE: It is now almost 10 months later and Peanut still LOVES this box! It’s looking a bit ragged now, but he uses it every day!
What have YOU made with crafting tape? There are so many types of tape available now that the possibilities are endless. I love that Duck Brand Craft Tapes are easy to use and very durable, letting you make crafts and DIY projects that you can really use! Here a few of the varieties of tape available from Duck Brand®:
Duck Fabric Crafting Tapes:
Allow crafters to add texture to any project without having to use a separate glue or adhesive. They are a perfect enhancement to Duck Tape® projects, and also work great for card making, home accents and more.
Duck Glitter Crafting Tapes:
Cool Glitter effect — glitter does not flake off! Durable film technology. Self-adhesive; no paper backing. Fun, bright colors – Pink , Aqua, Silver, and Red.
Duck Prism Crafting Tapes:
Duck Prism® crafting tapes feature a unique holographic/prismatic effect to add shine and dimension to projects. They are ideal for scrapbooking, decorating and making shapes/letters.
Duck Washi Crafting Tape:
Easy to tear and repositionable, these decorative paper tapes are ideal for scrapbooking, paper crafts, embellishing projects and more. The variety of designs and colors gives fun flair to any craft project. Plus, they're surface writable making them useful for notes and labeling!
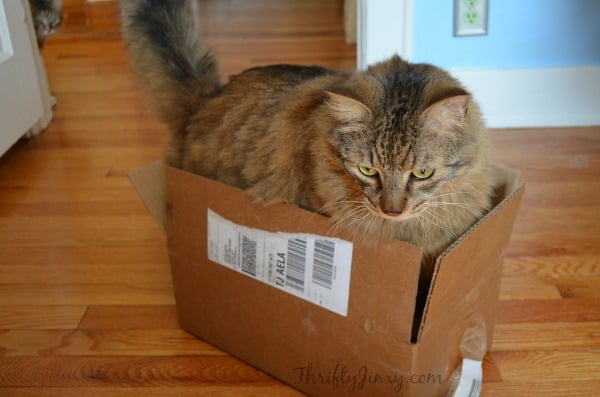
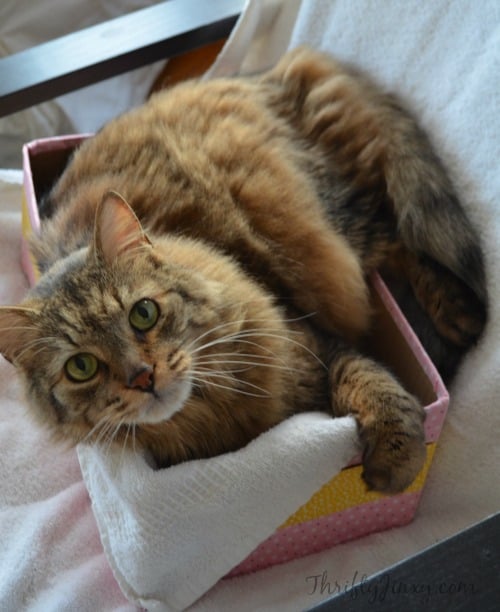
I recently got a few rolls of Duck Brand® Fabric Crafting Tapes and got to work to make a fun project. The inspiration was my cat Peanut who LOVES to crawl into any cardboard box and will stay there for hours.
The problem is that I don’t like to have ugly cardboard boxes sitting around the house. SO, I decided to turn one of those boxes into a Cozy Kitty Nap Box.
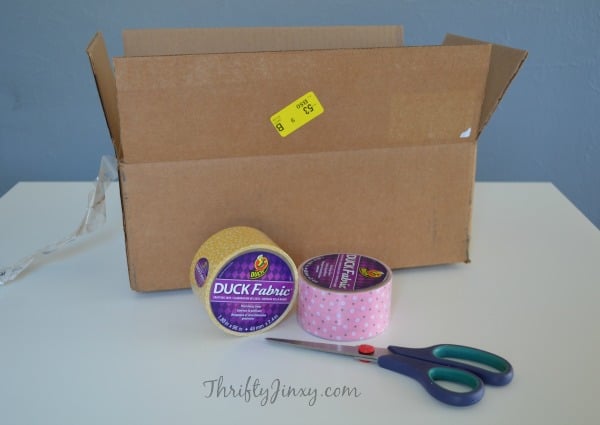
Supplies Needed:
- Cardboard Box
- 2 (or more) contrasting colors of Fabric Tape
- Scissors
How to Make a DIY Cat Nap Box:
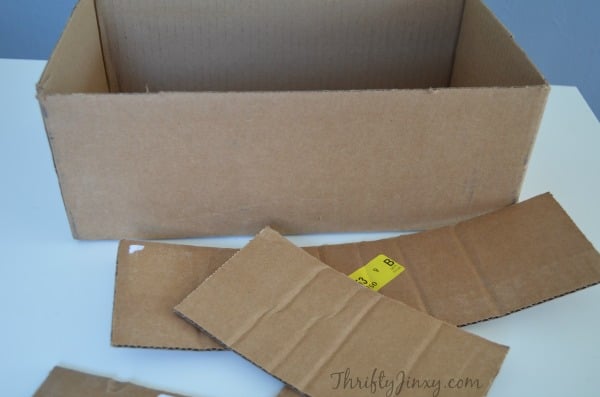
1 – Cut top flaps off of box and recycle.
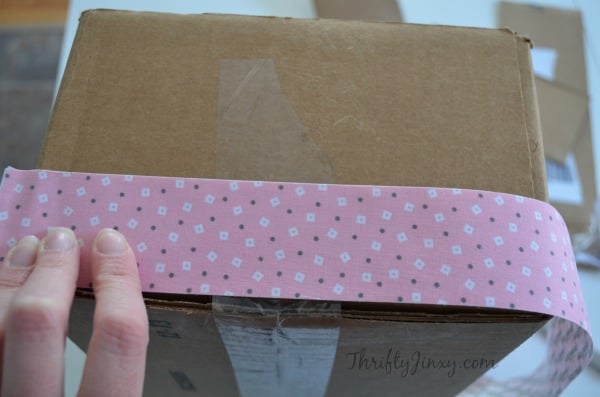
2. Starting at the bottom of the box. Cut a piece of Duck Brand® Fabric Crafting Tape long enough to fit around the box. Remove backing and apply to box pressing firmly.
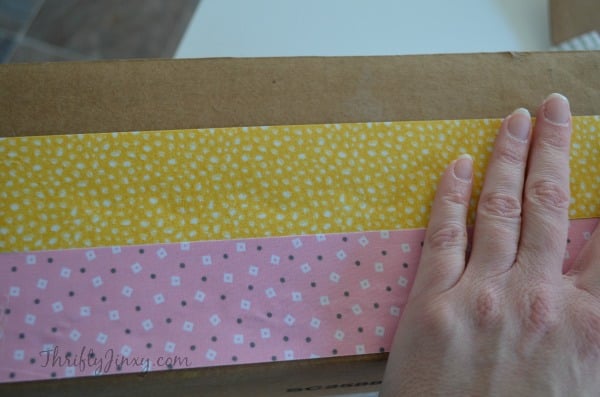
3 – Repeat with a second strip of Duck Brand® Fabric Crafting Tape placed just above the first. Repeat until you get to the top of box.
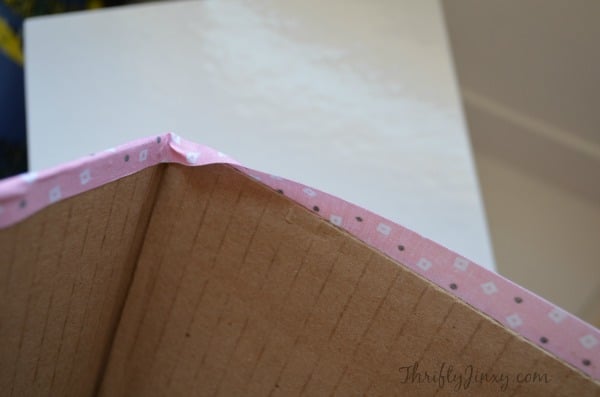
4 – Once the top layer of ribbon reaches over the edge of the box, fold down edge into top of box. For the corners, just press down one side first and then fold over remaining edge.
Peanut absolutely loves his new box and it looks so much cuter than that plain old box! He has been sitting it in so much!
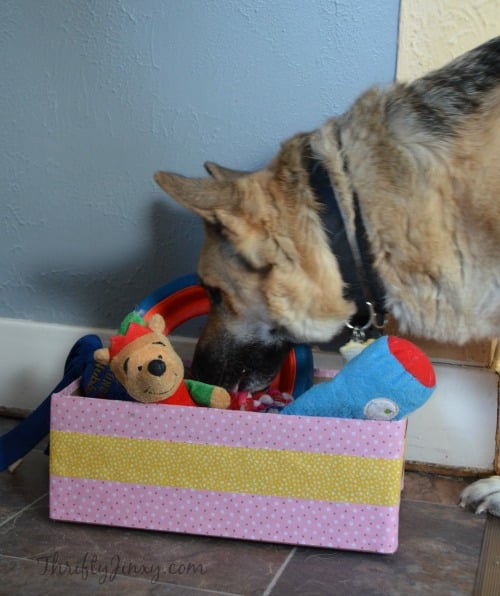
And if you don’t have a cat, but have a dog….. this box also makes a great toy box! You can follow @TheDuckBrand on Twitter for lots more ideas and creative inspiration!


Karen says
We have the same problem with our cat, Max and cardboard boxes at our house. Thanks for this post.
nicole dz says
I love how you reused the box. So eco friendly. I also love how easy it is to make. I like it better as a cat or dog toy box! Great craft!
Pauline Cabrera says
I love the Duck Brand fabric tape. It works well with garments. Your post is perfect for all cat lovers out there! This is sure fun and lovely DIY project. I would let my niece know about this post as she likes cat and crafts. 🙂
Lauren (Lolo) says
That is the prettiest cat box I have ever seen! Love duck tape!
Janel says
That’s really cute. So very creative!
Felicia says
What an adorable treat box! I love crafting with washi and craft tape.
Debi@ The Spring Mount 6 Pack says
What a cute idea. I can see my kids loving to make this for my cats.
Jennifer Bullock {MommyBKnowsBest} says
We don’t have a cat, but that nap box is adorable. I bet my girls could find a use for something like this.
Terin Garrett says
Aww, I think my little dog would like the box too! 🙂
Eliz Frank says
That is soo sooo cute. My kitty would love to get one… May he come visit?
Rosey says
Cats and kids love boxes!! And this turned out very cute. 🙂
Dina says
that is too cute. My cat loves boxes so this I must make.
Lisa says
How adorable! Clever use of Duck Tape too! We have some Minion Duck Tape laying around that I need to do something with.
Christina S says
This is cute! I love all the duck tape designs they have now!
Ashley M says
The tape makes it so easy to turn the box from drab to fab. I like that you can create matchng toy boxes too.